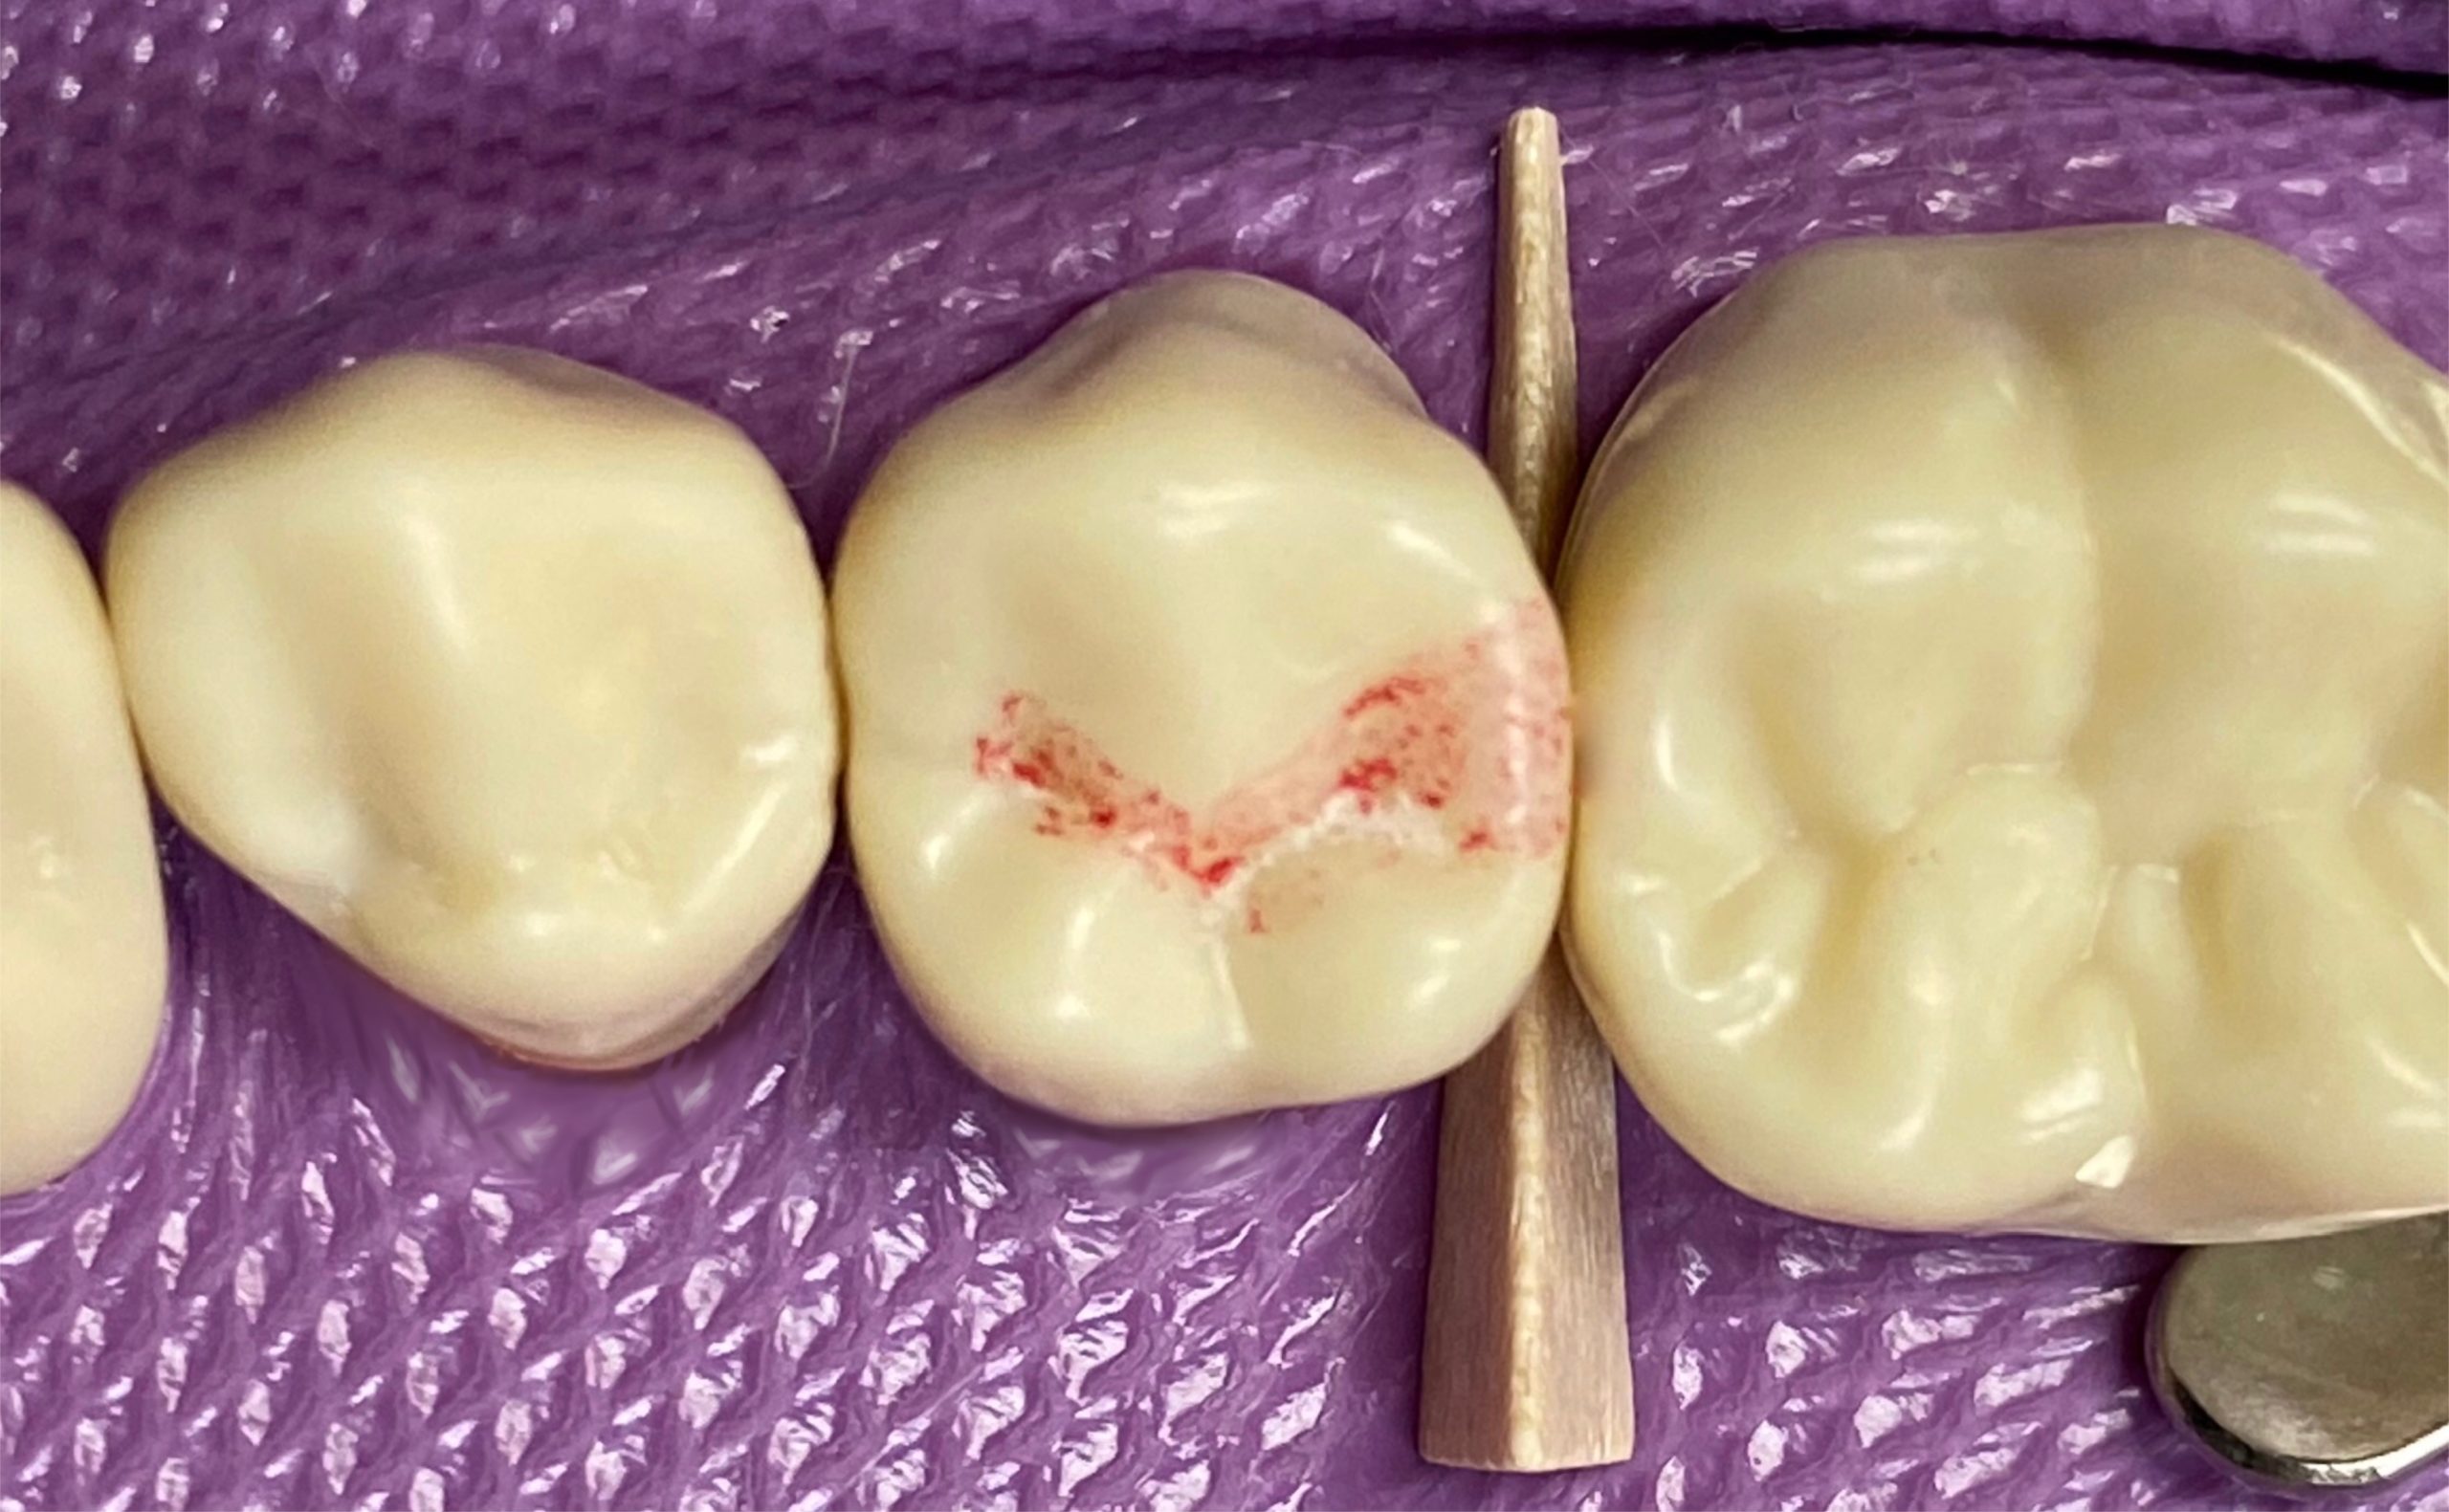
Class II Amalgam Preparation
#29 DO

Overview
-
Outline Form
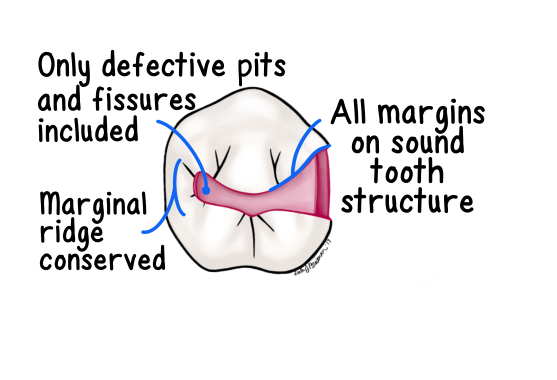
extent of preparation on tooth surface
*amalgam preparations are typically larger than comparable composite preparations due to material requirements -
Retention Form
form, shape, and configuration of the tooth preparation that resists the displacement or removal of restoration from the preparation under lifting and tipping masticatory forces
-
Resistance Form
internal form of tooth preparation that allows restoration to resist forces of mastication
-
Convenience Form
form of tooth preparation that allows for physical and visual accessibility to preparation
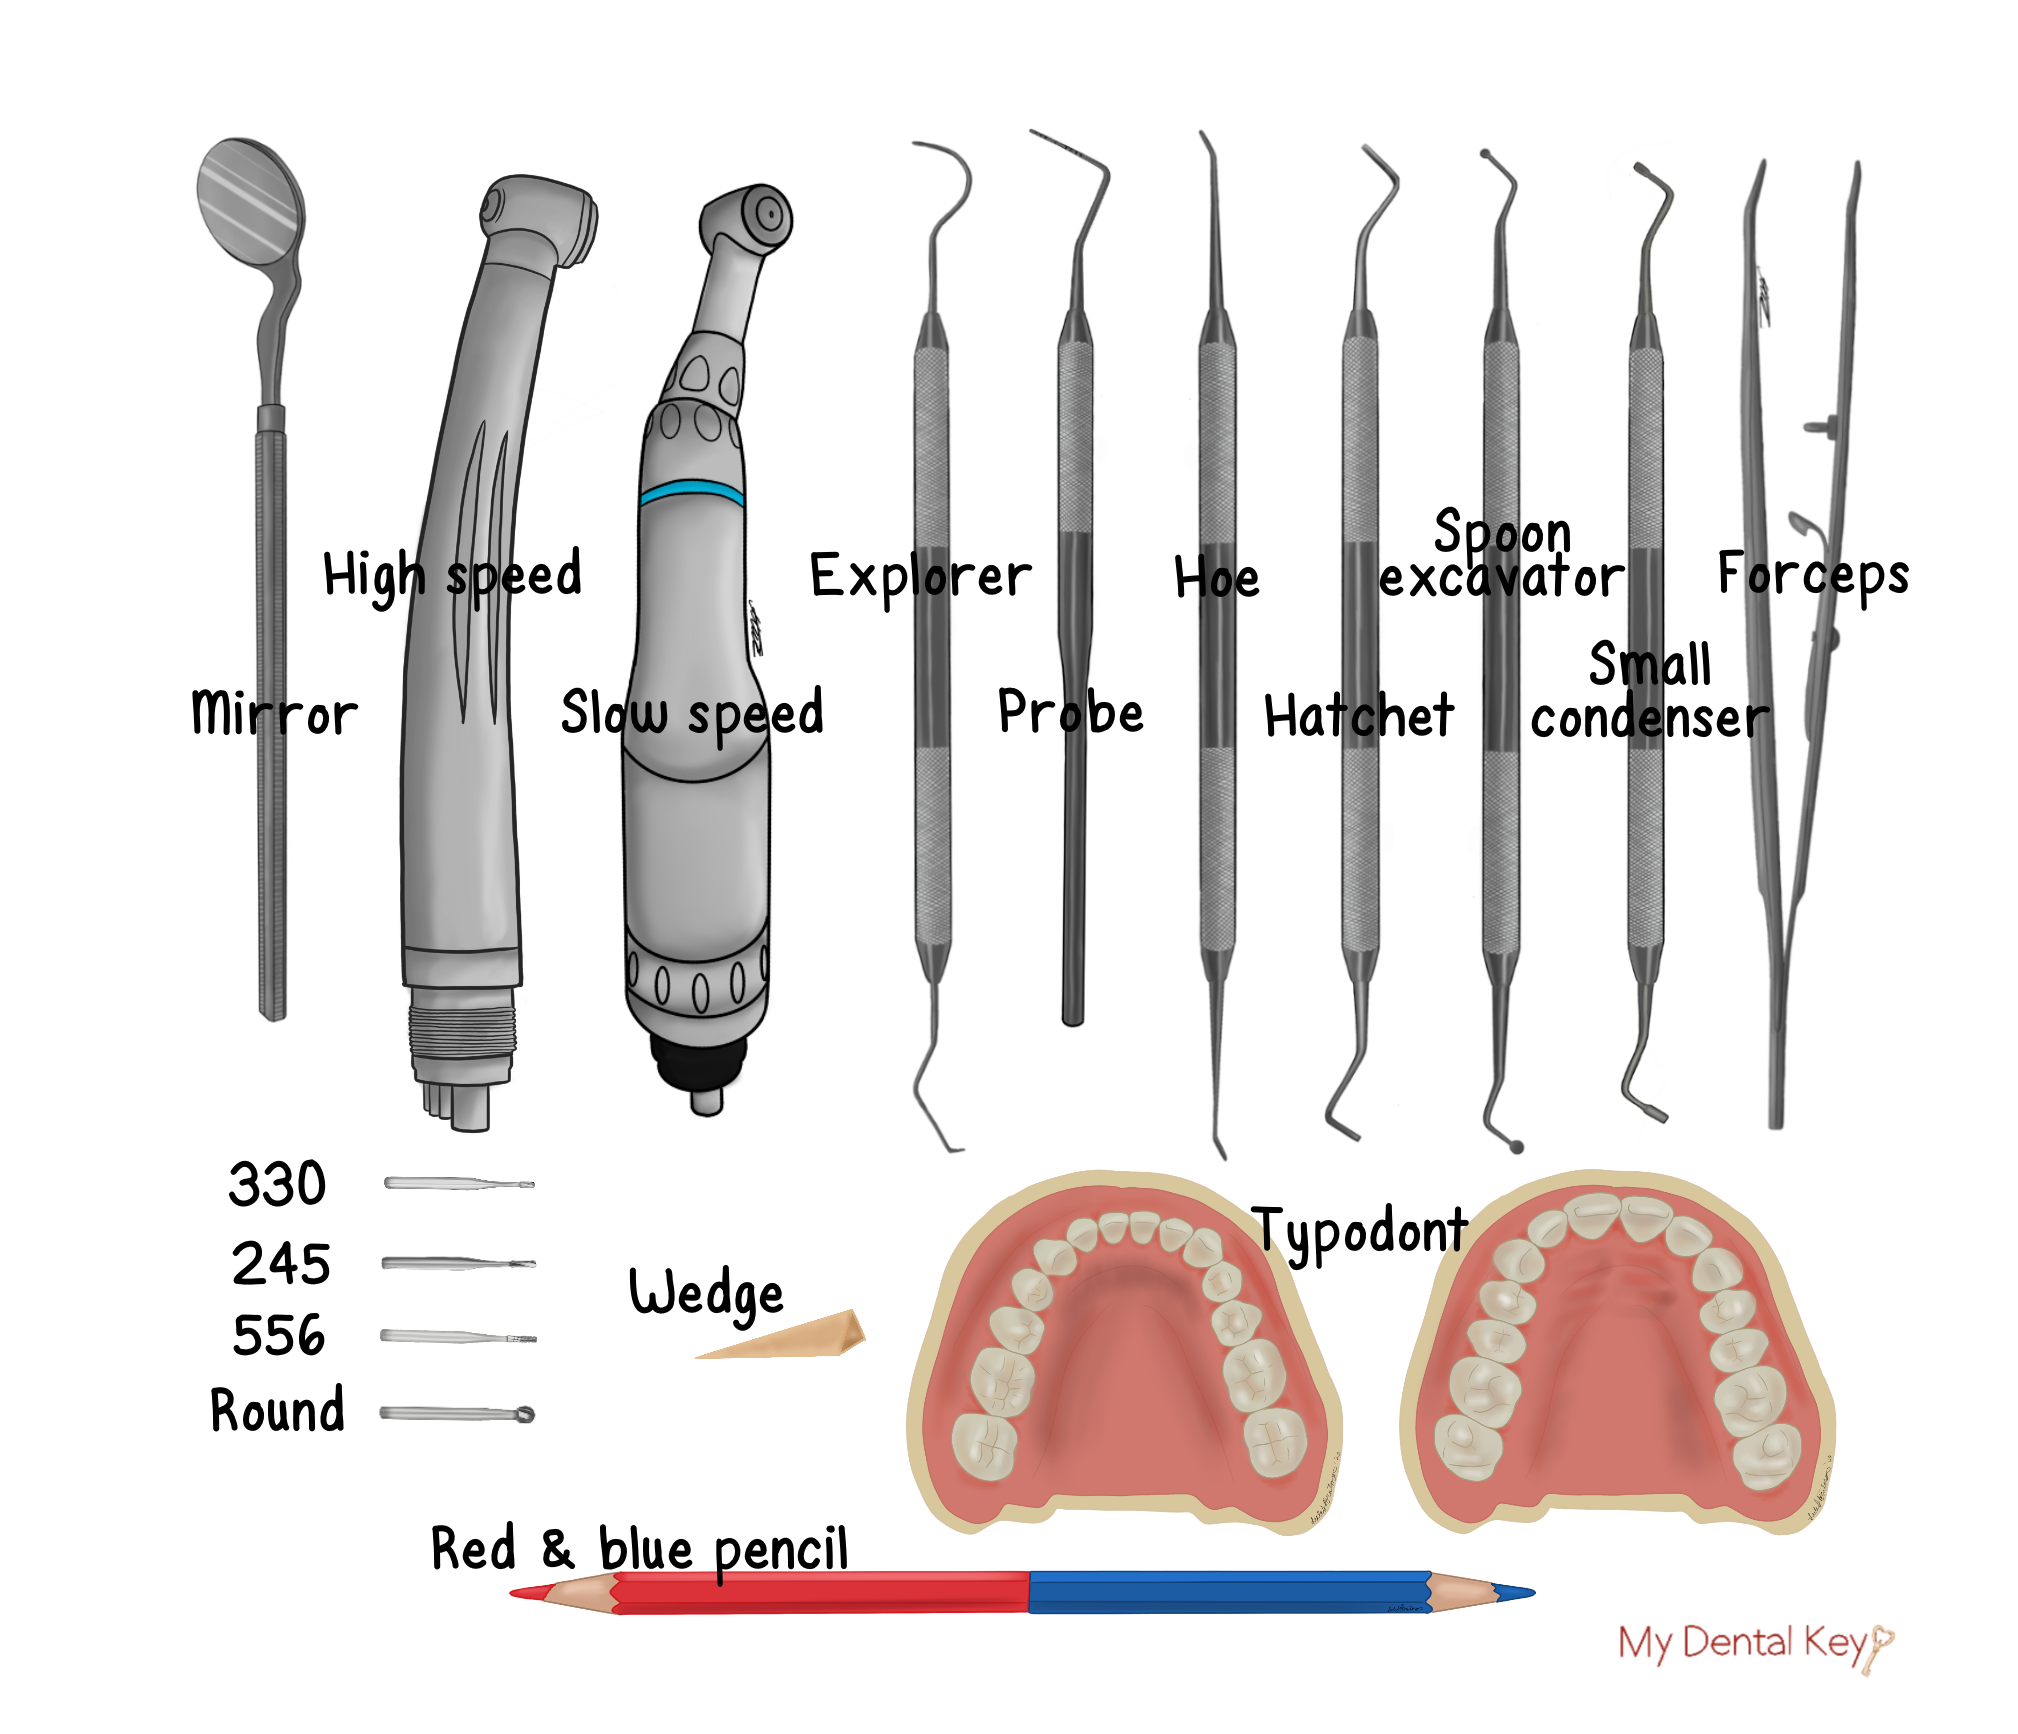
Armamentarium
Instruments and Materials
Video Demonstration
Procedures
- Clinical note: The final preparation dimensions are determined by the extent of the carious lesion or existing, faulty restoration
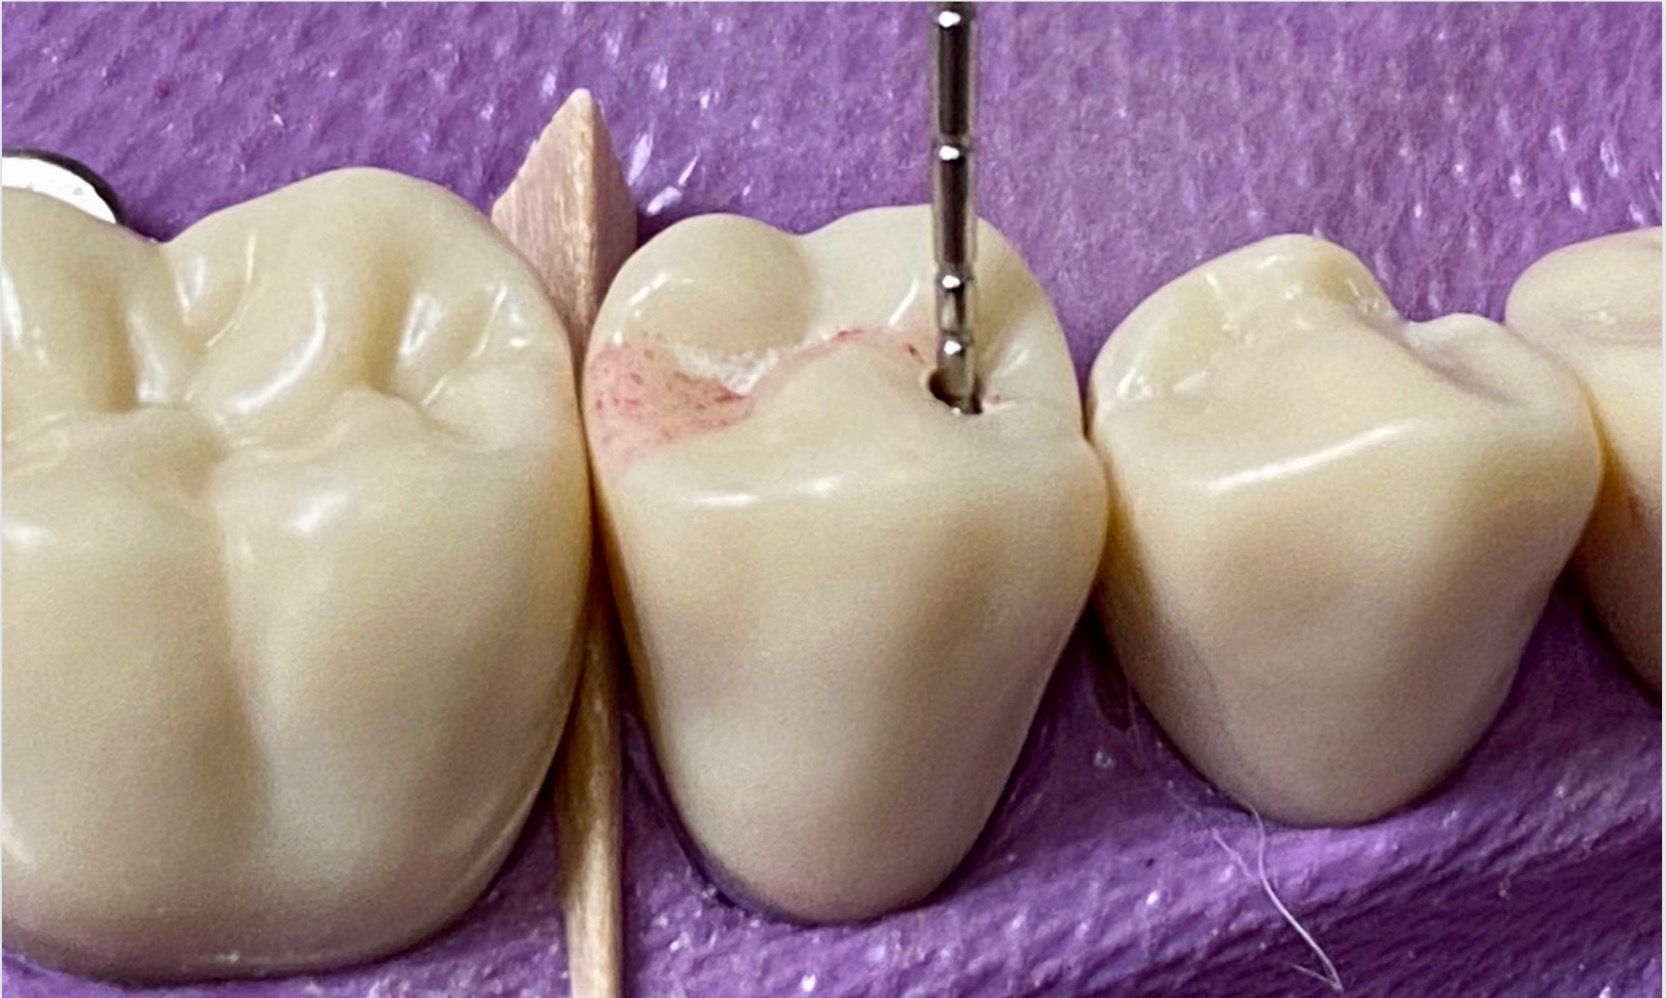
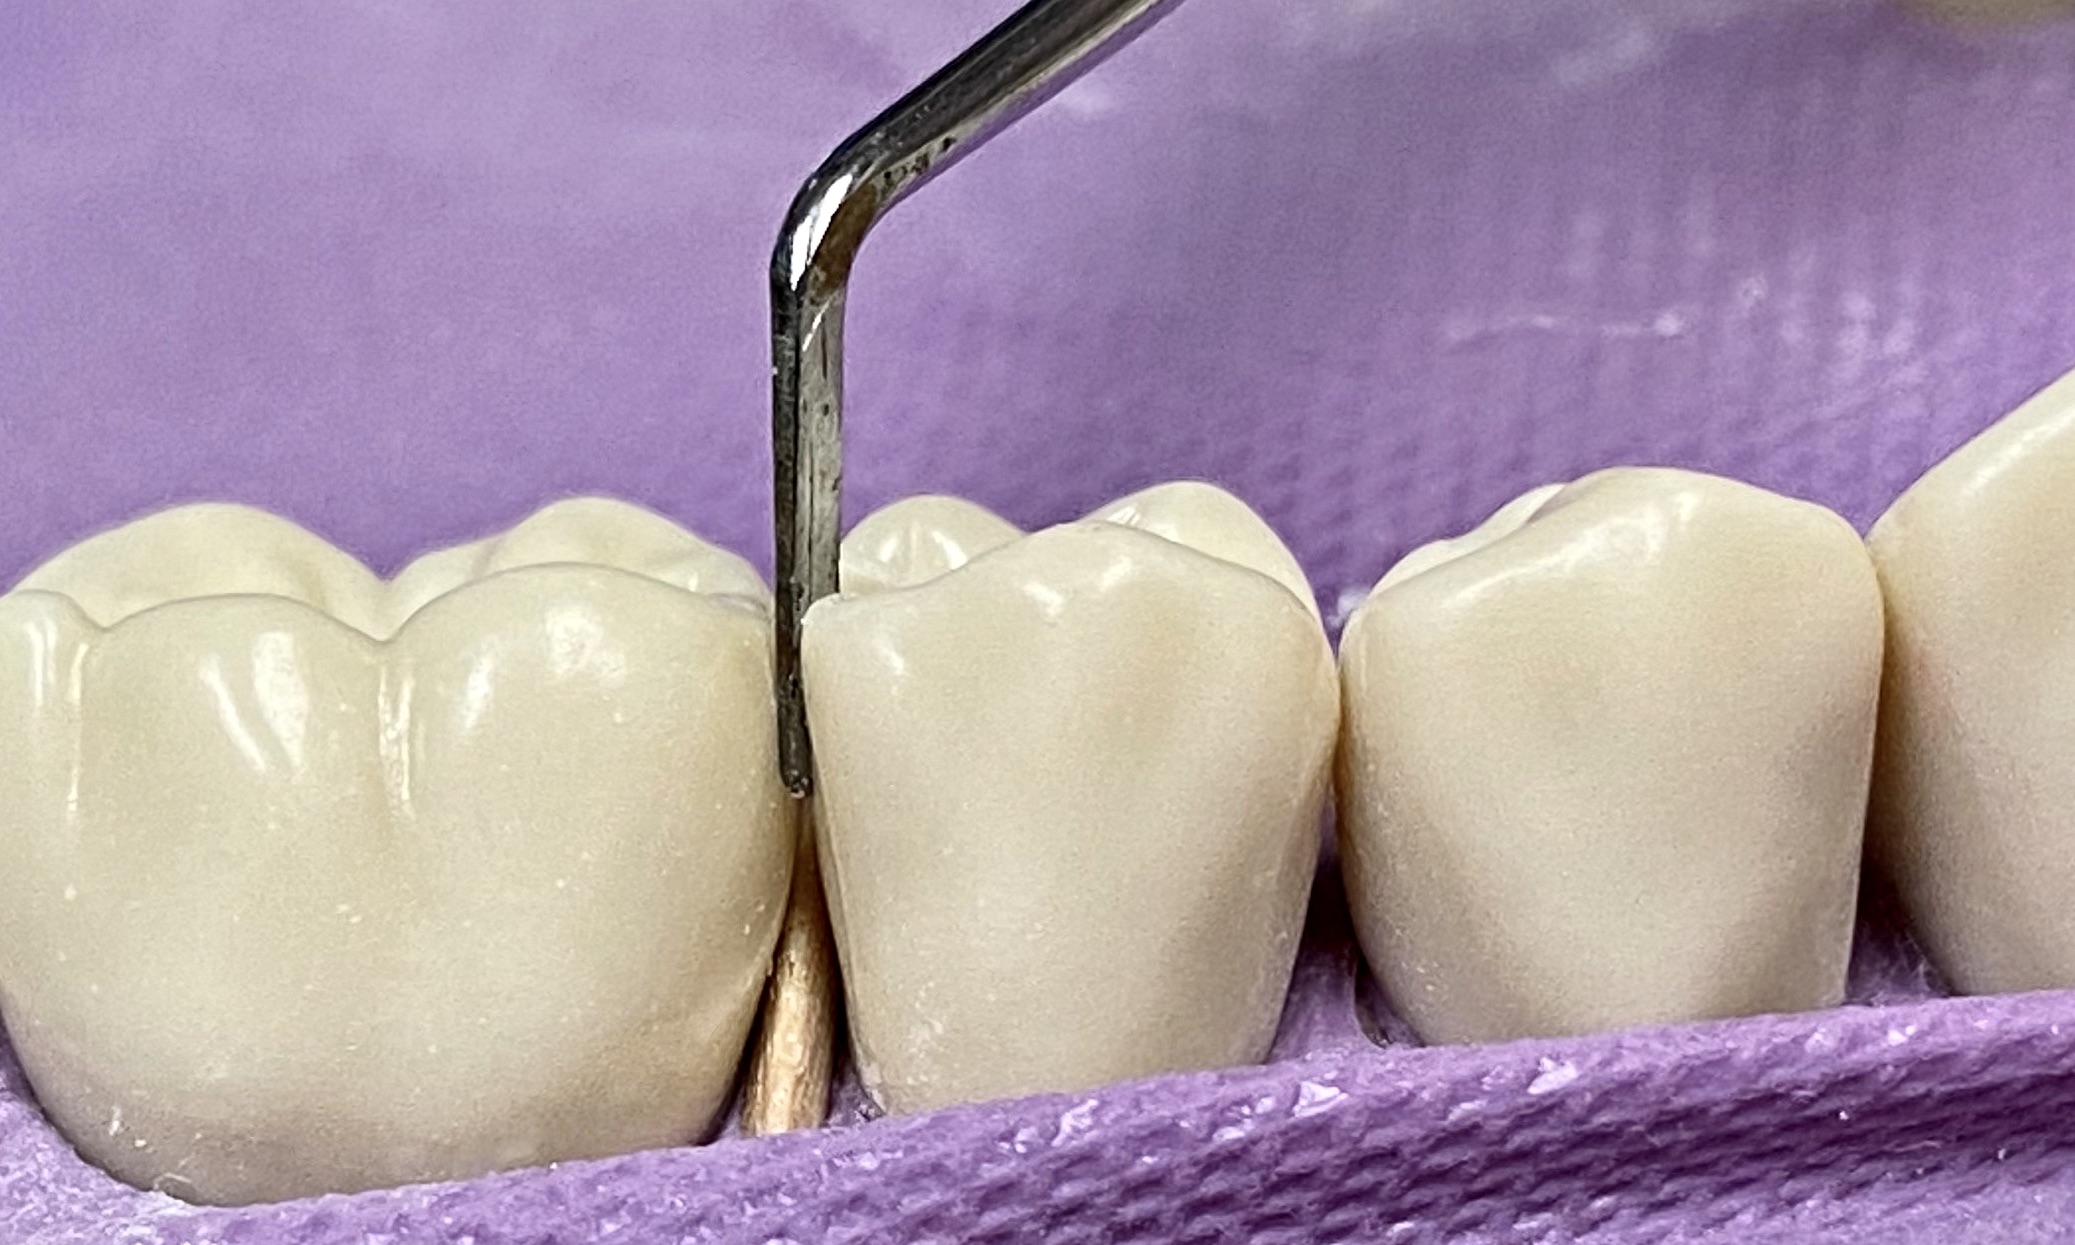
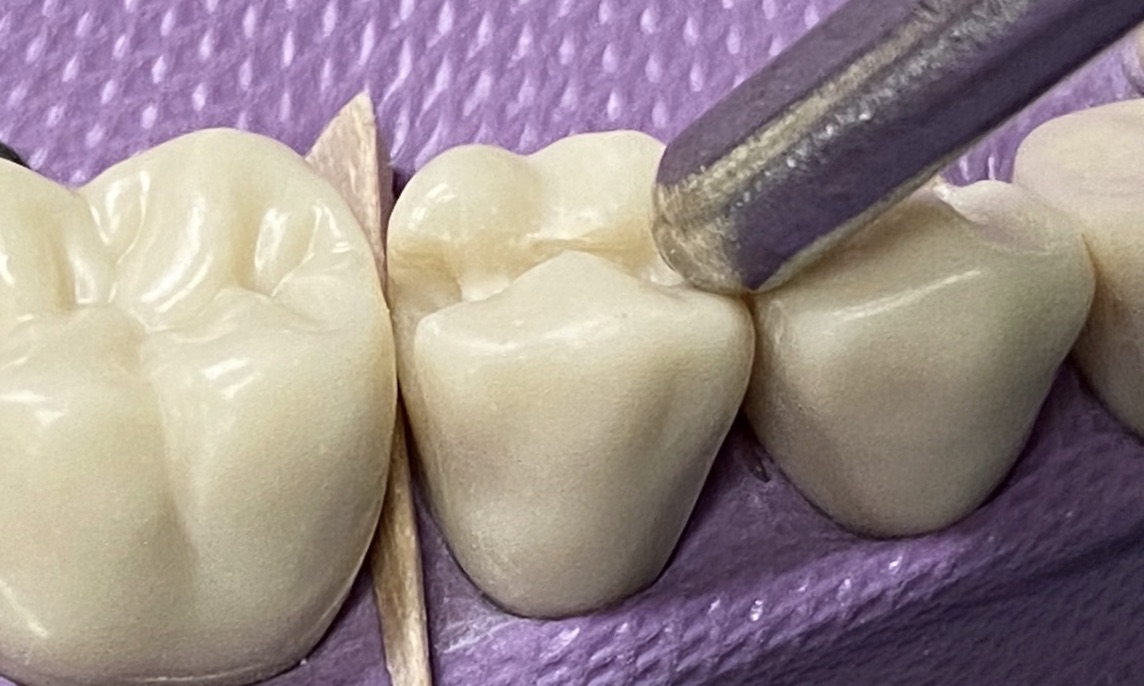
- Optional: Place a matrix band or metallic fender wedge interproximally to protect the adjacent tooth from iatrogenic damage
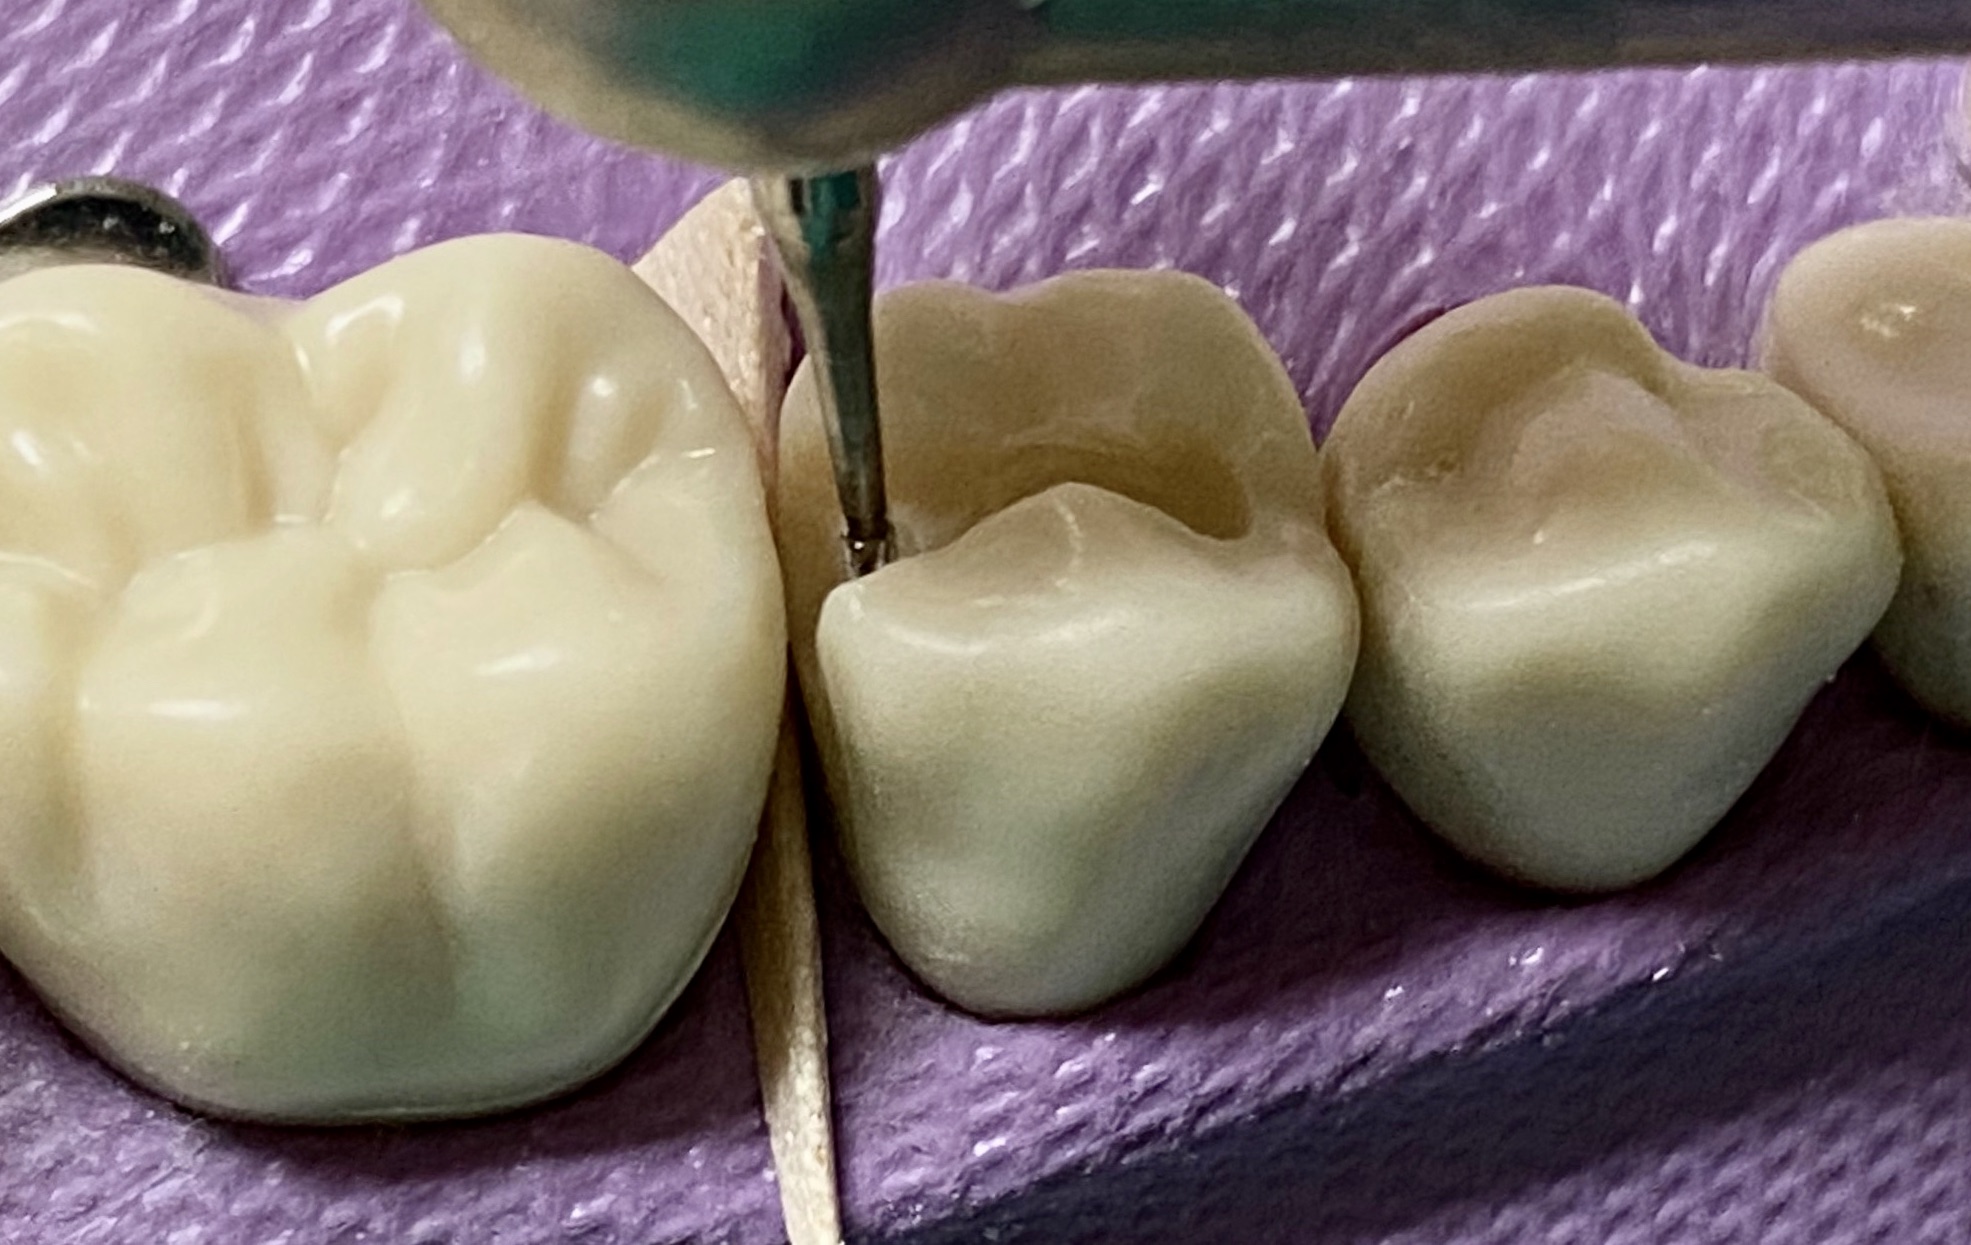
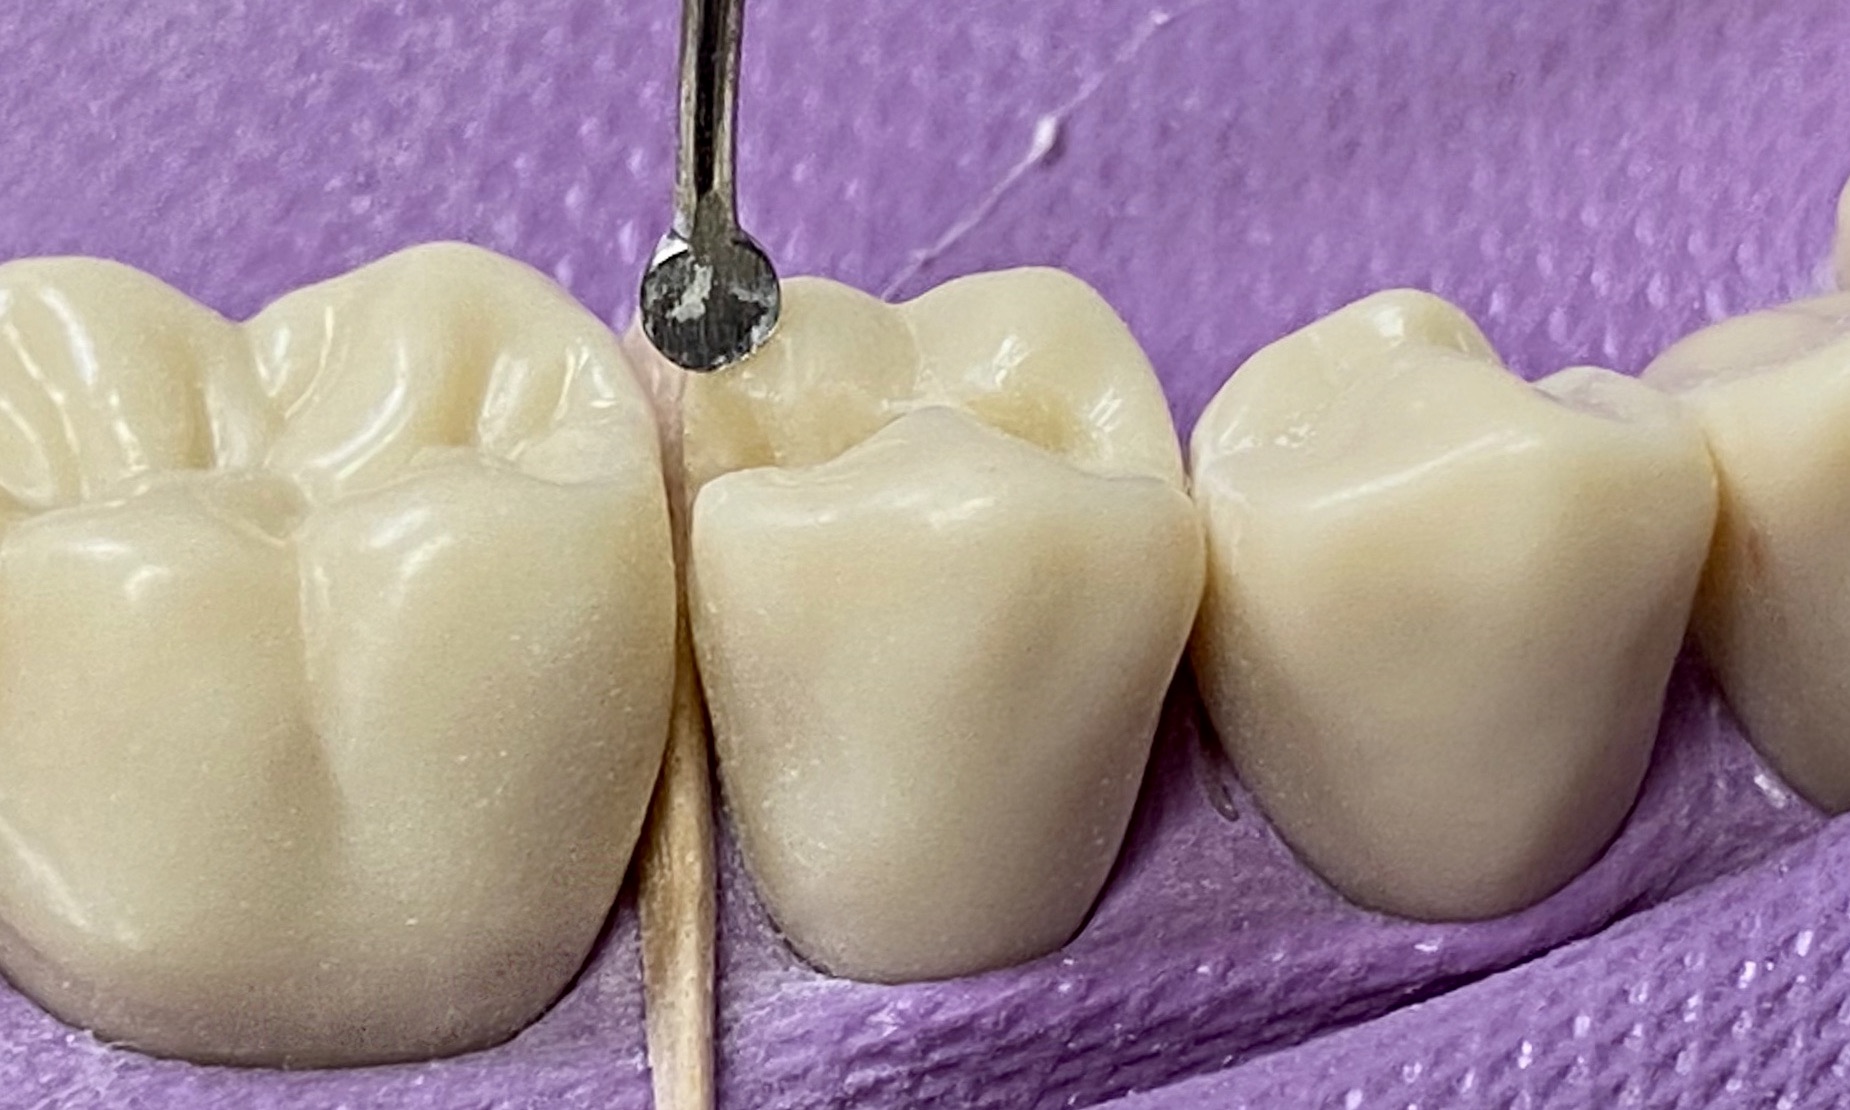
- Bur options: pear shaped carbide bur (330)
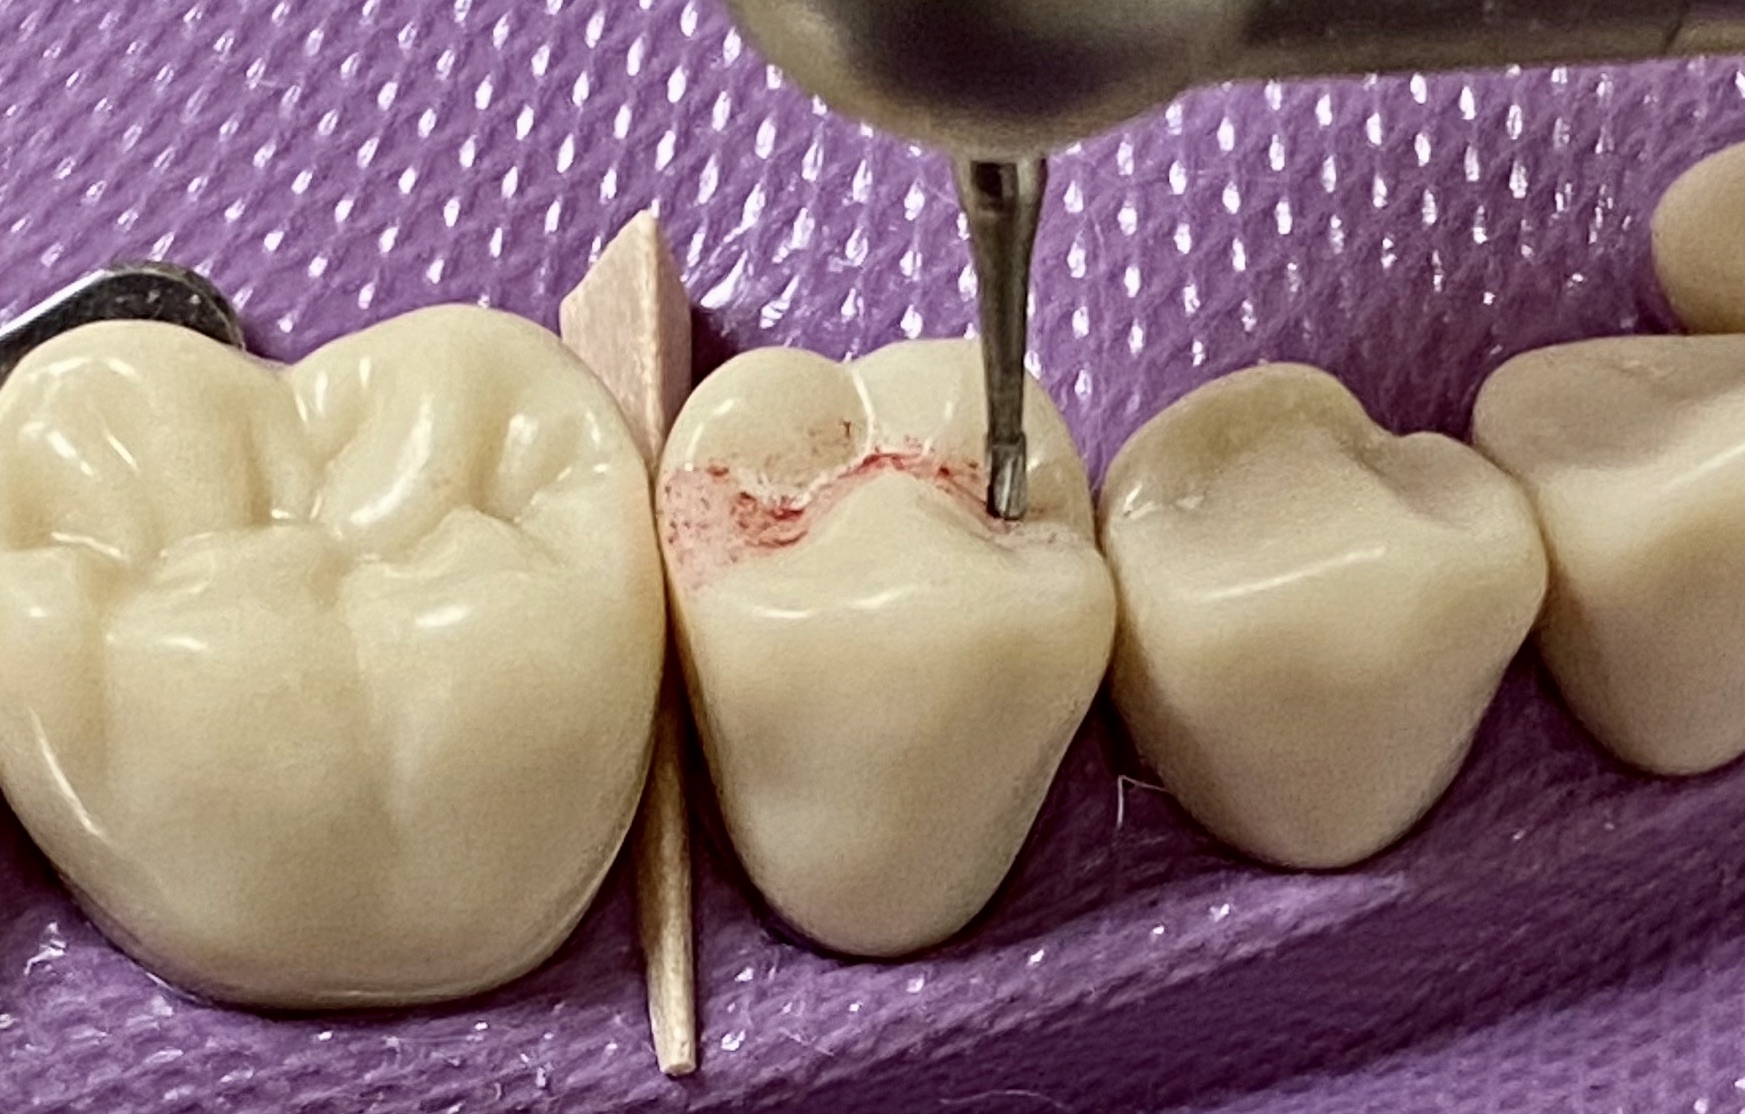
Clinical note: The final preparation depth is determined by the extent of the carious lesion or existing, faulty restoration

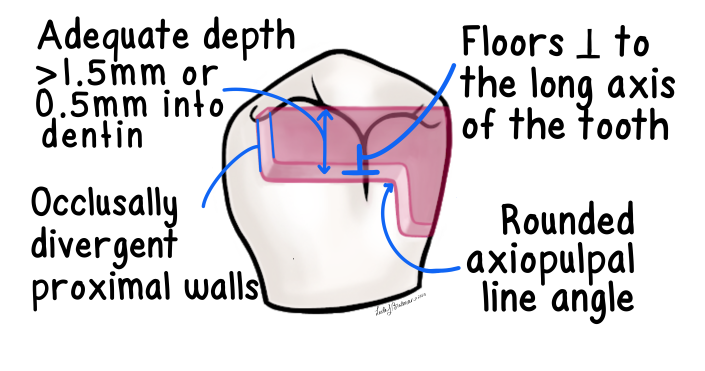
- Always keep the bur perpendicular to the long axis of the tooth
- Follow the anatomical grooves of the tooth
- Leave a small “enamel shell” interproximally to protect the adjacent tooth from iatrogenic damage
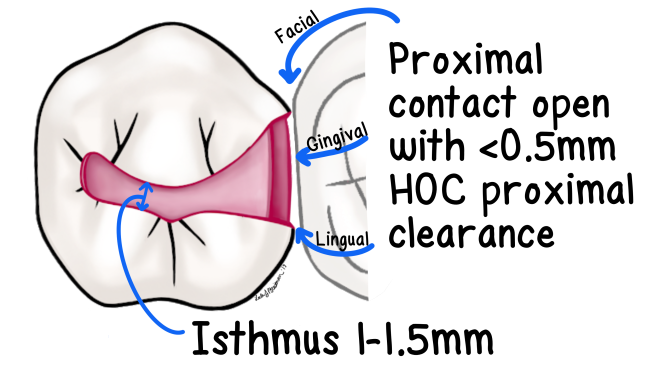
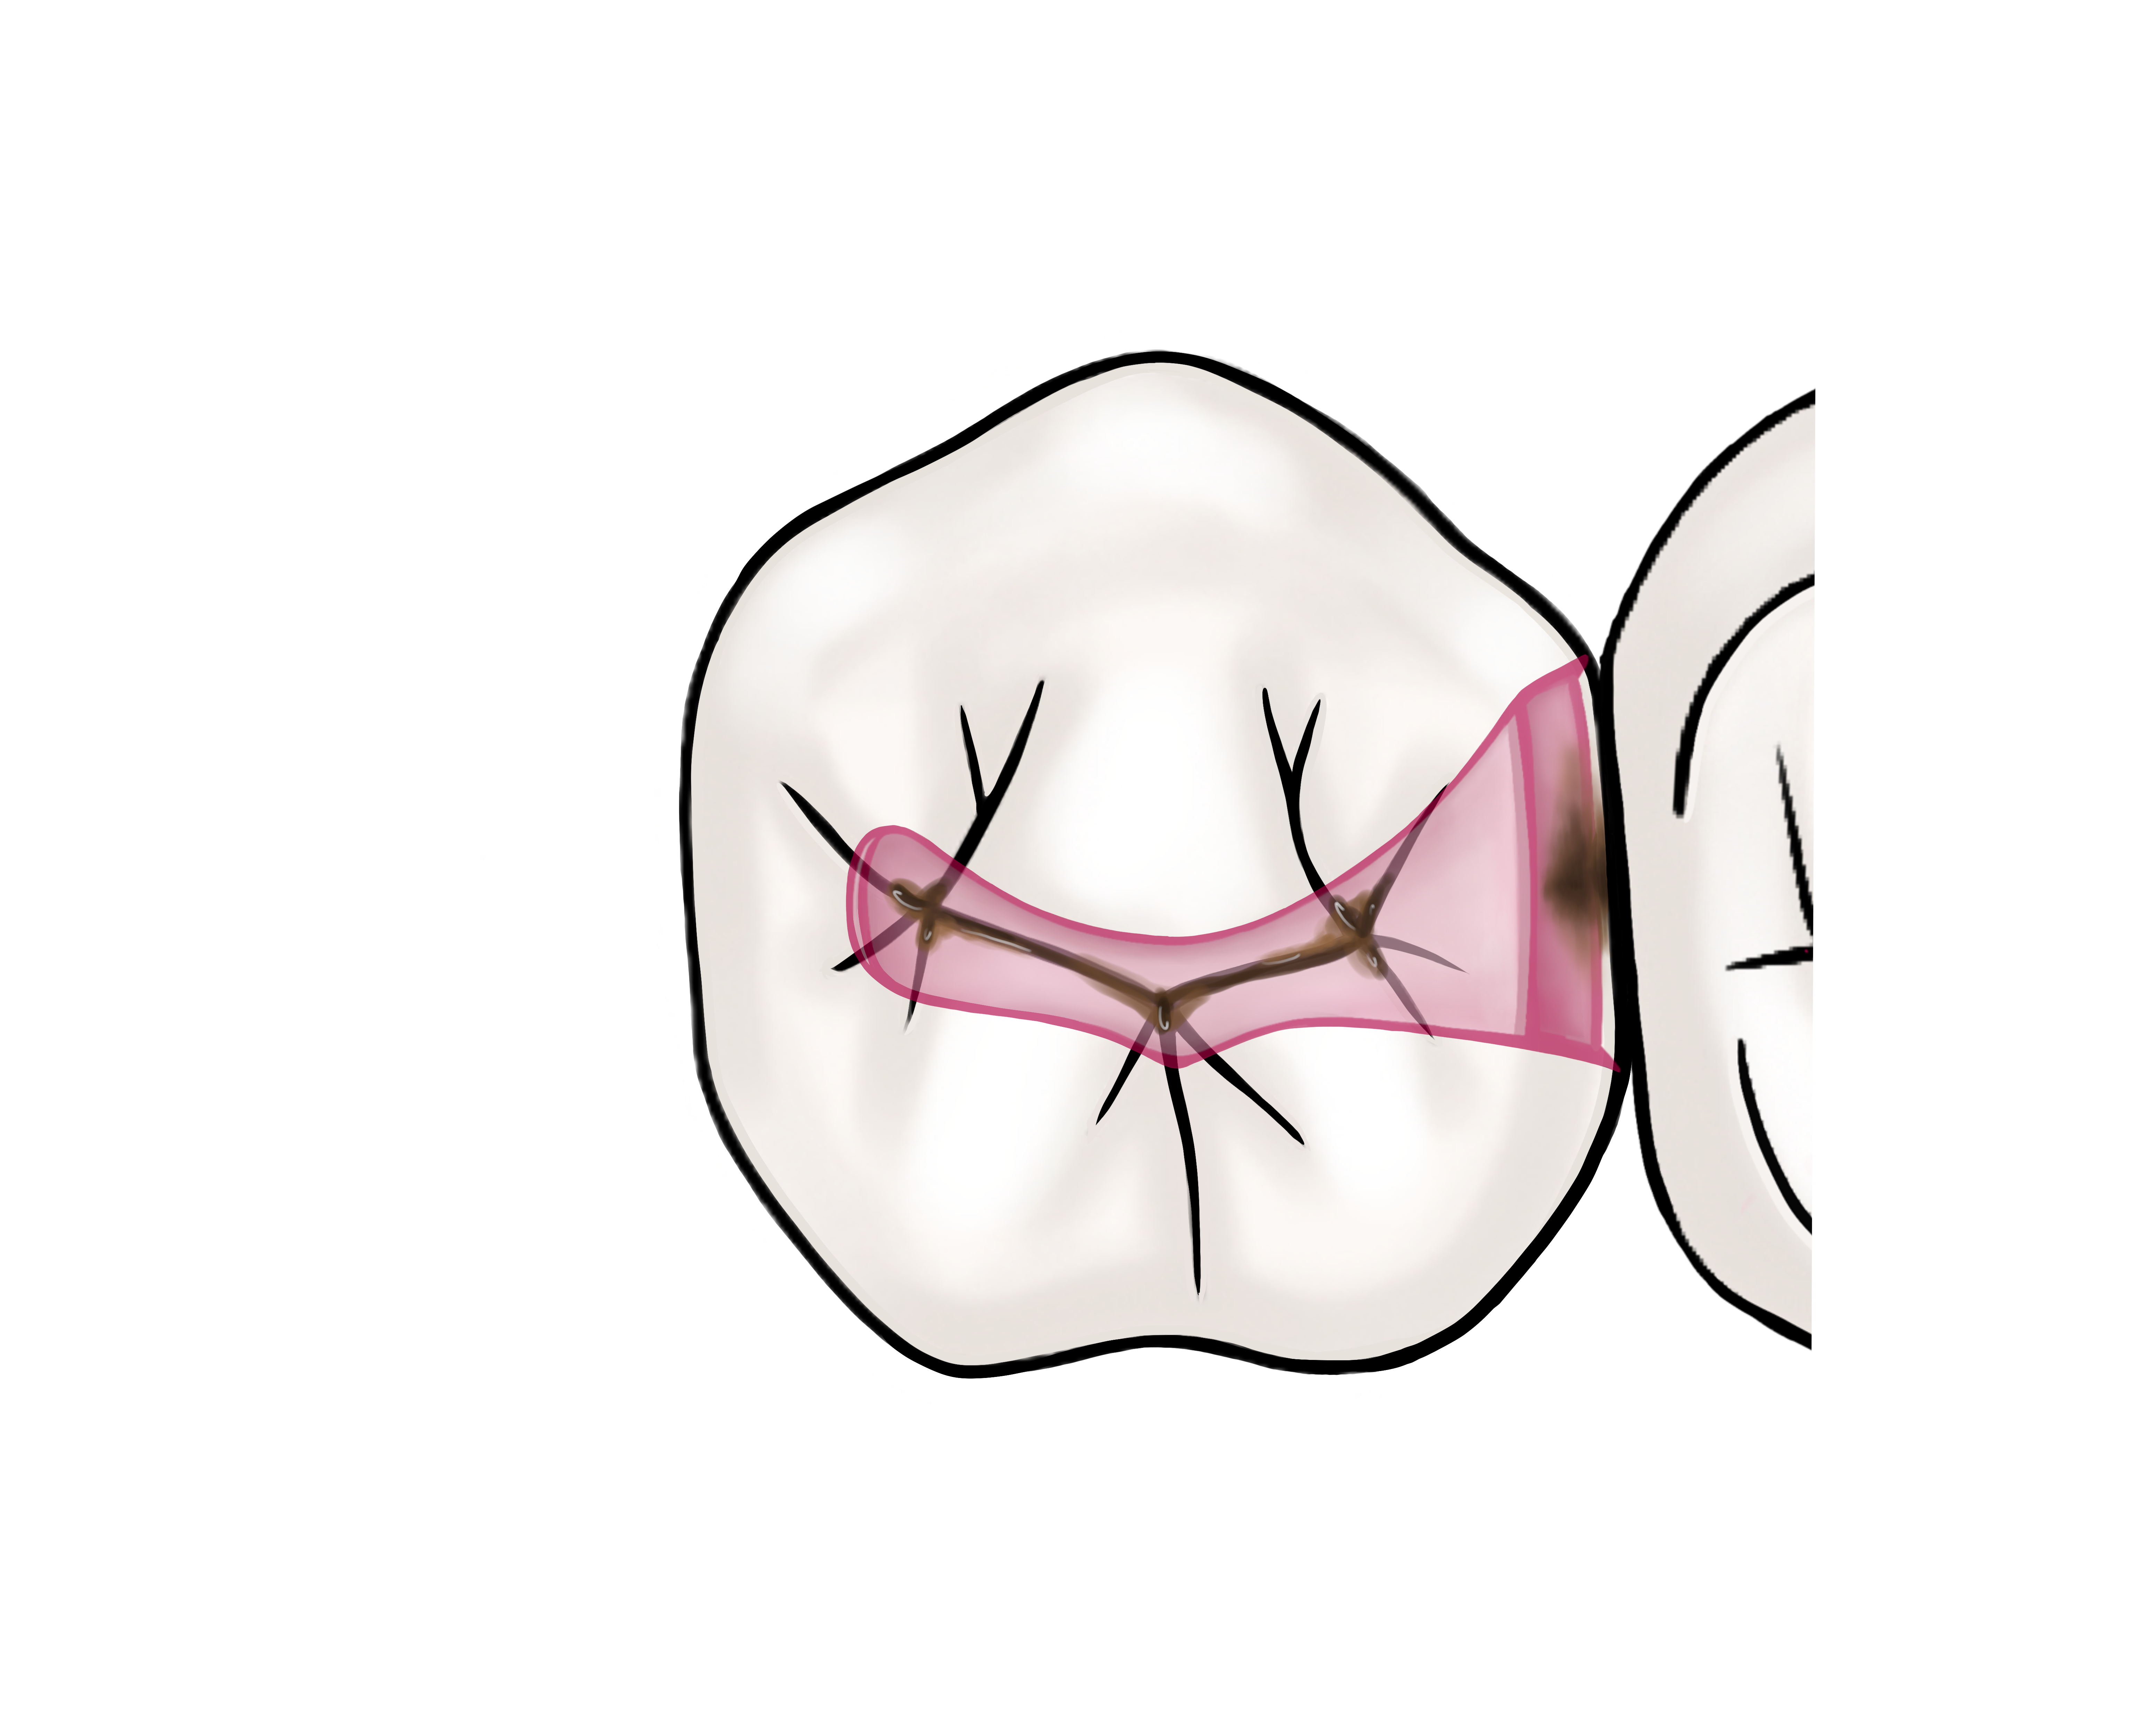
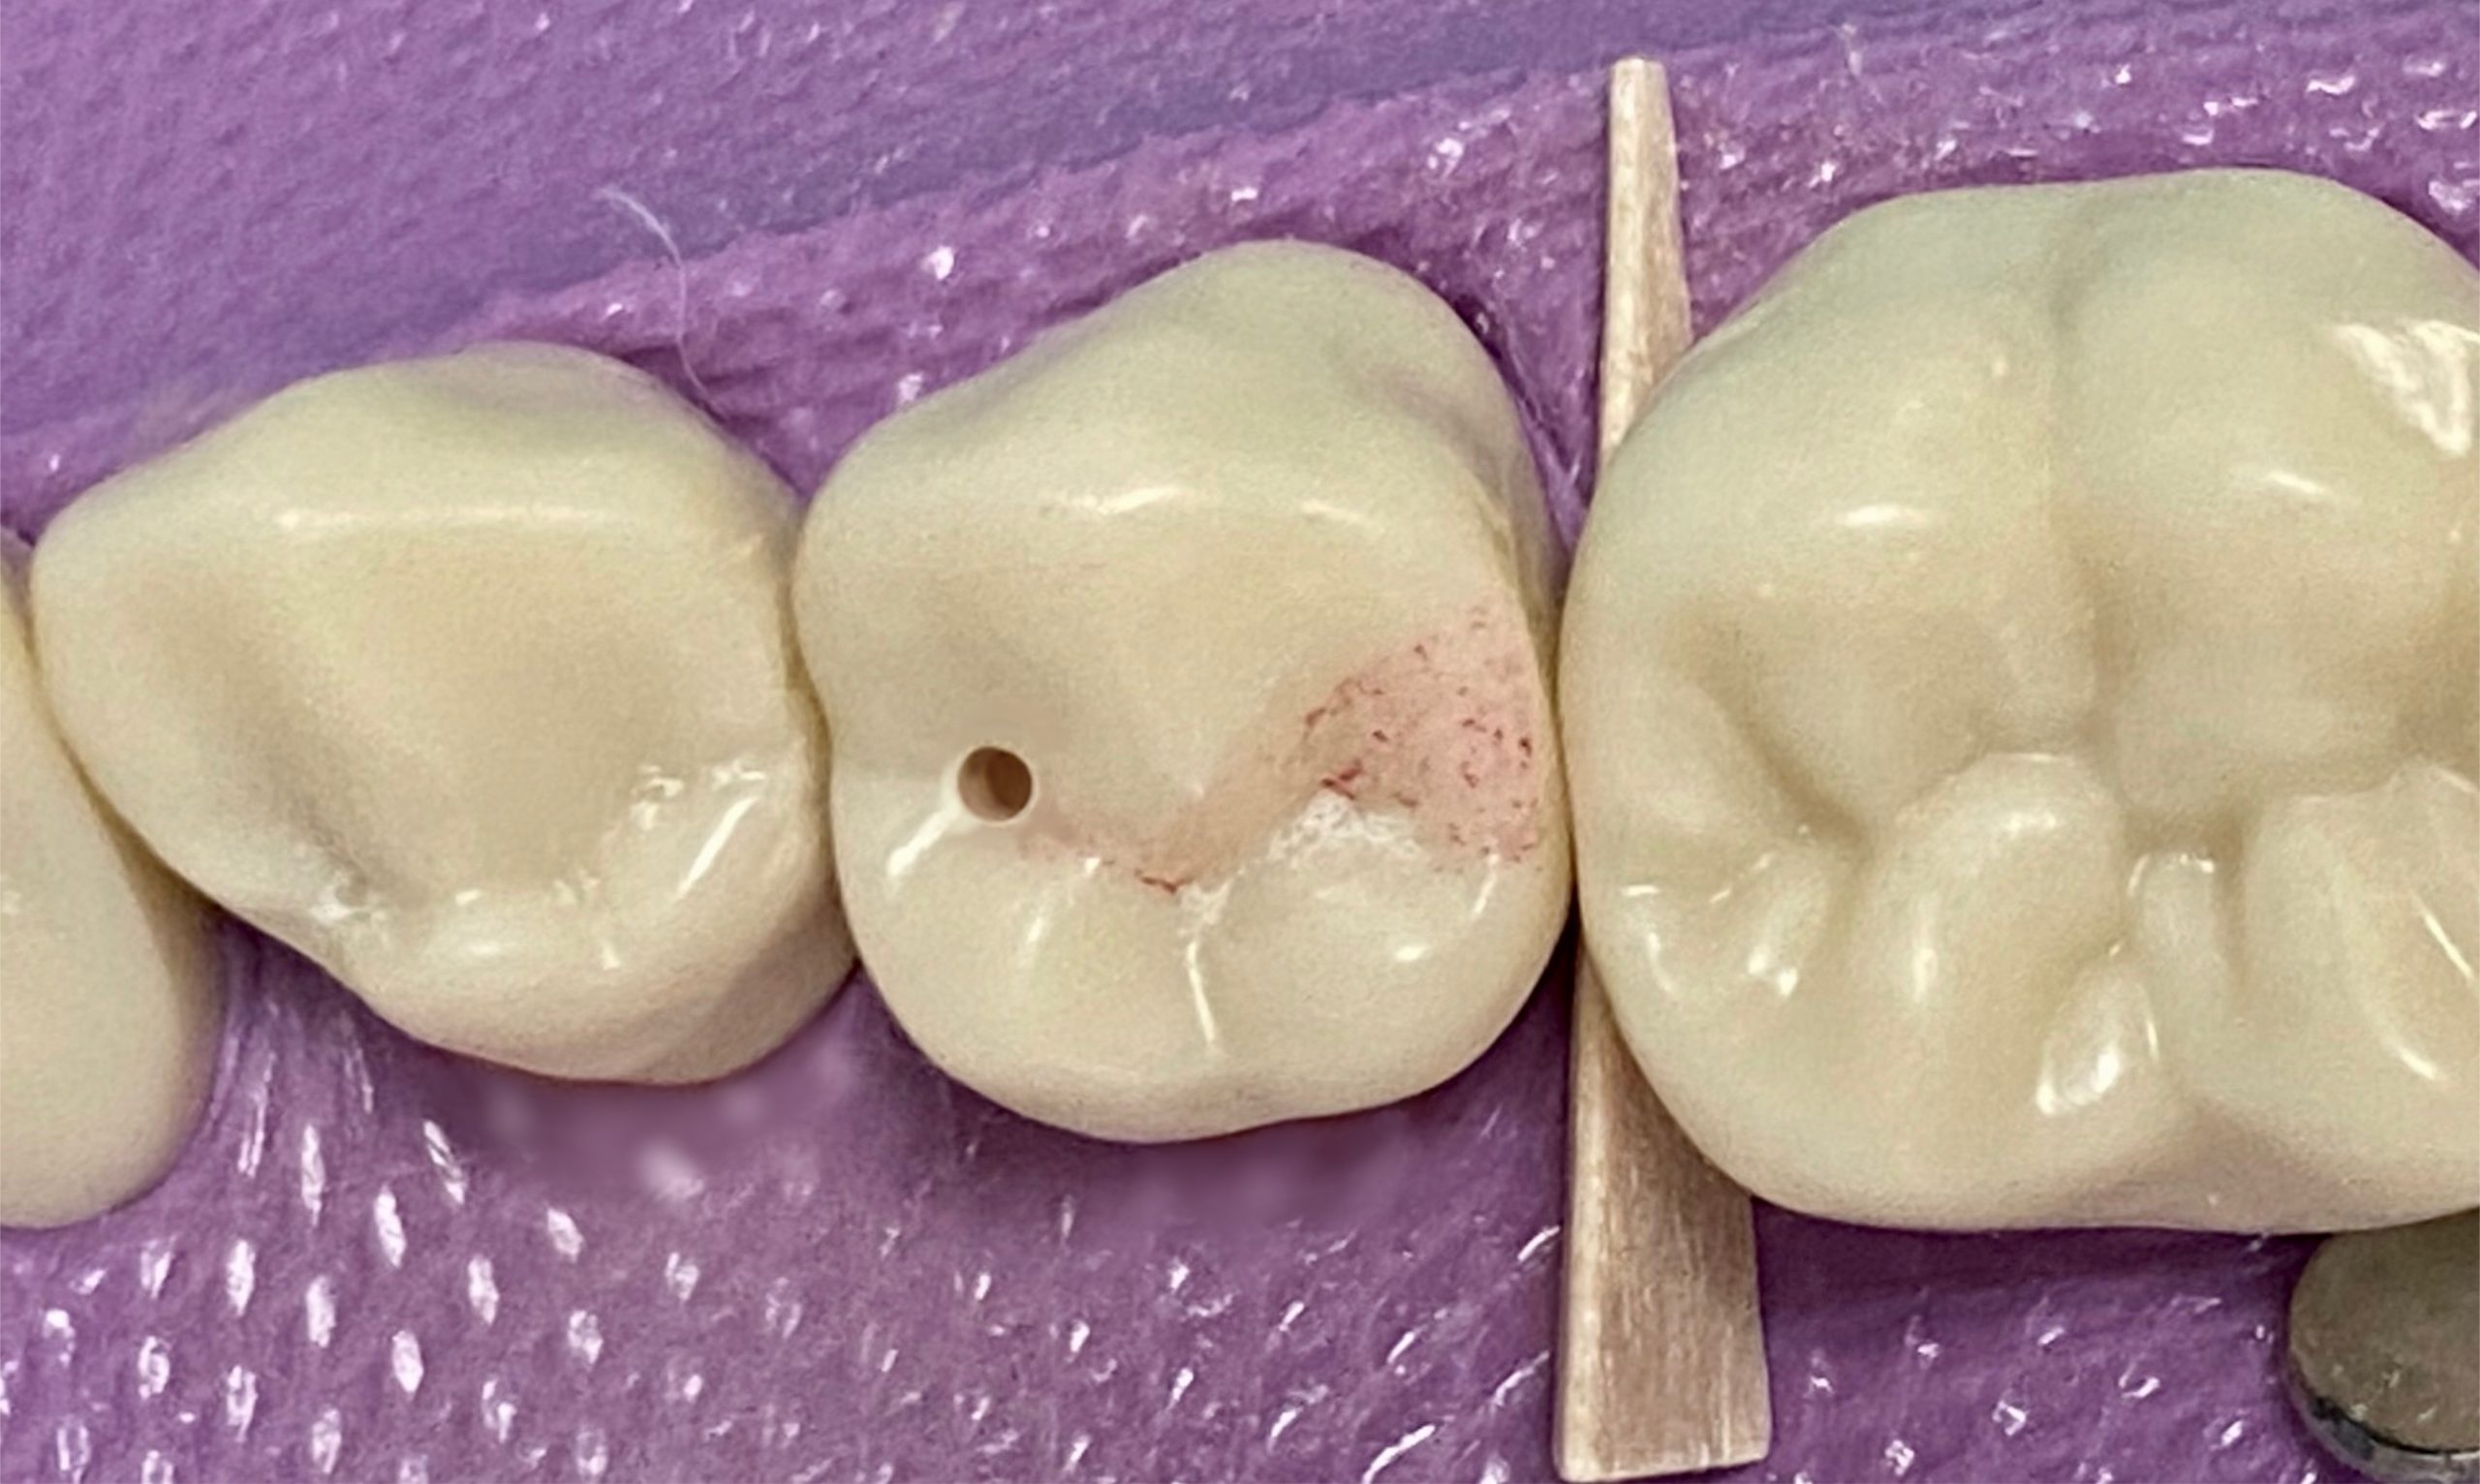
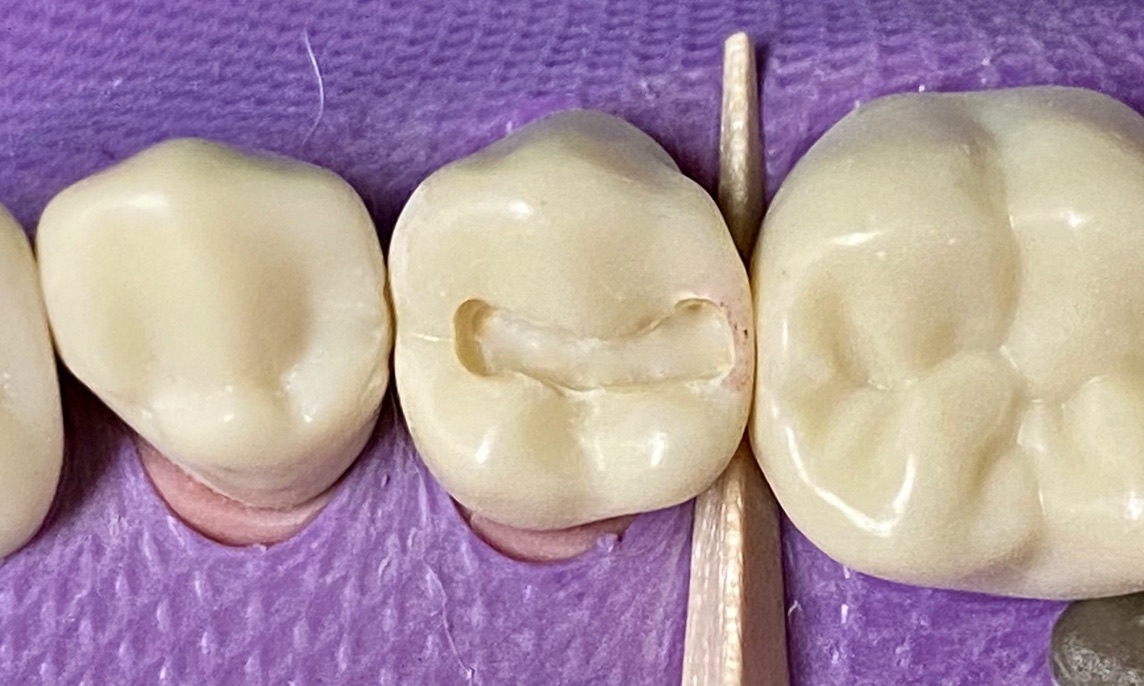
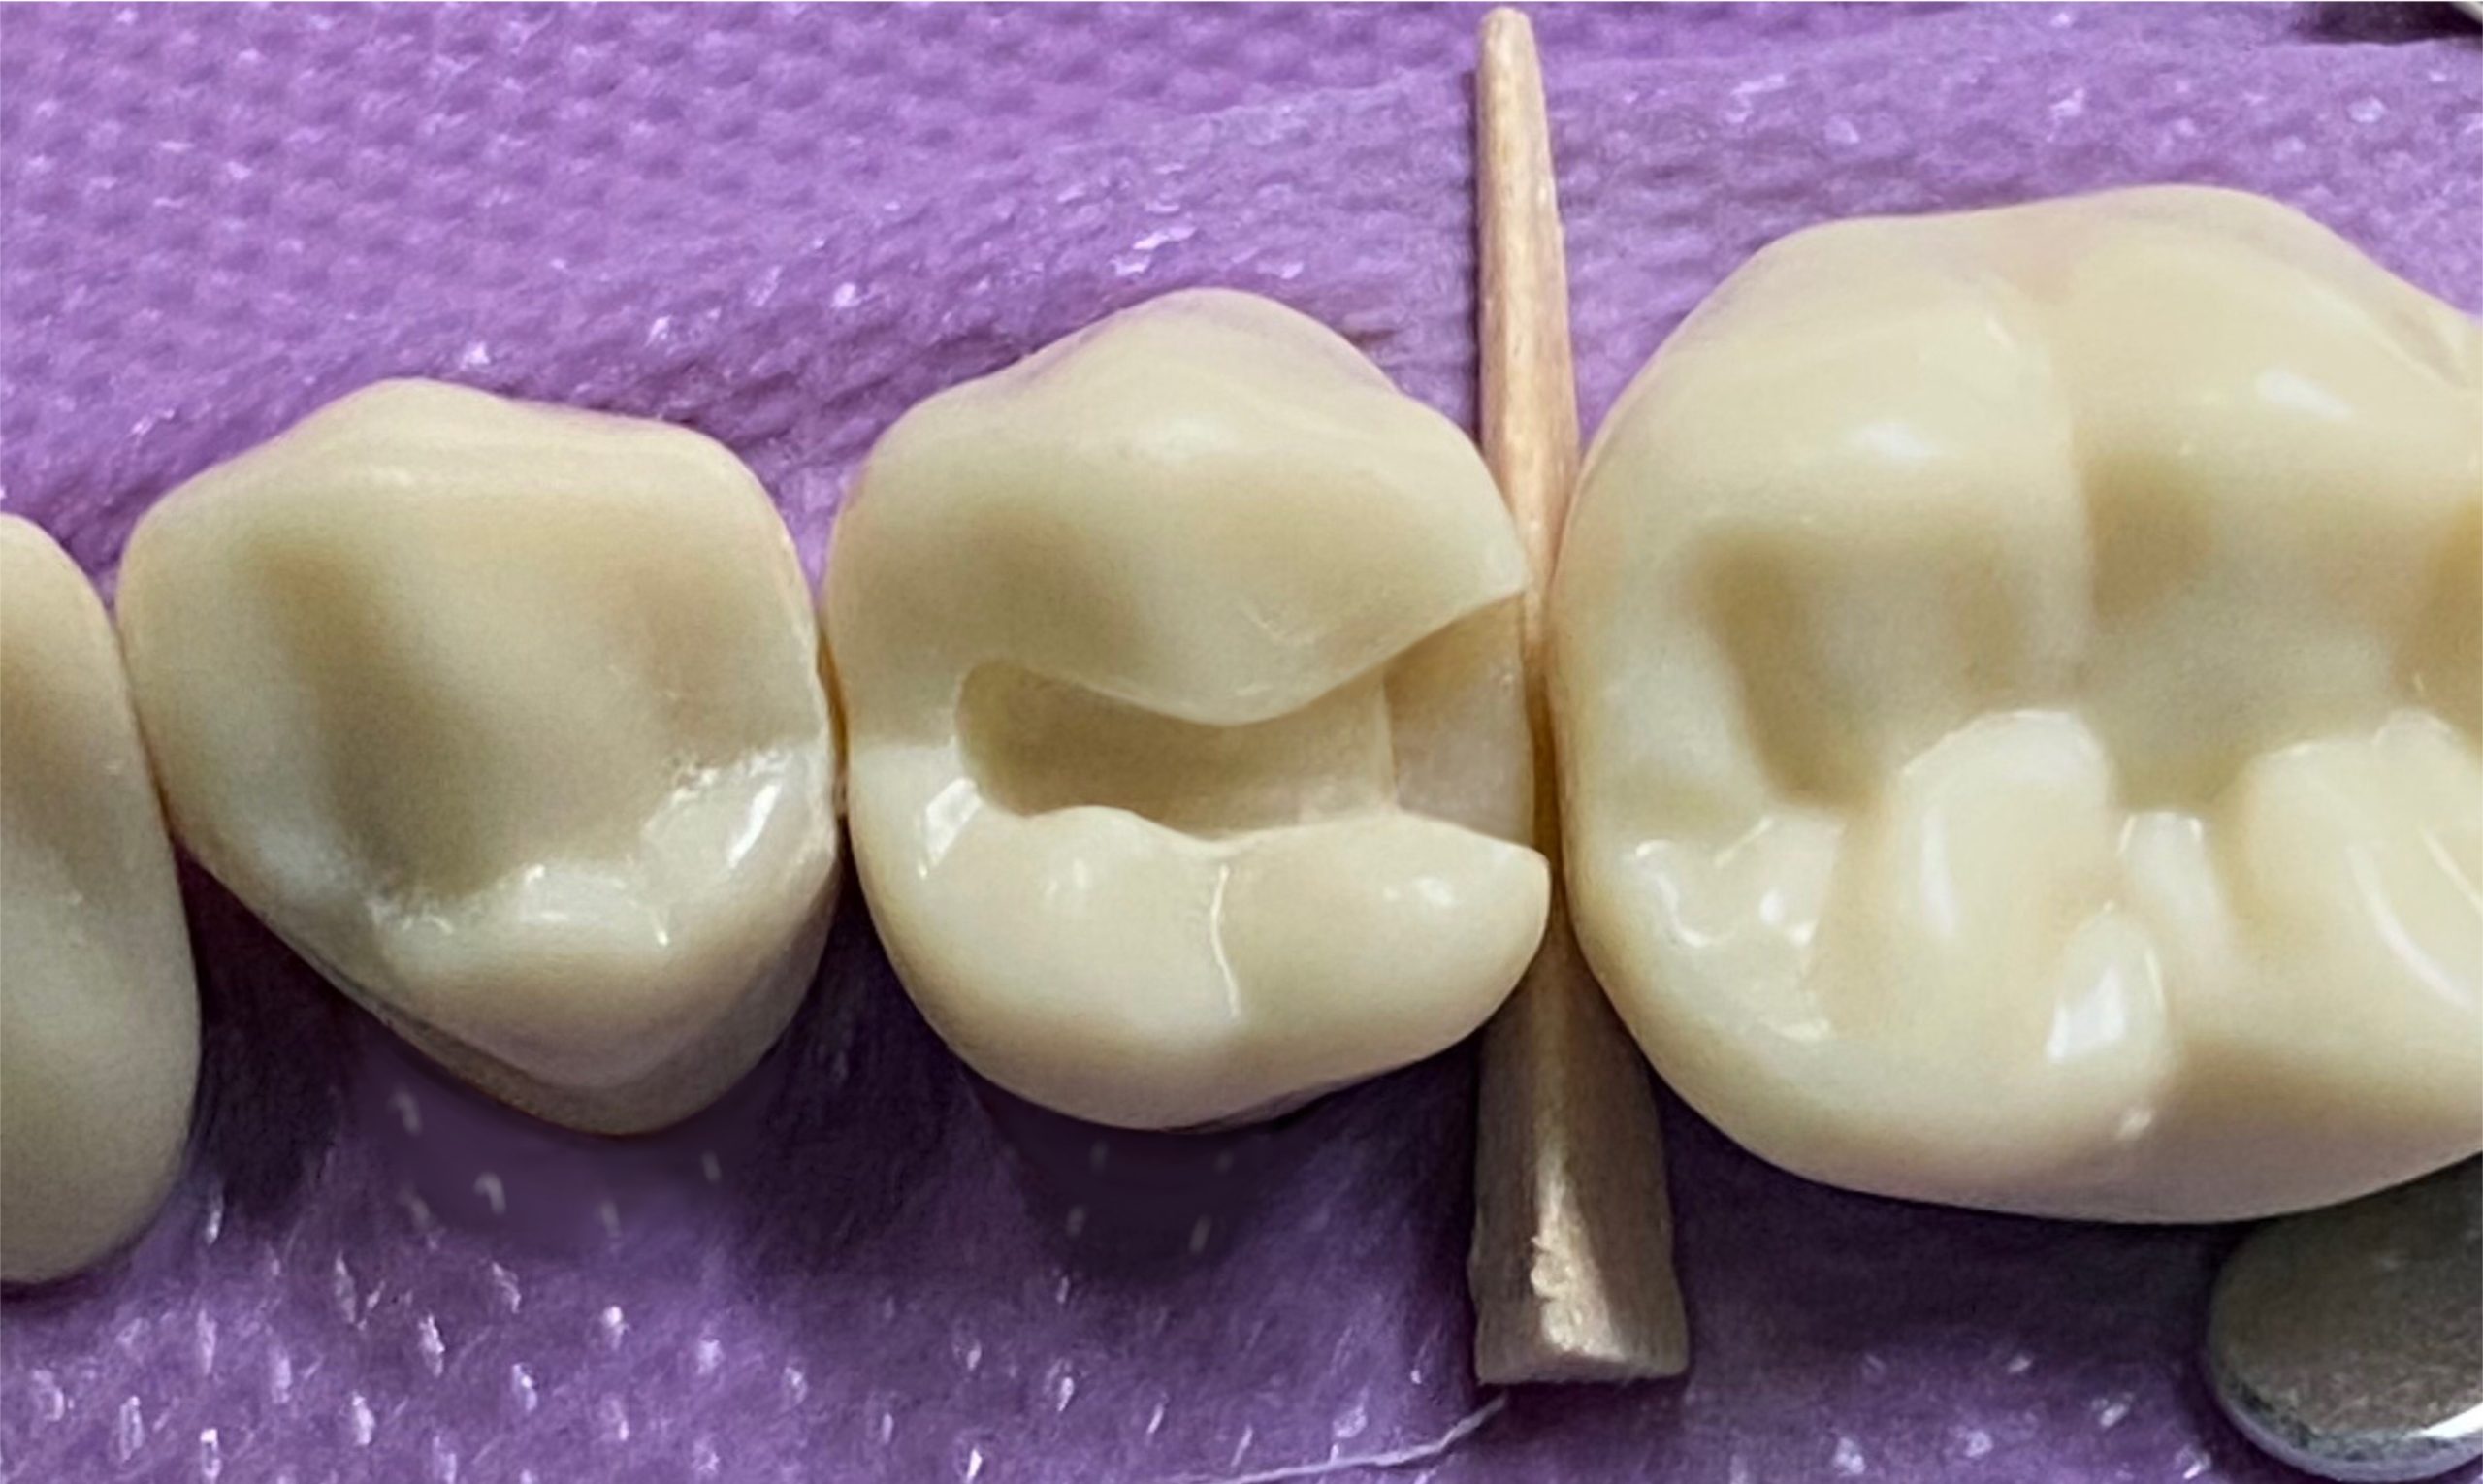
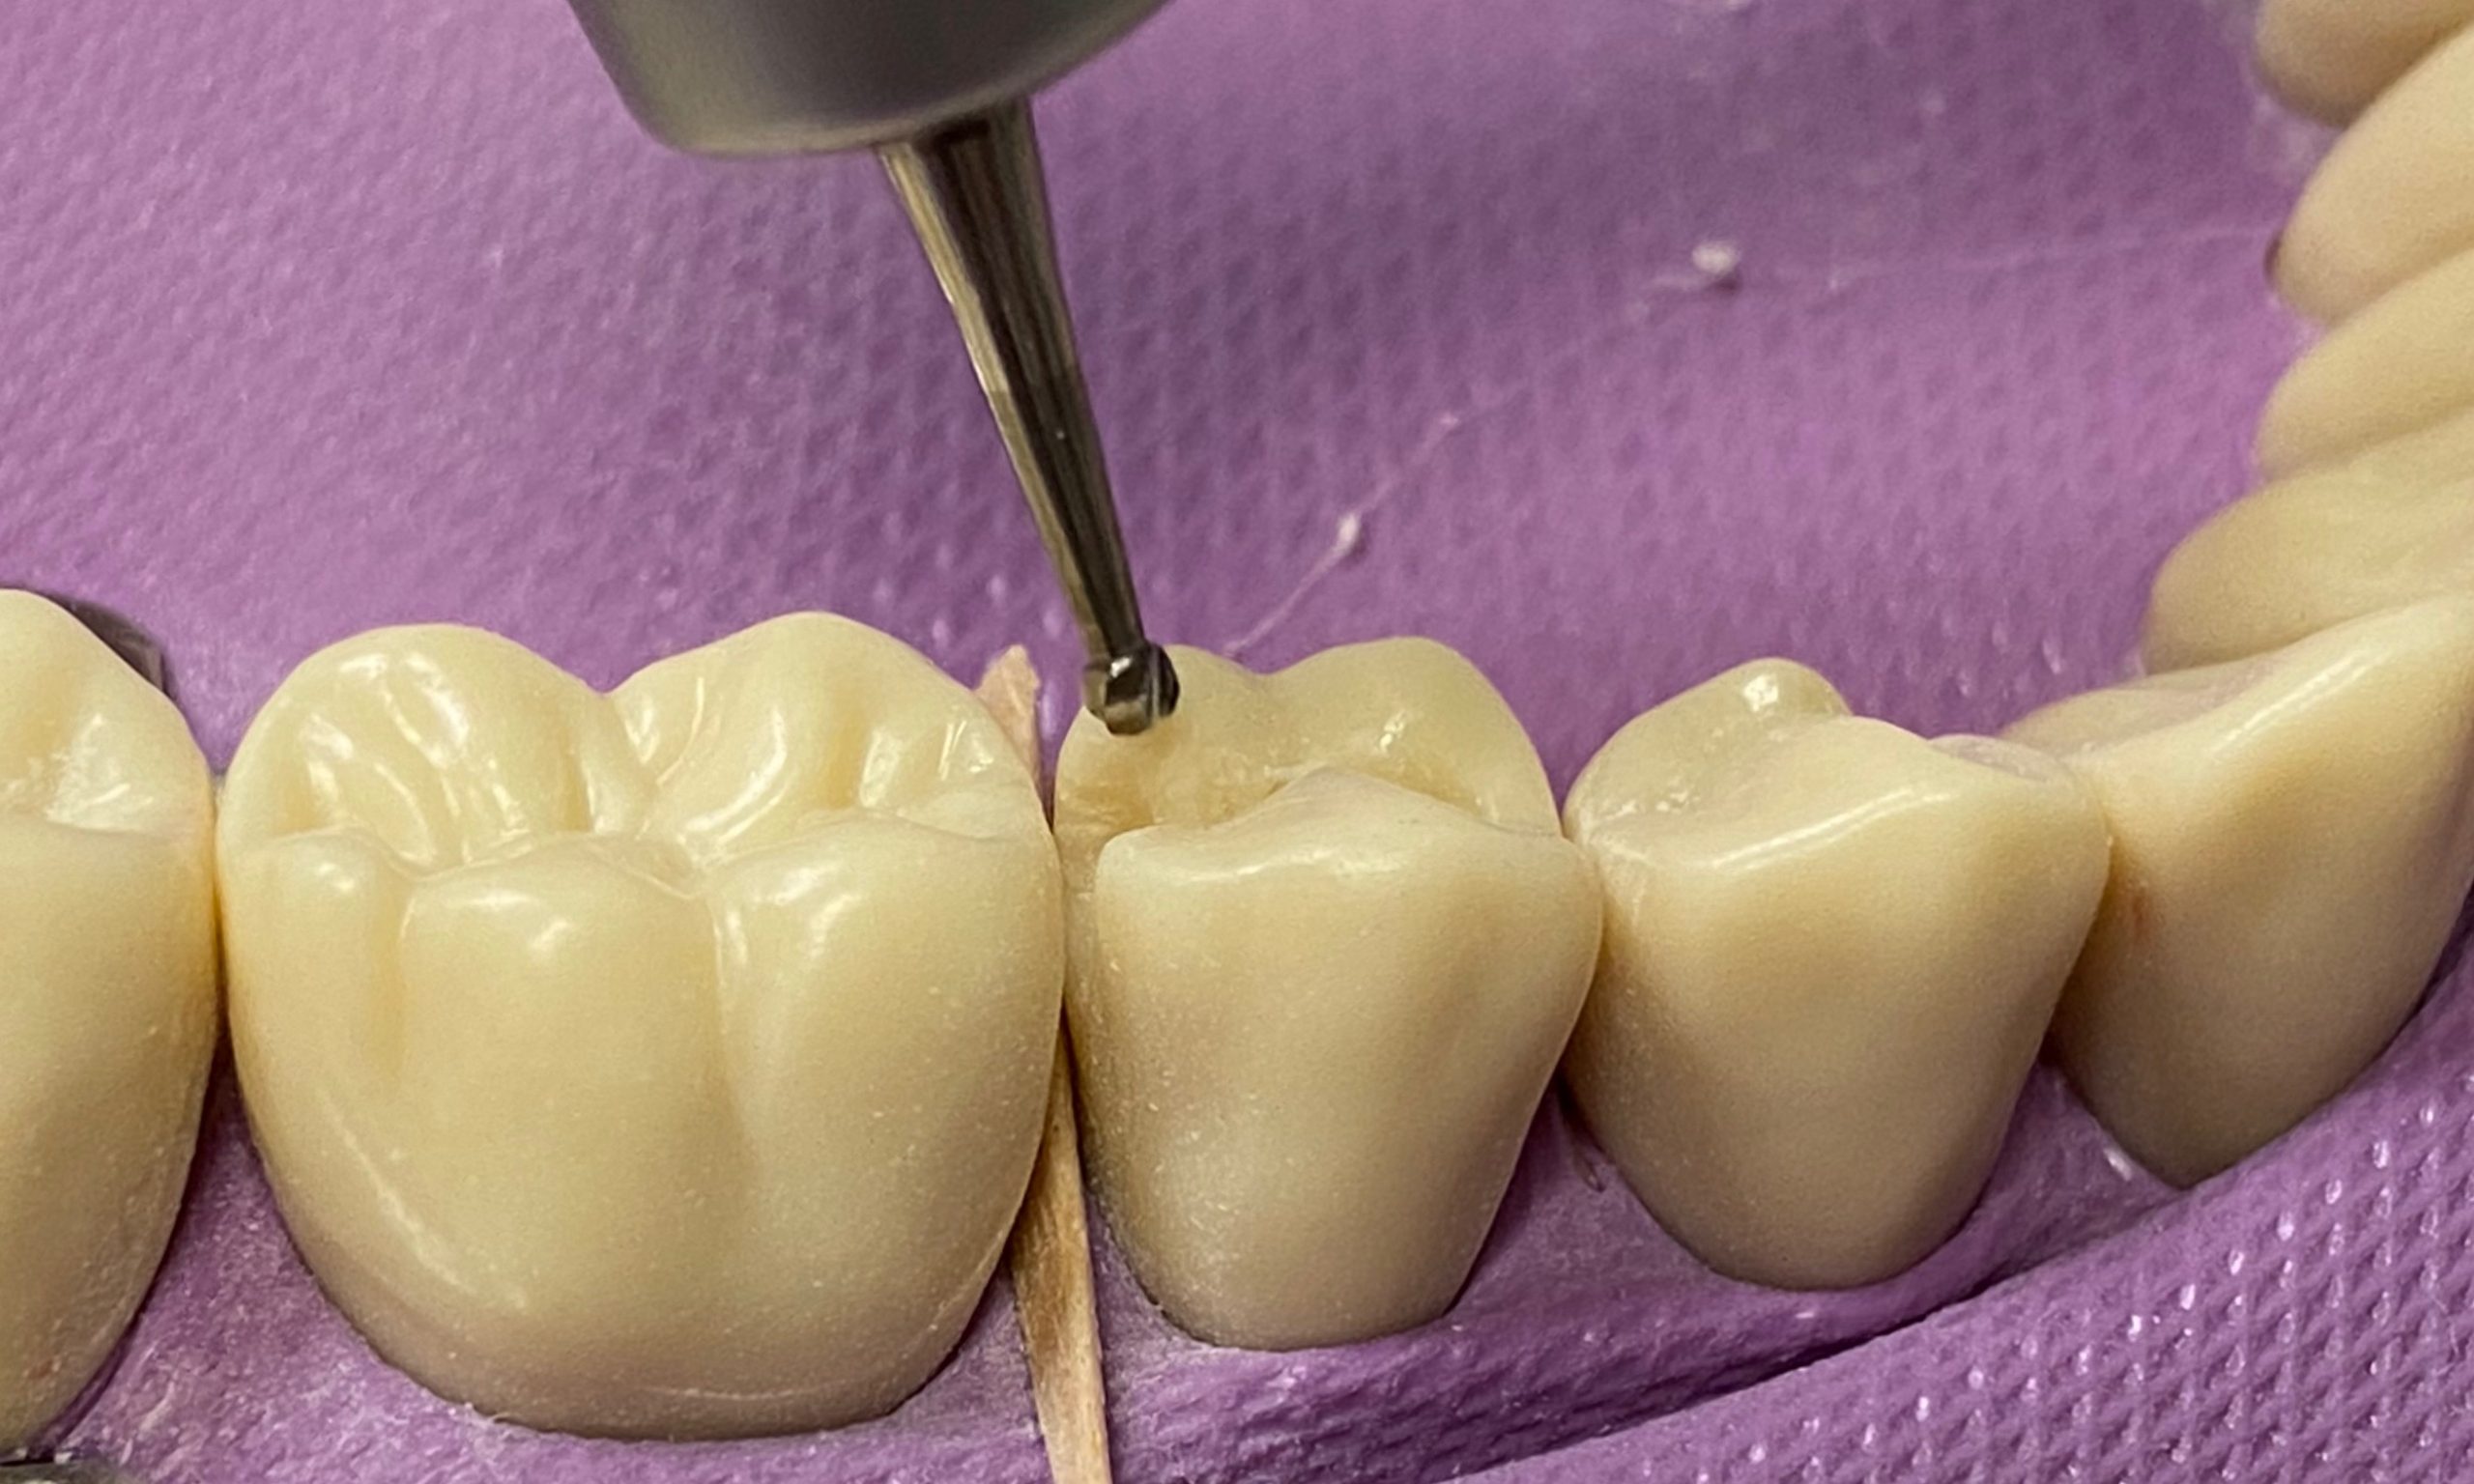
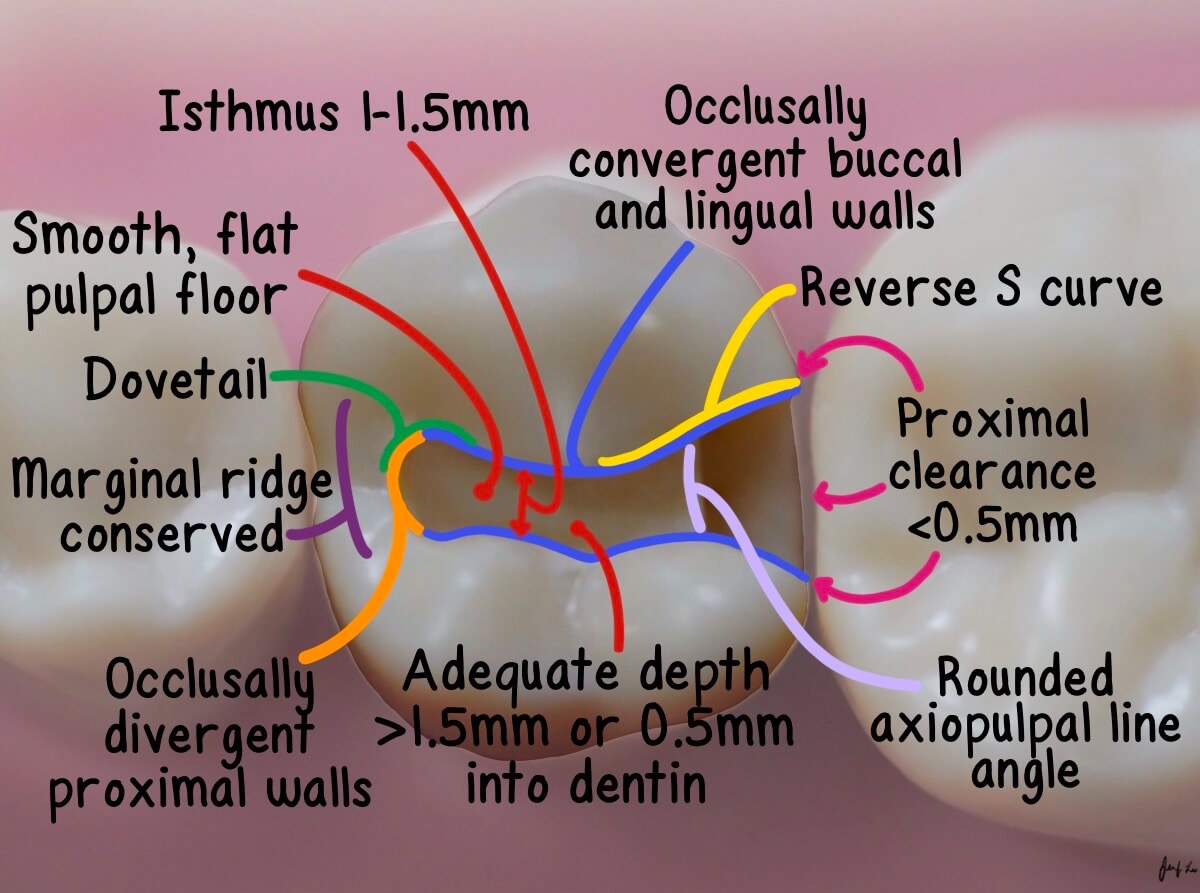
- BL width of occlusal outline: at least 1mm
- BL width of isthmus: 1-1.5mm
- BL dimension must accommodate the smallest condenser
- Follow the anatomy of the grooves
Bur options: pear shaped carbide burs (330, 245)
Bur options: pear shaped carbide burs (330, 245)
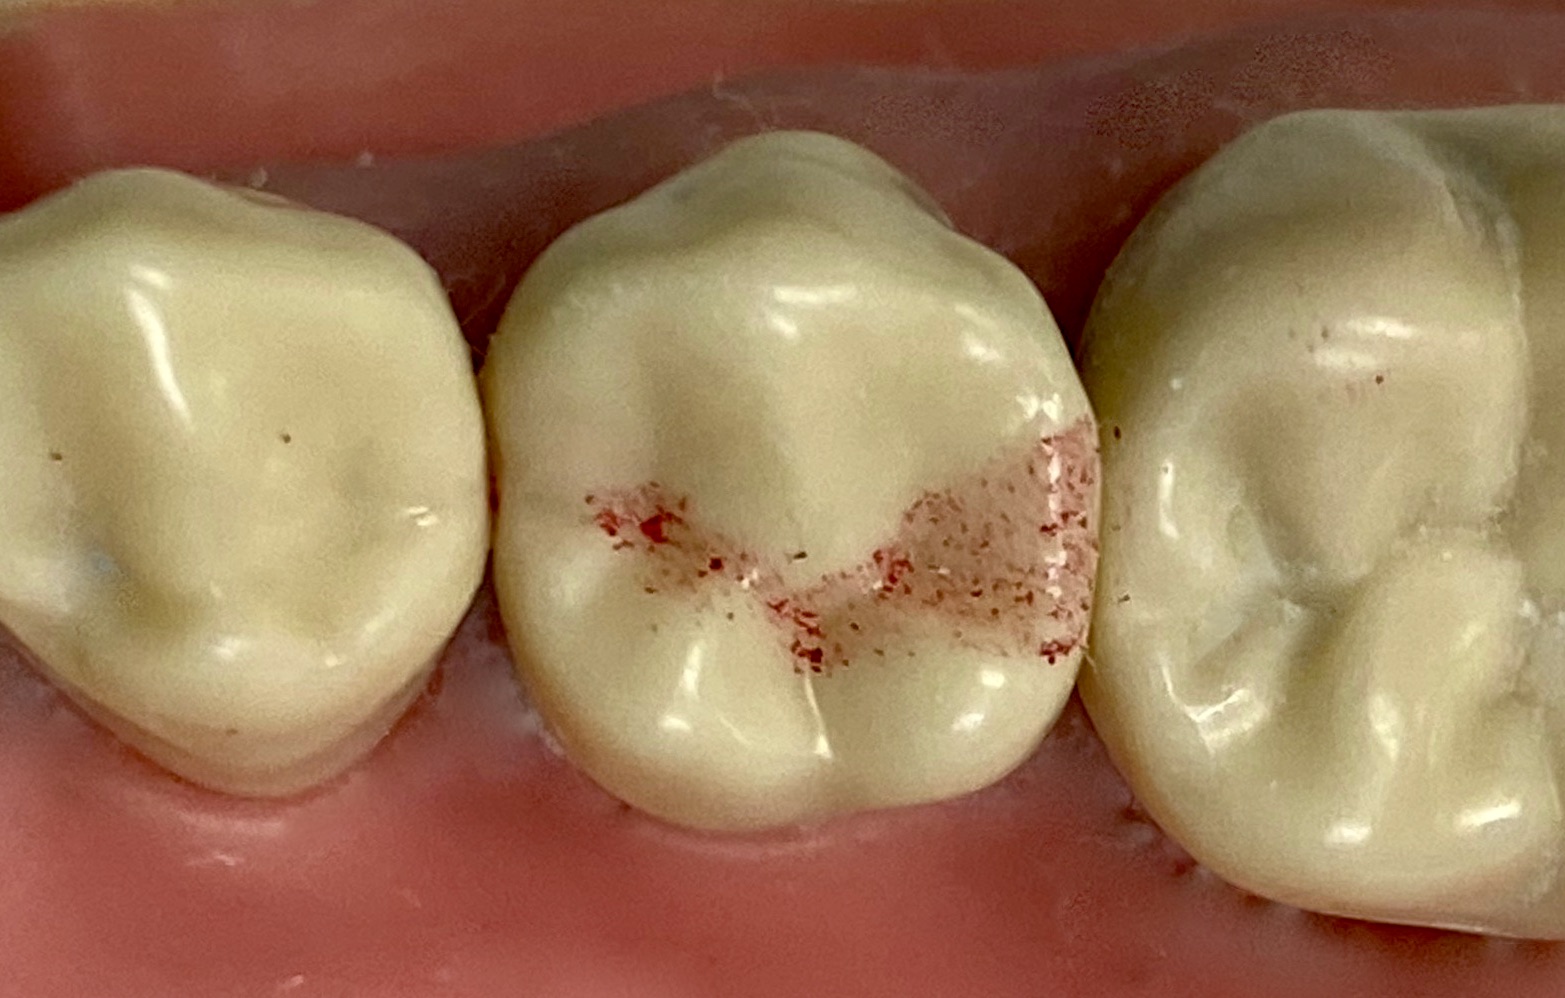
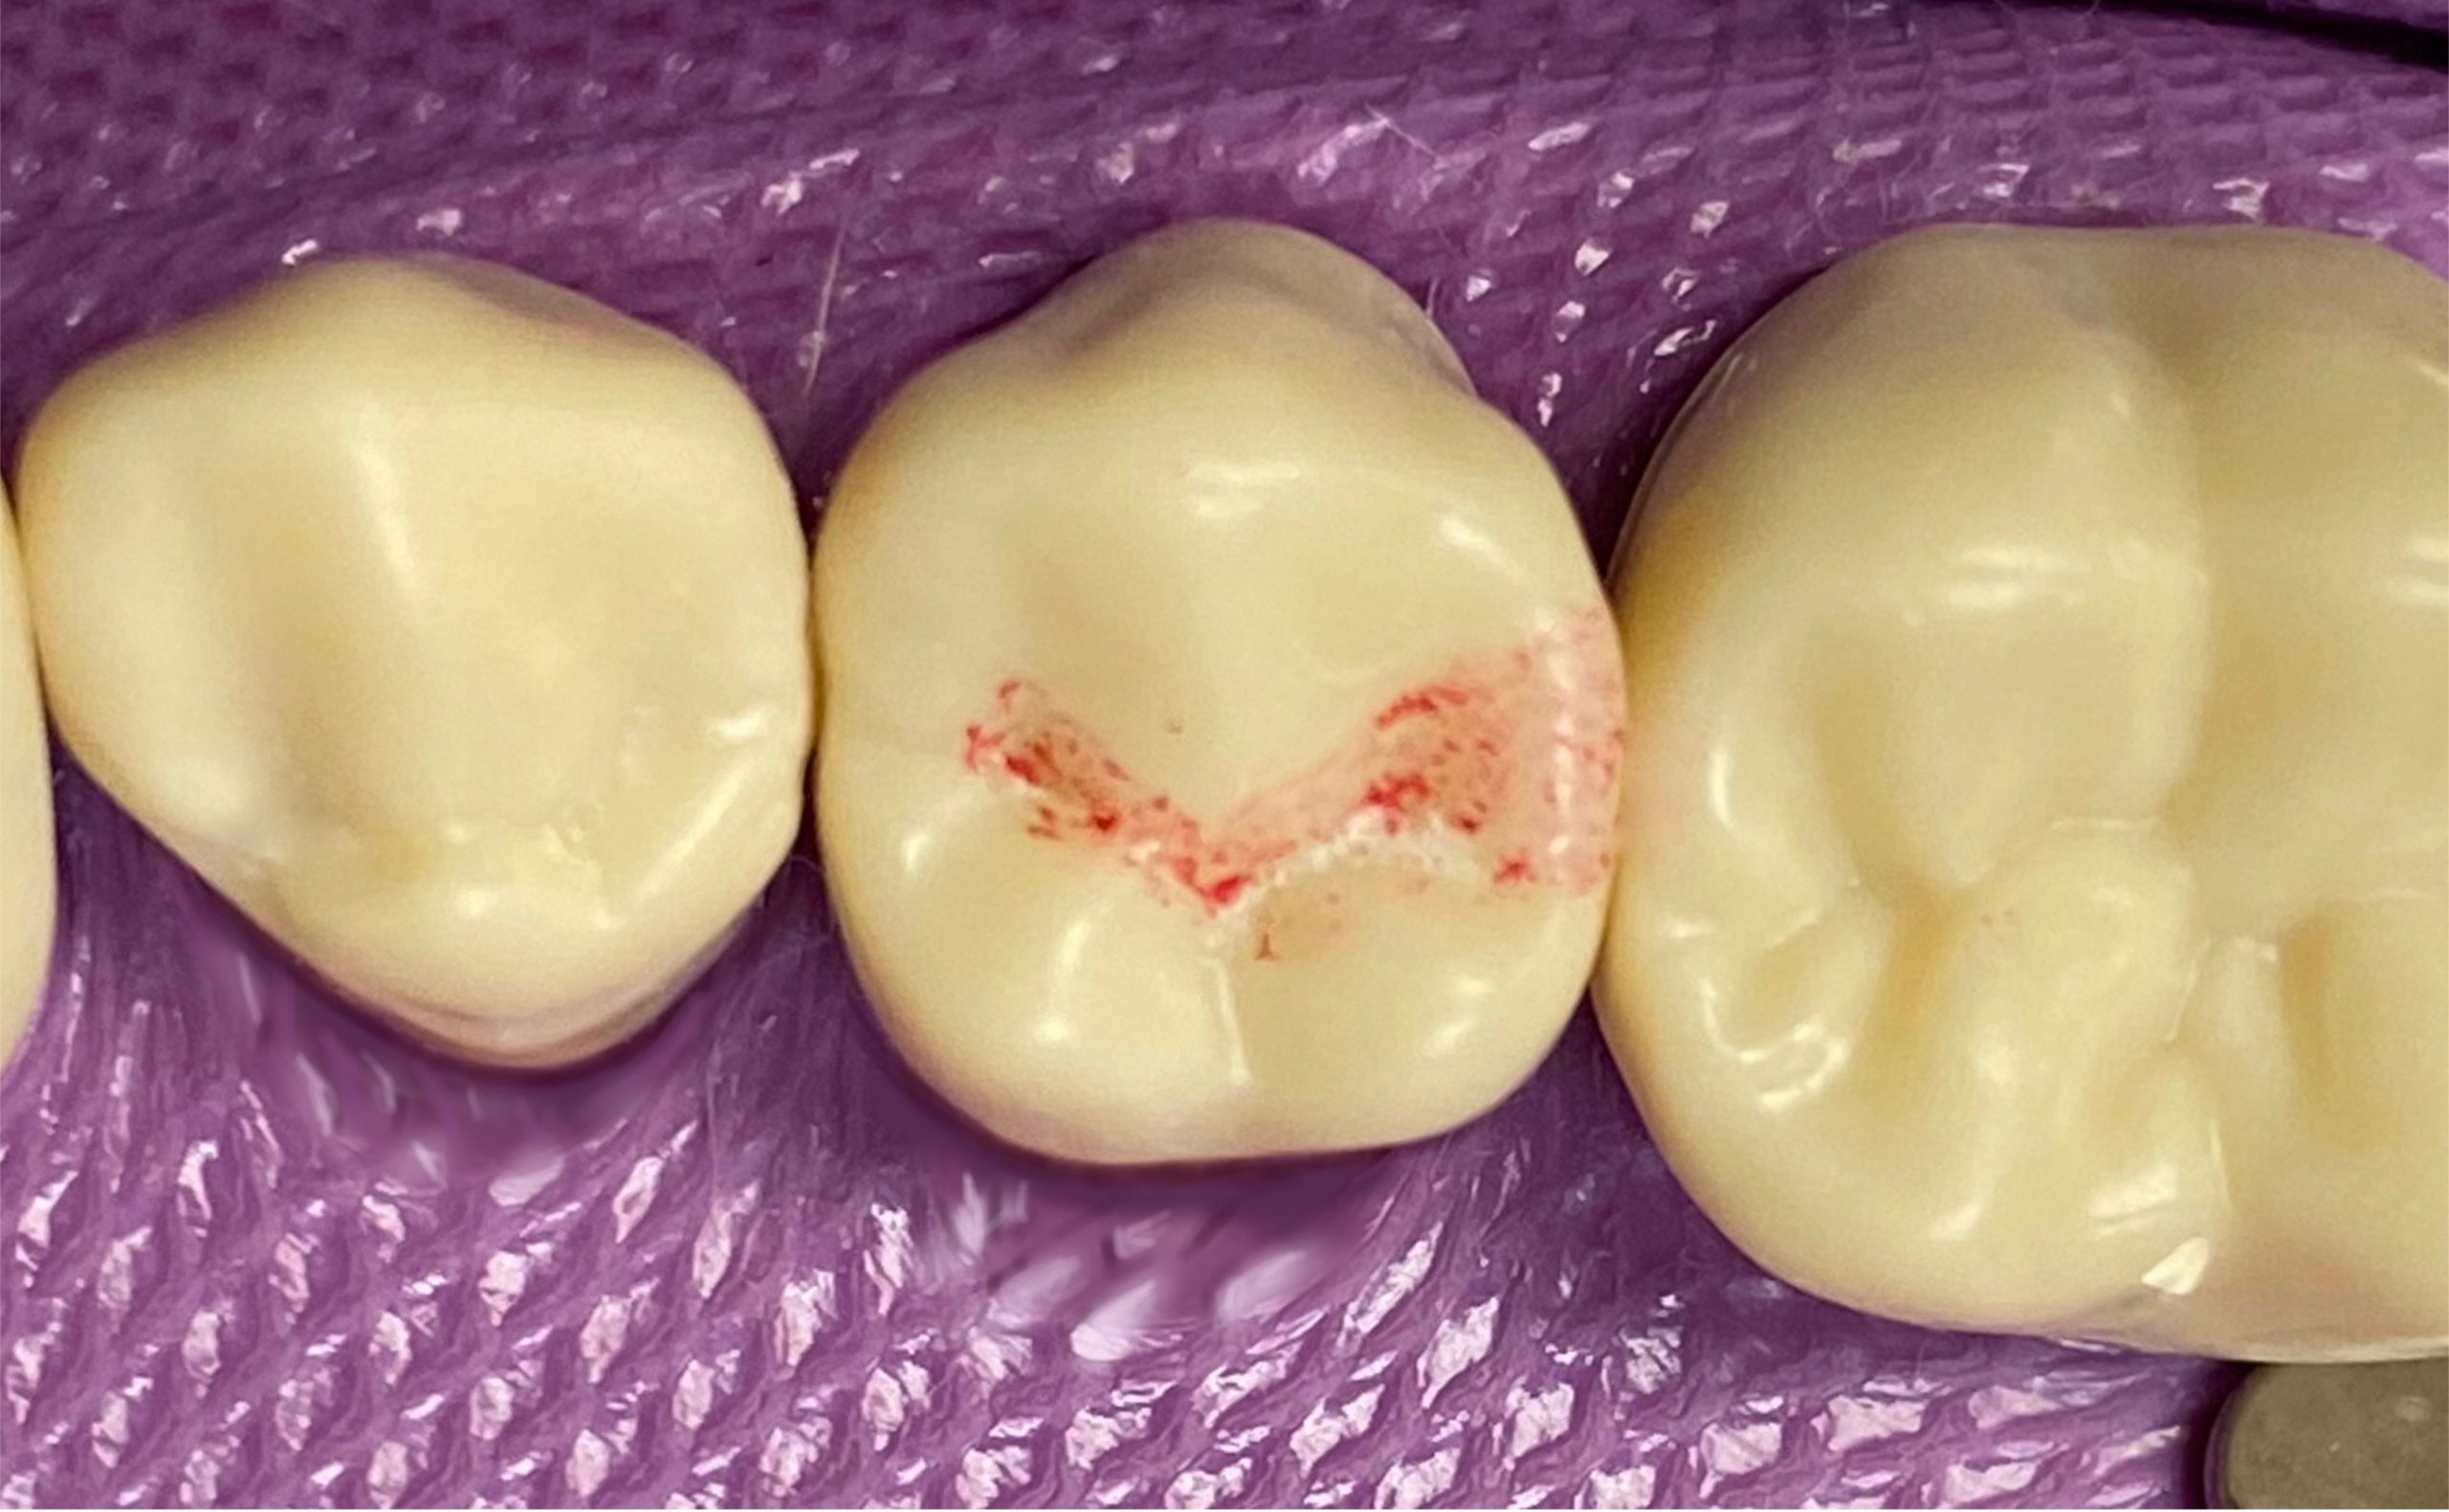
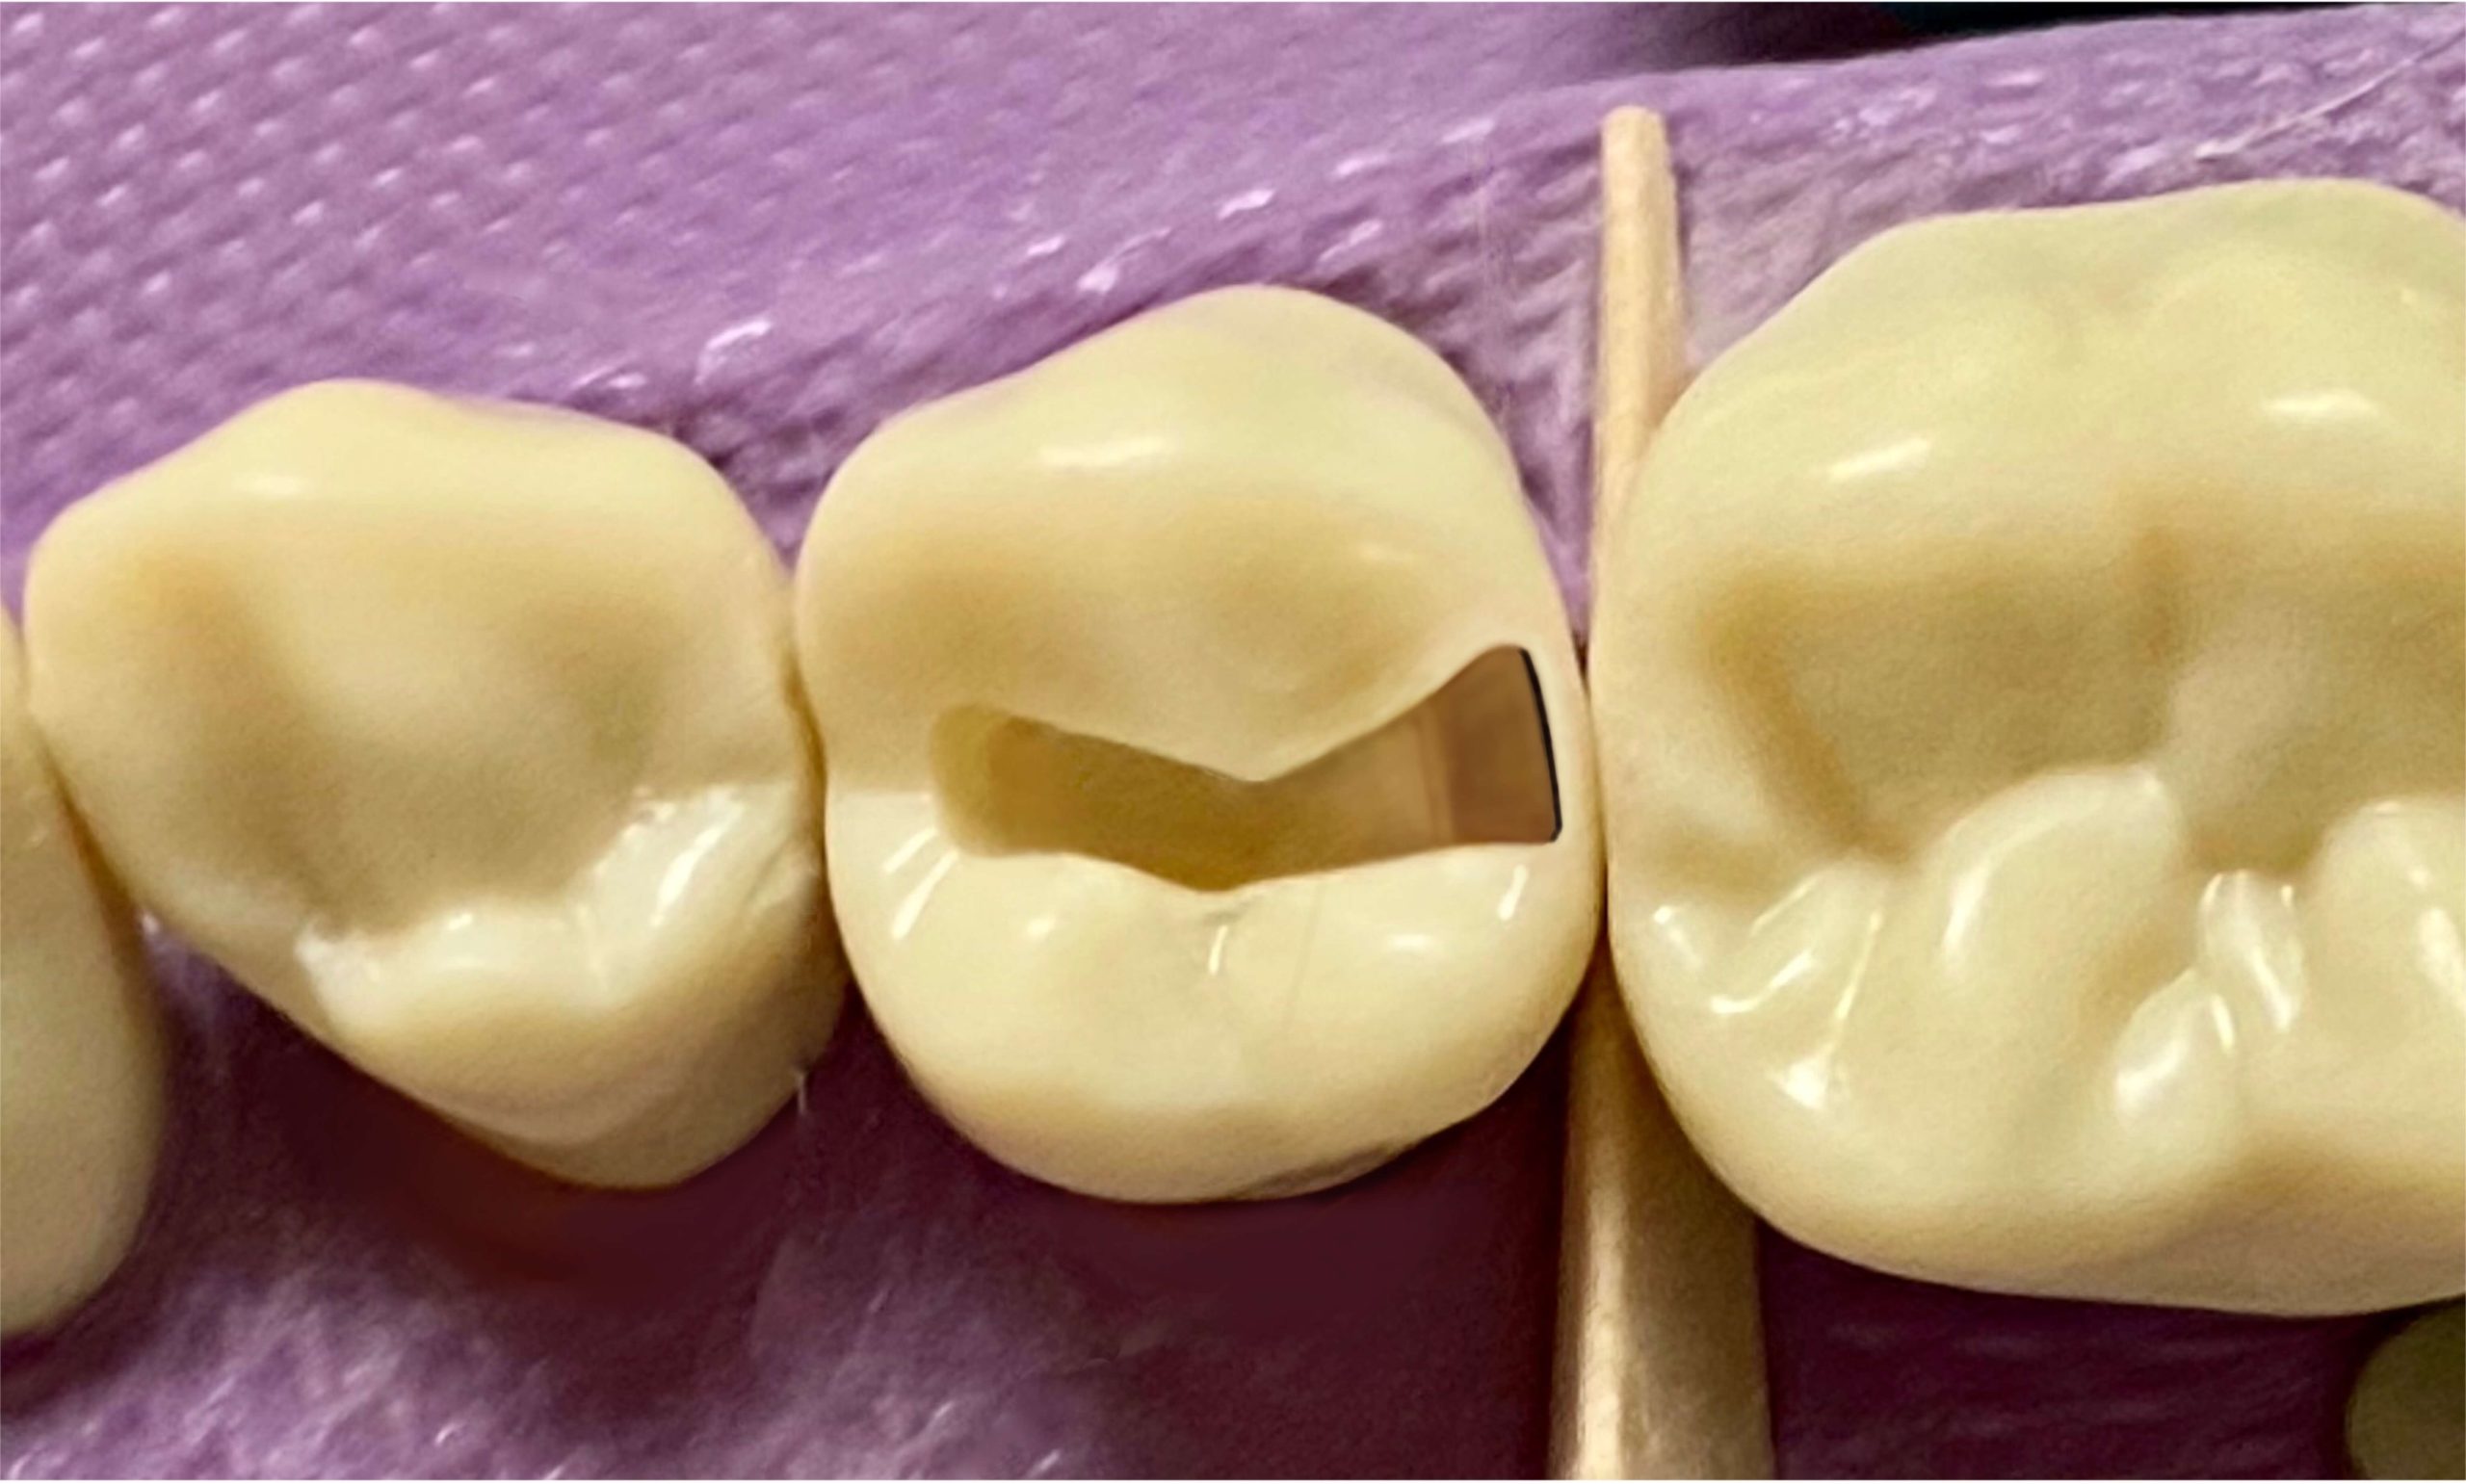
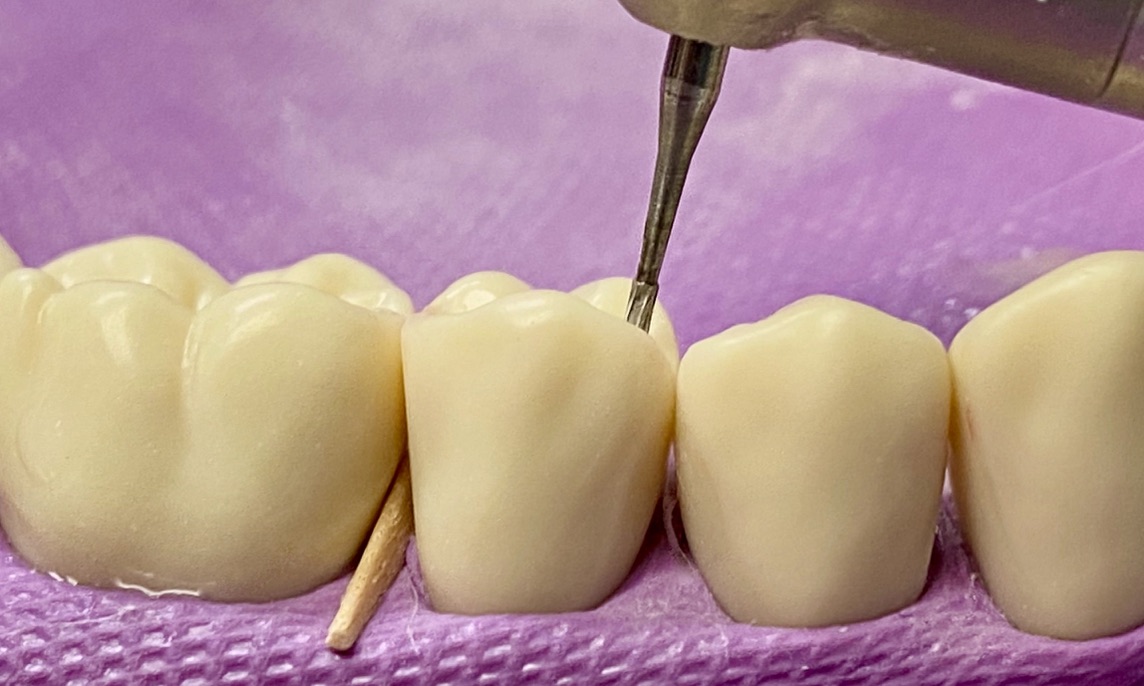
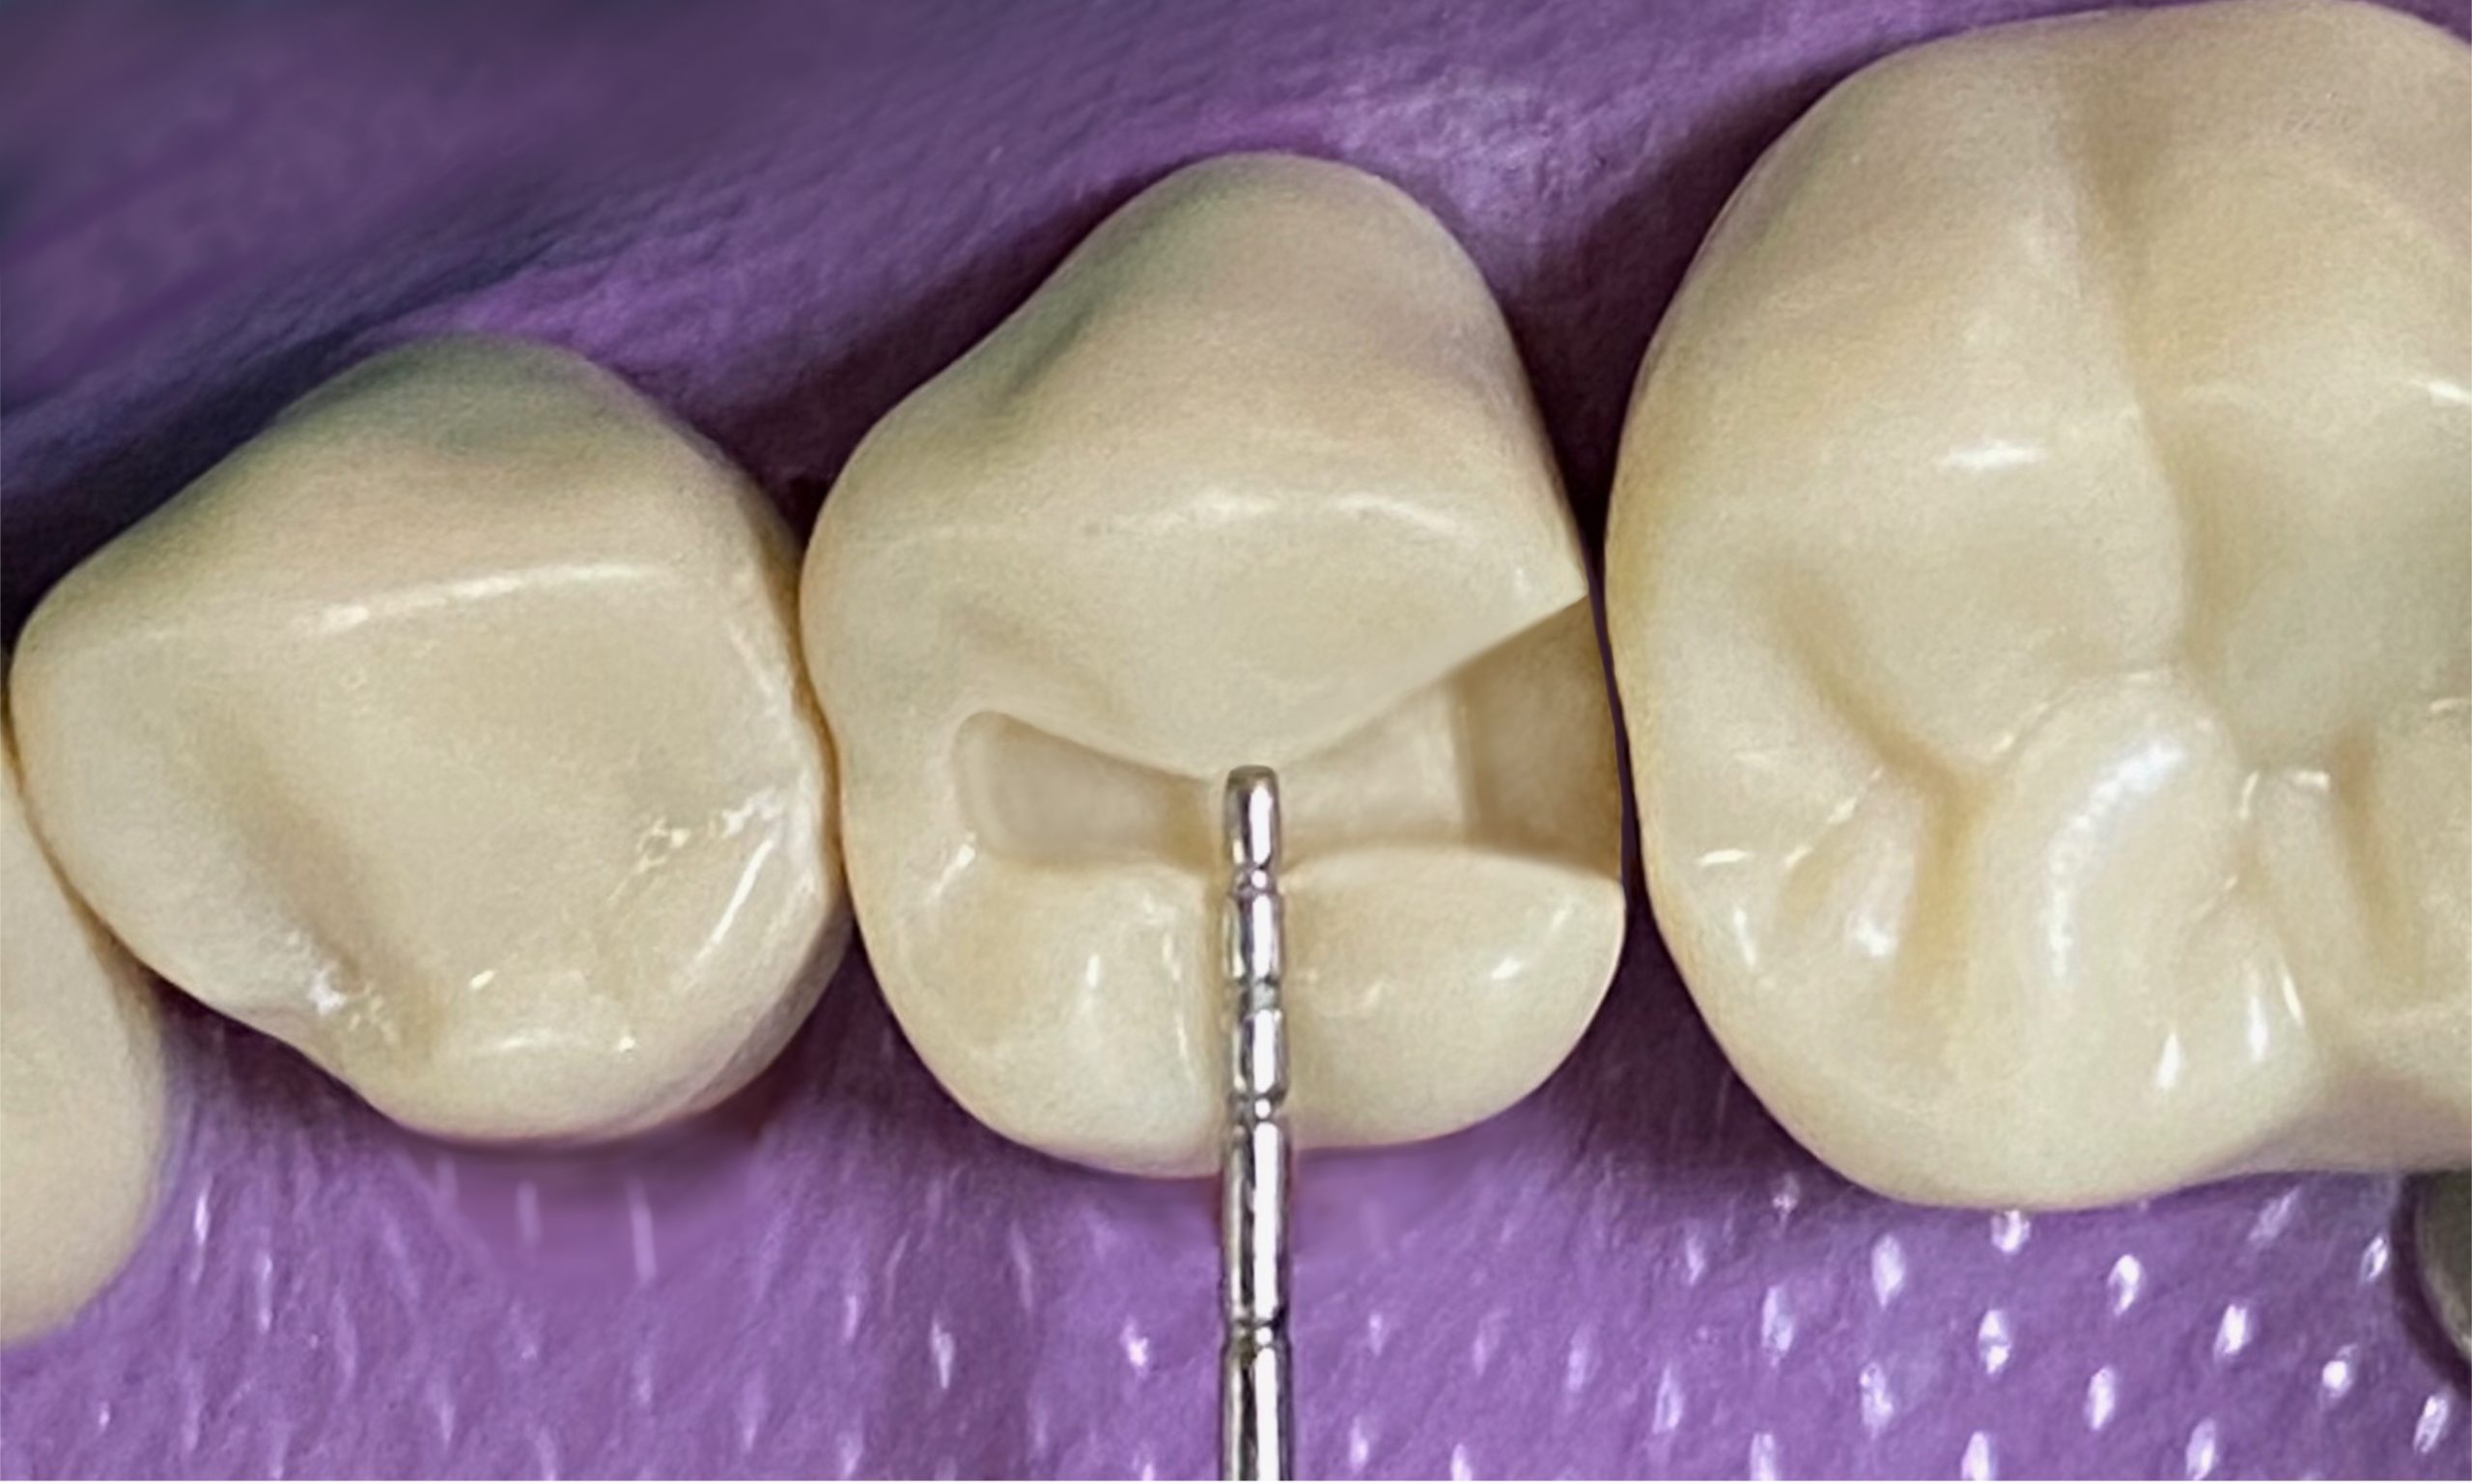
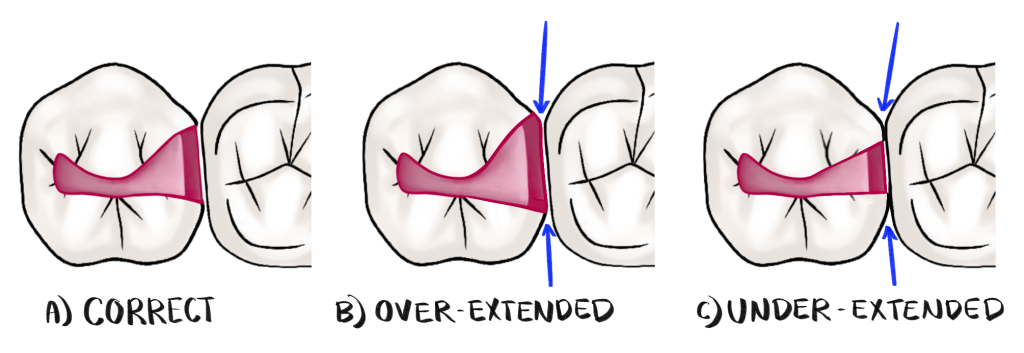
- The gingival contact is broken <0.5mm
- When the gingival contact is broken, the tip of the explorer will pass through the broken contact
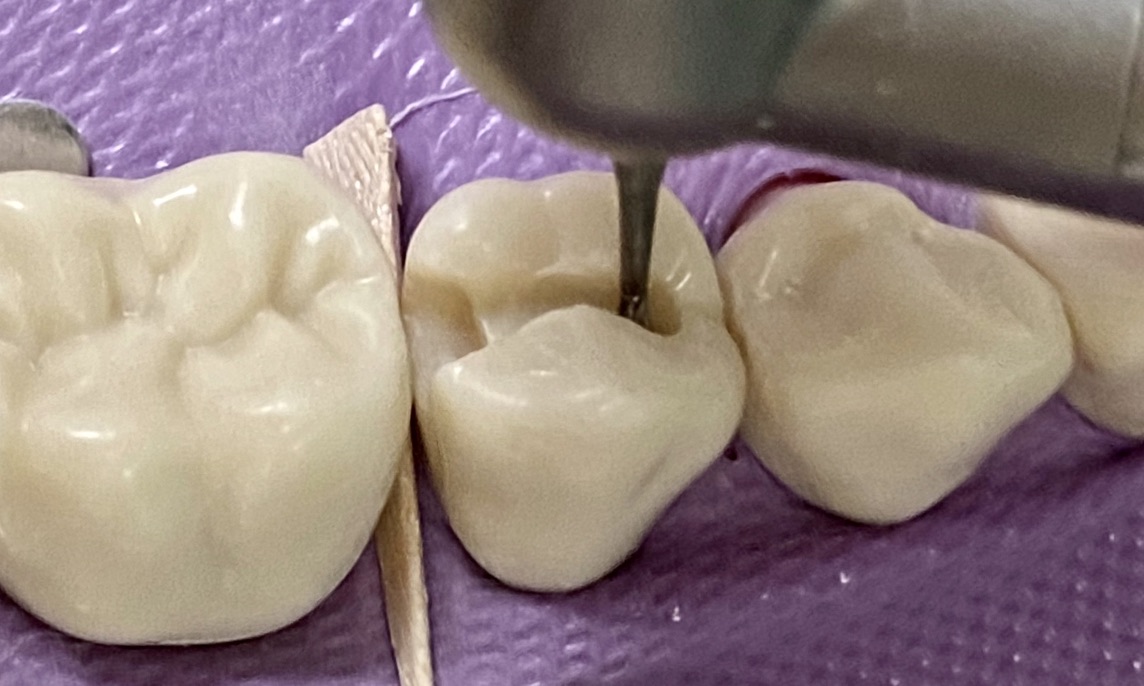
Drop the box = creating the proximal box!
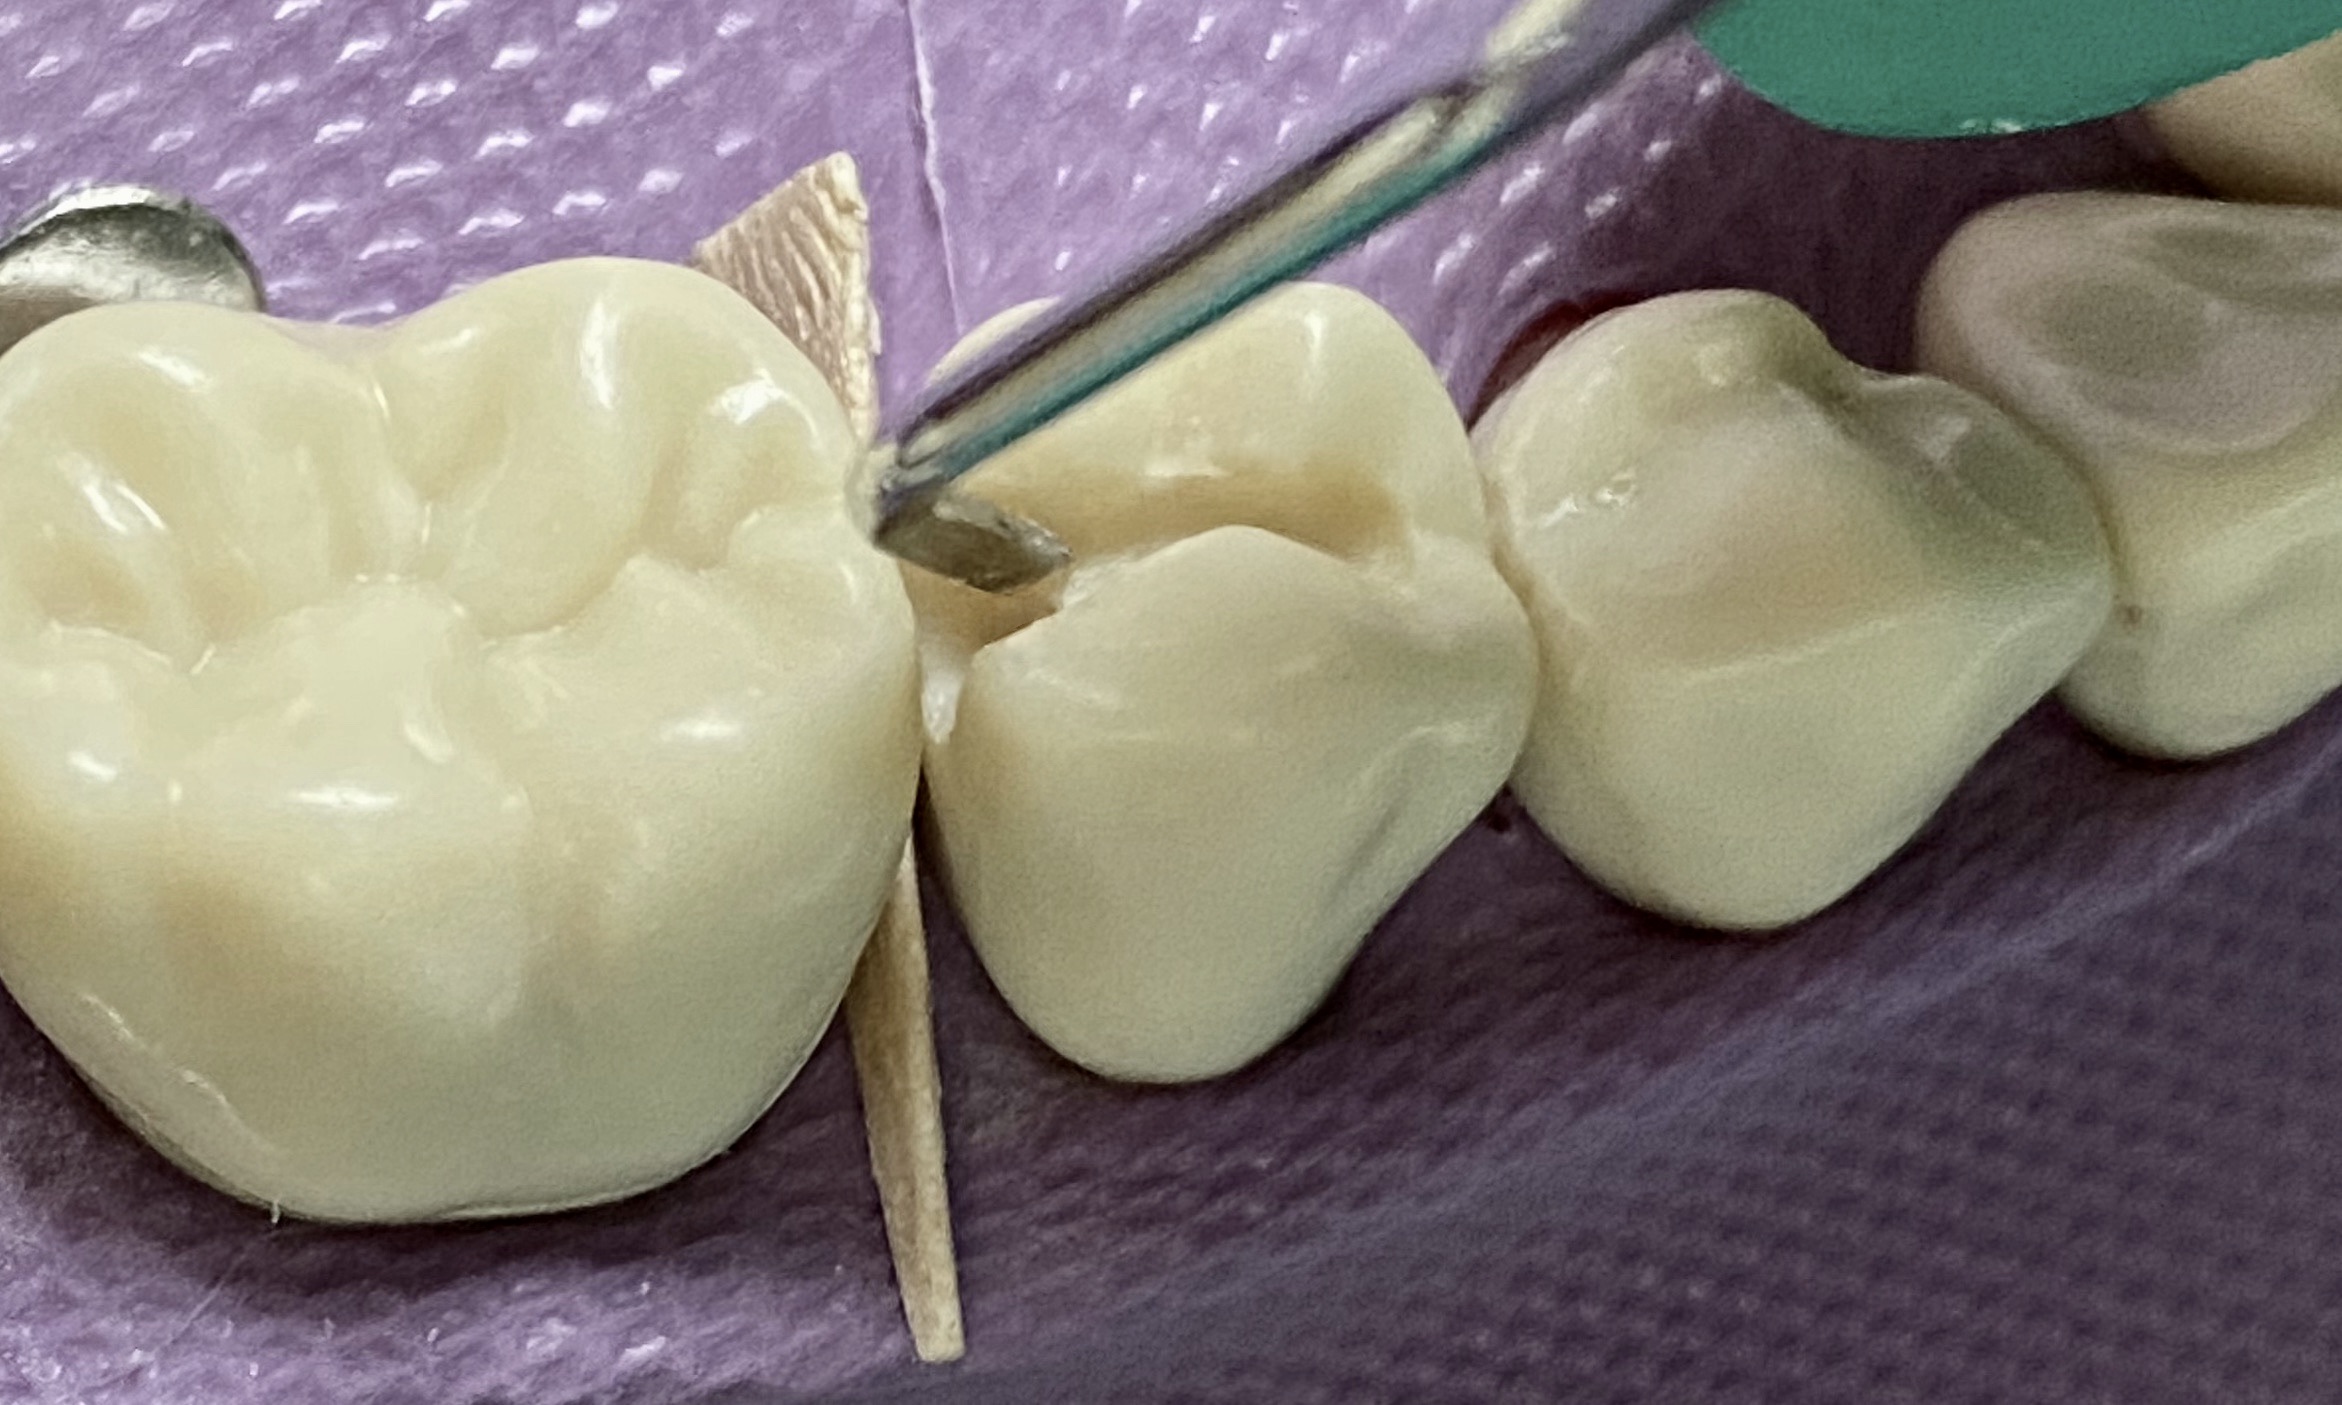
- Position the flat side of the instrument against the enamel shell and push the instrument outward toward the adjacent tooth
Hand instrument option: enamel hatchet
Bur options: pear shaped carbide burs (330, 245) <br>
Hand instrument options: enamel hatchet
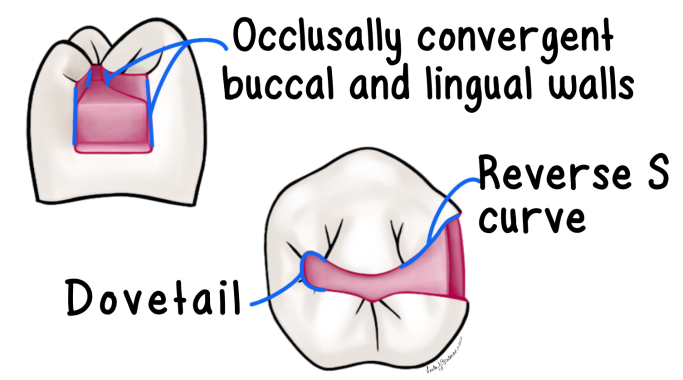
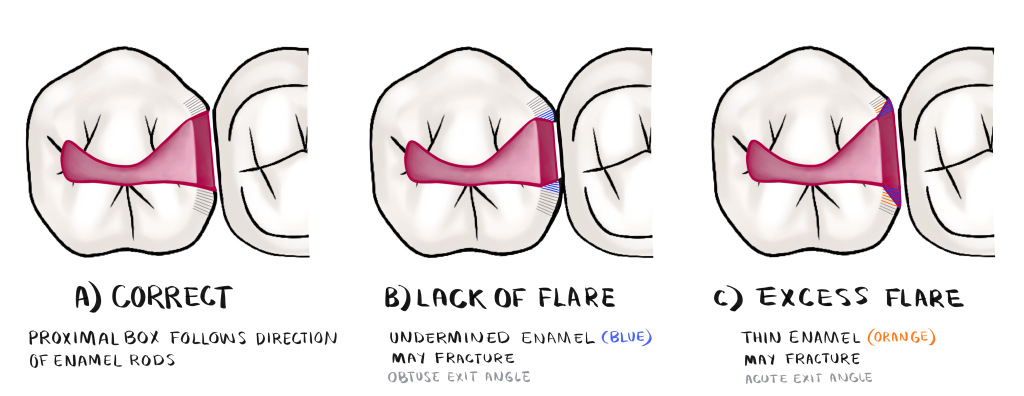
- The exit angles are 90º degrees to the tooth surface, following the direction of the enamel rods
- The buccal and lingual walls are occlusally convergent
- The axial wall is occlusally divergent
- The tip of the explorer should pass through buccal, lingual, gingival contacts
Bur options: pear shaped carbide burs (330, 245)
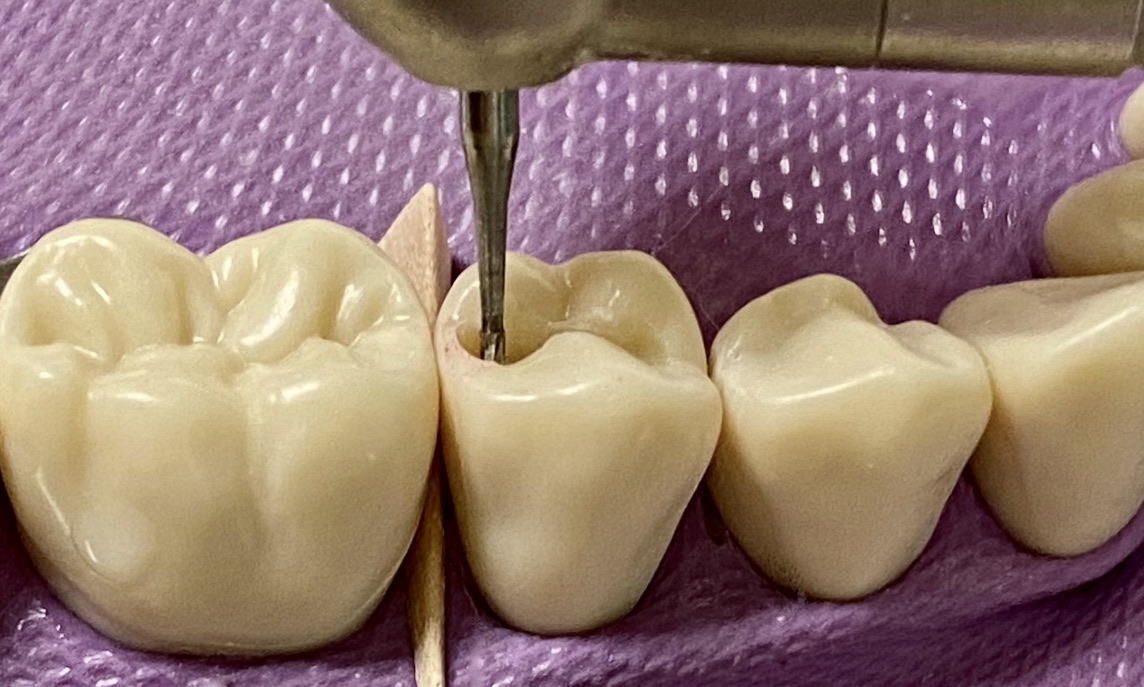
Bur options: round carbide burs (4, 6)
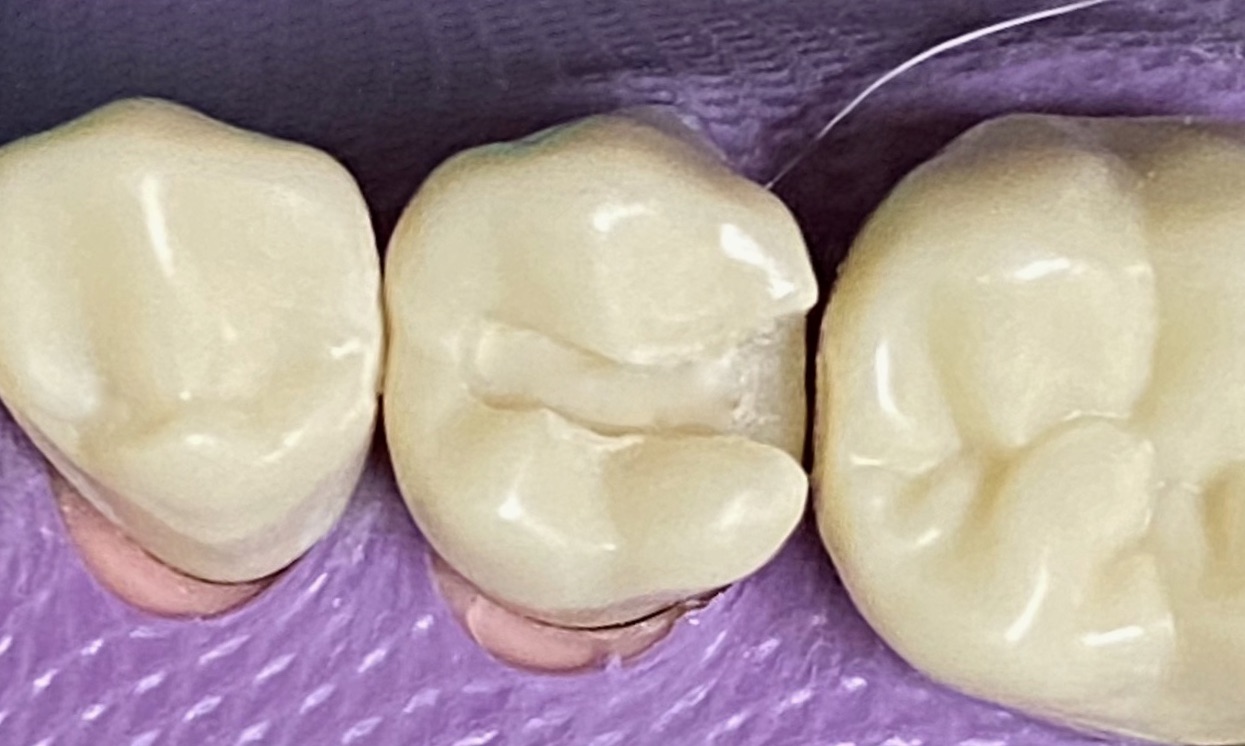
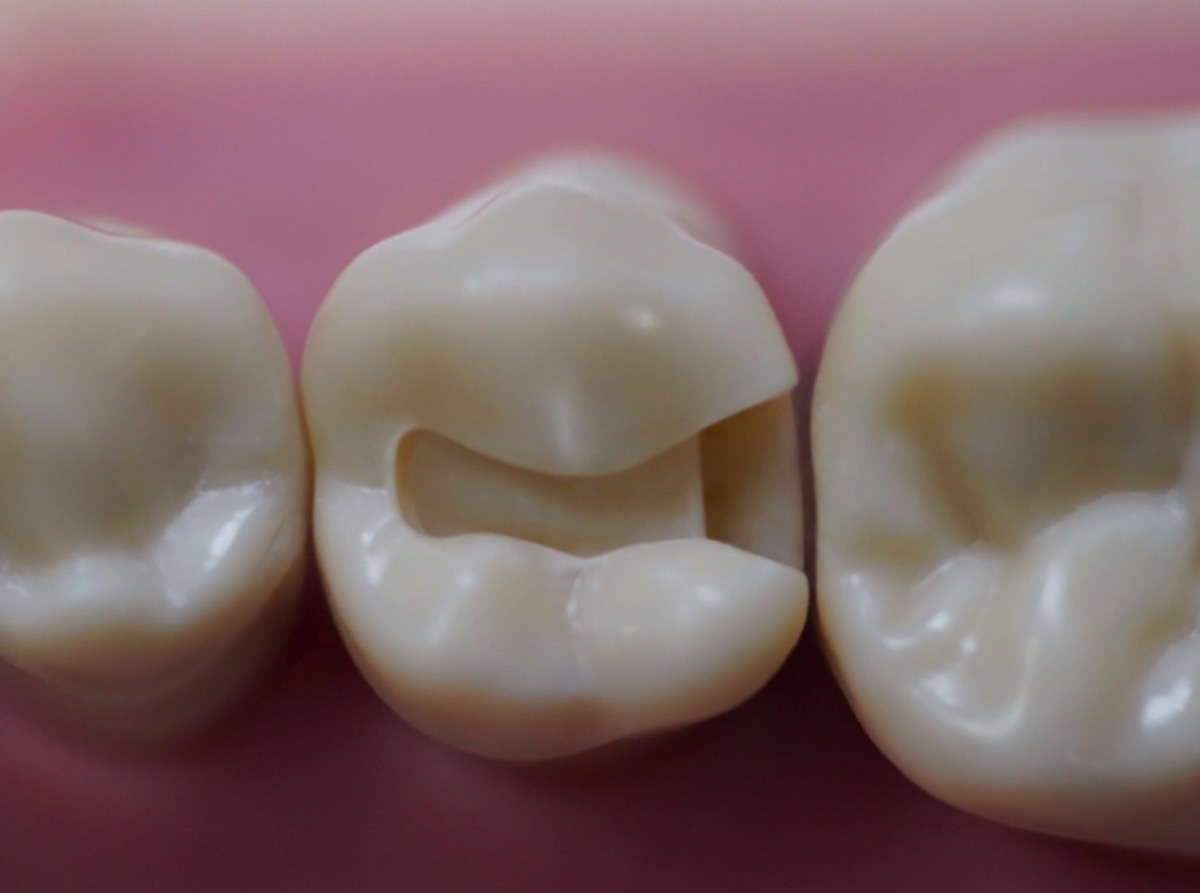
- Remove unsupported enamel
- Remove steps/ledges
- Bevel the axiopulpal line angle
Hand instrument options: enamel hatchet, enamel hoe, gingival margin trimmer
- Use the explorer to check for smoothness
- Use the probe to check for appropriate depth and width
- Clinical note: The final dimensions of the preparation are determined by the extent of the carious lesion or existing, faulty restoration
Checklist
Common Mistakes
Quiz Time!
Test your knowledge of this procedure by completing the following questions
References
Hilton, T. J., Ferracane, J. L., & Broome, J. C. (2013). Summitt’s fundamentals of operative dentistry a contemporary approach. Quintessence Publishing Co. Inc.
Ritter, A. V., Boushell, L. W., Walter, R., & Sturdevant, C. M. (2019). Sturdevant’s art and Science of Operative Dentistry. Elsevier.
Congratulations
You’ve reached the end of this lesson