Maxillary Molars
#1, 2, 3, 14, 15, 16

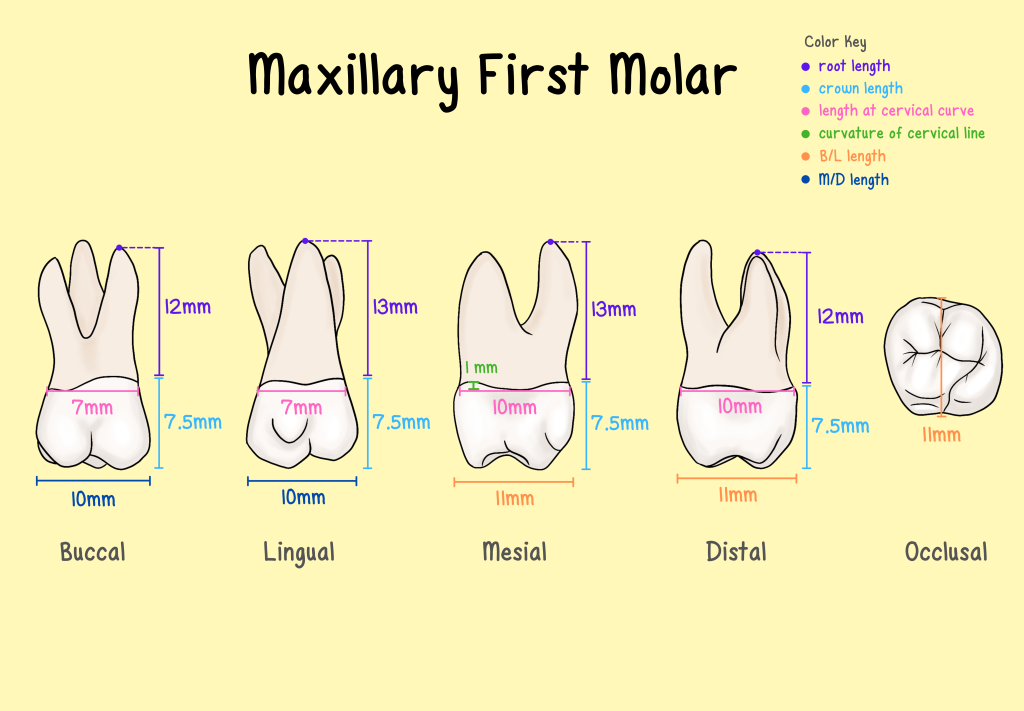
Maxillary 1st Molar
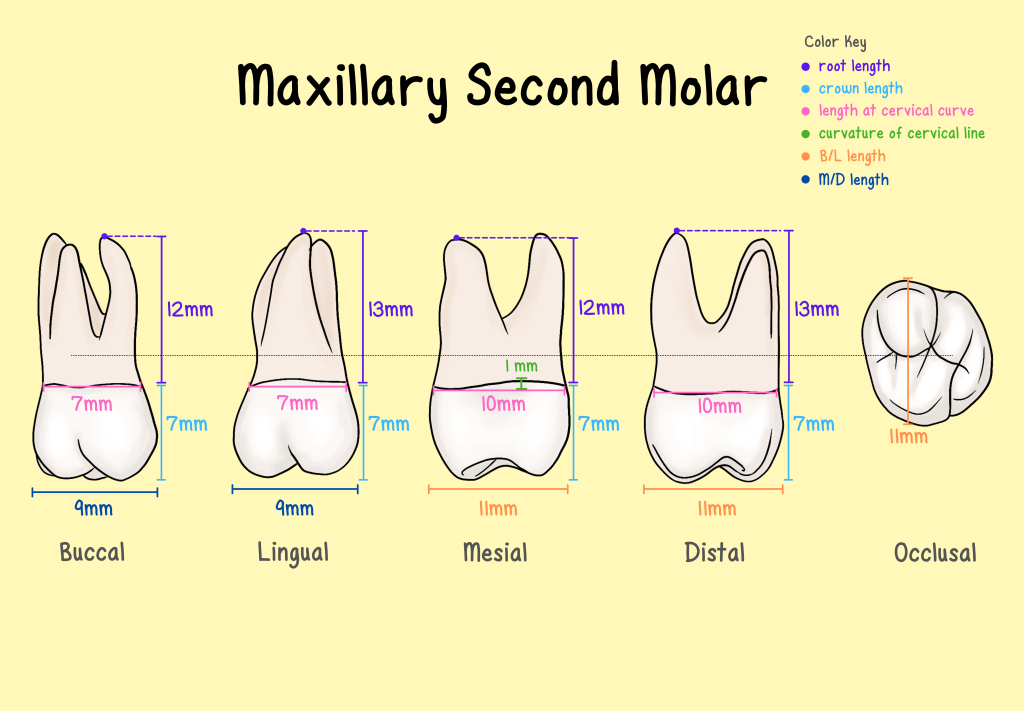
Maxillary 2nd Molar
Maxillary 3rd Molar
Measurements

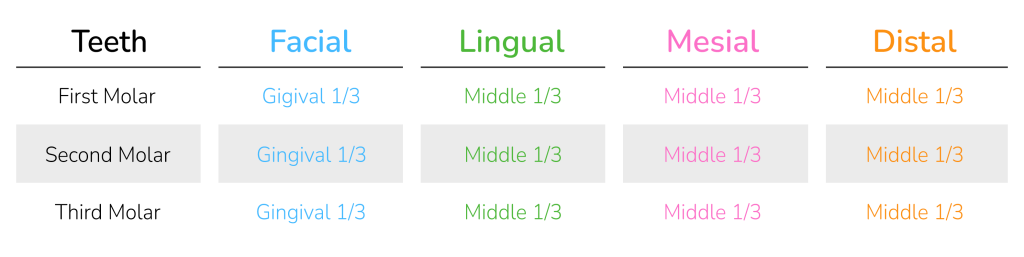
Height of Contour
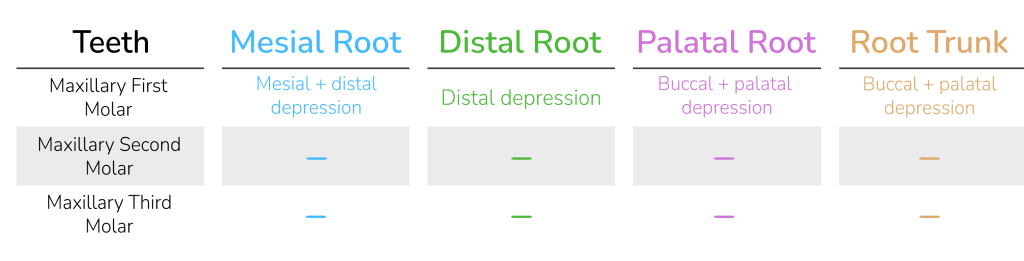
Root Depressions
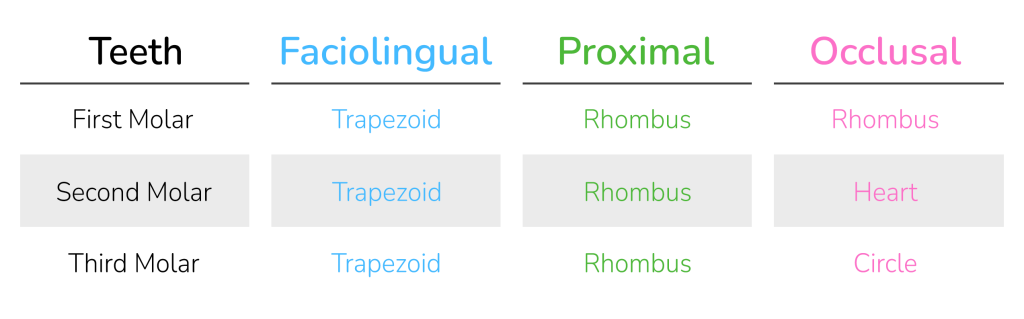
Crown Shapes
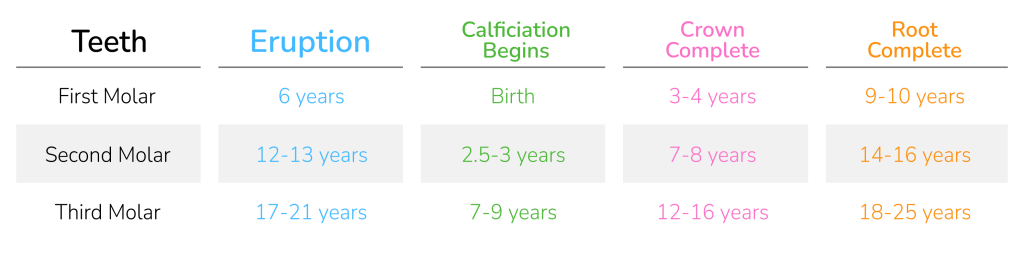
Eruption and Calcification
Quiz
Learn More Anatomy
References
Nelson. (2009). Wheeler’s Dental Anatomy, Physiology and Occlusion (9th ed.). Elsevier.
Scheid, Weiss, G., & Woelfel, J. B. (2012). Woelfel’s dental anatomy (8th ed.). Wolters Kluwer Health/Lippincott Williams & Wilkins.