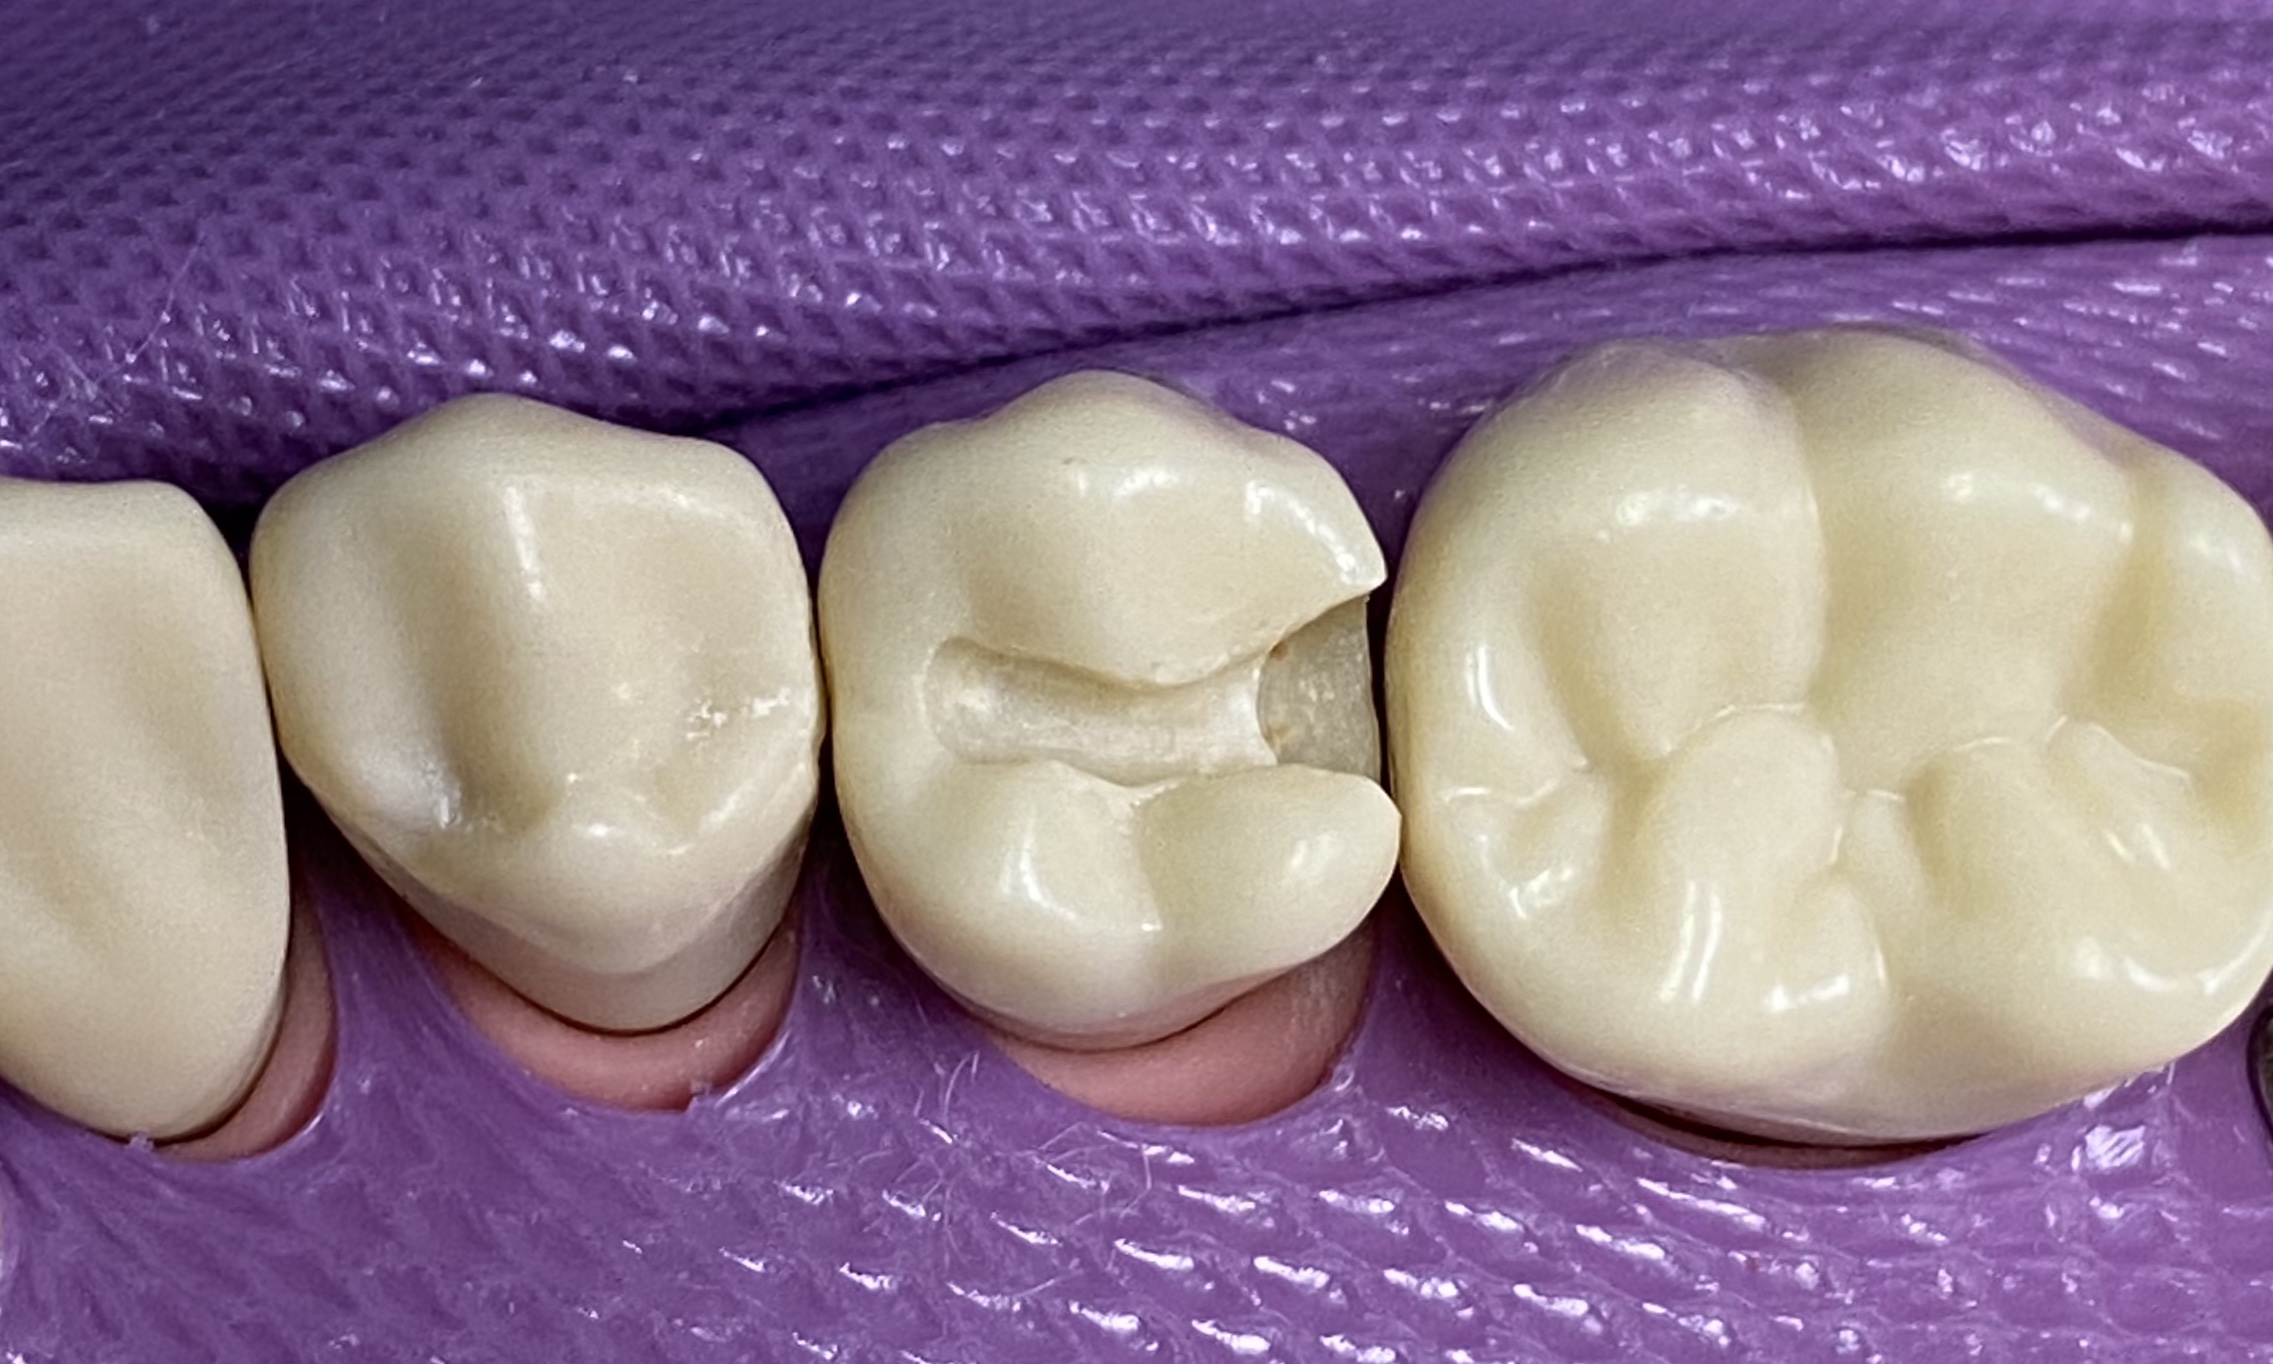
Class II Amalgam Restoration
#29 DO

Overview
-
Occlusal
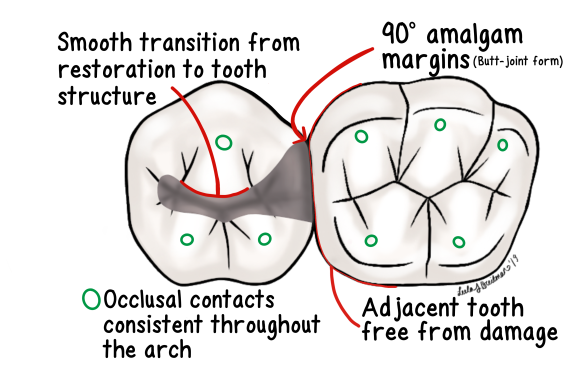
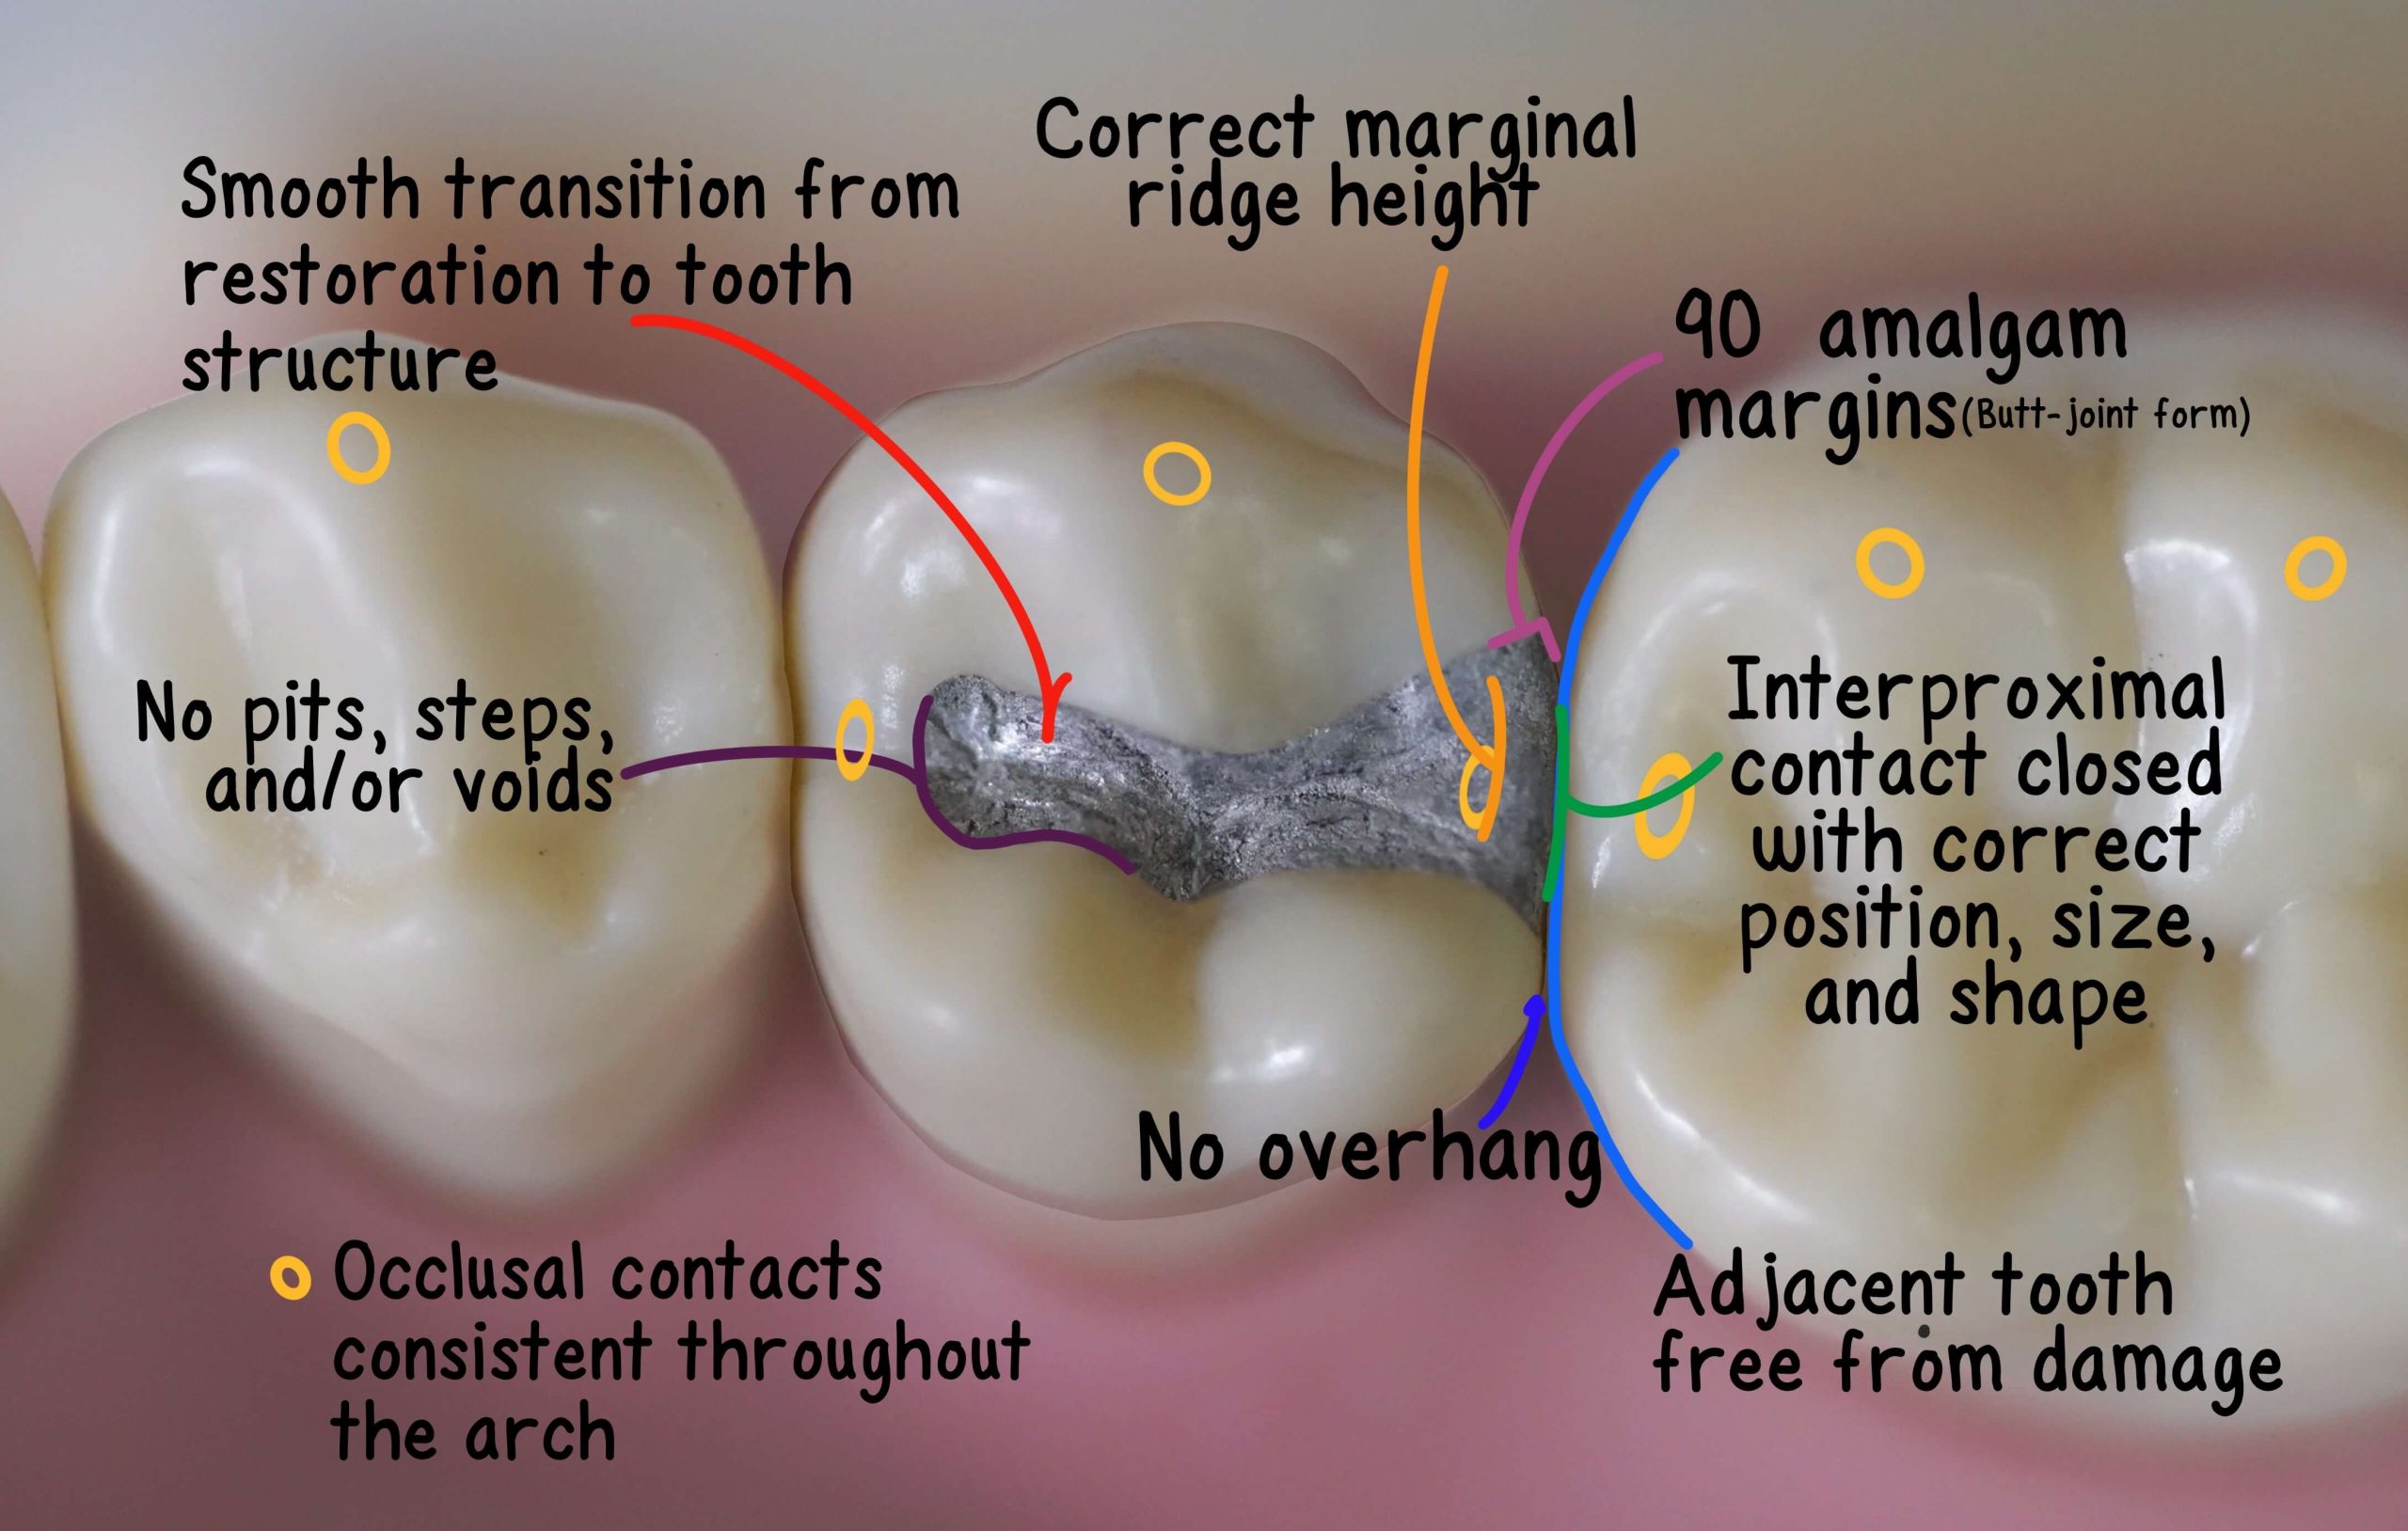
all centric and excursive contacts on the restoration are consistent in size, shape, and intensity with such contacts on other teeth in that quadrant
-
Proximal
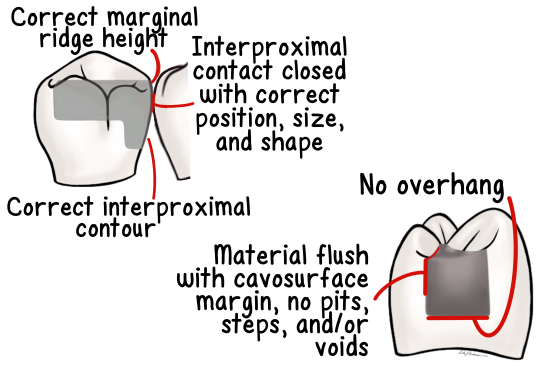
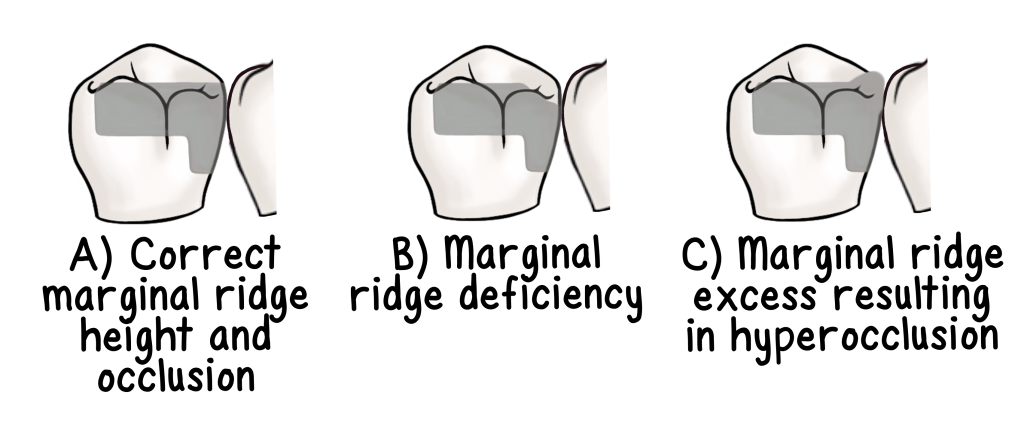
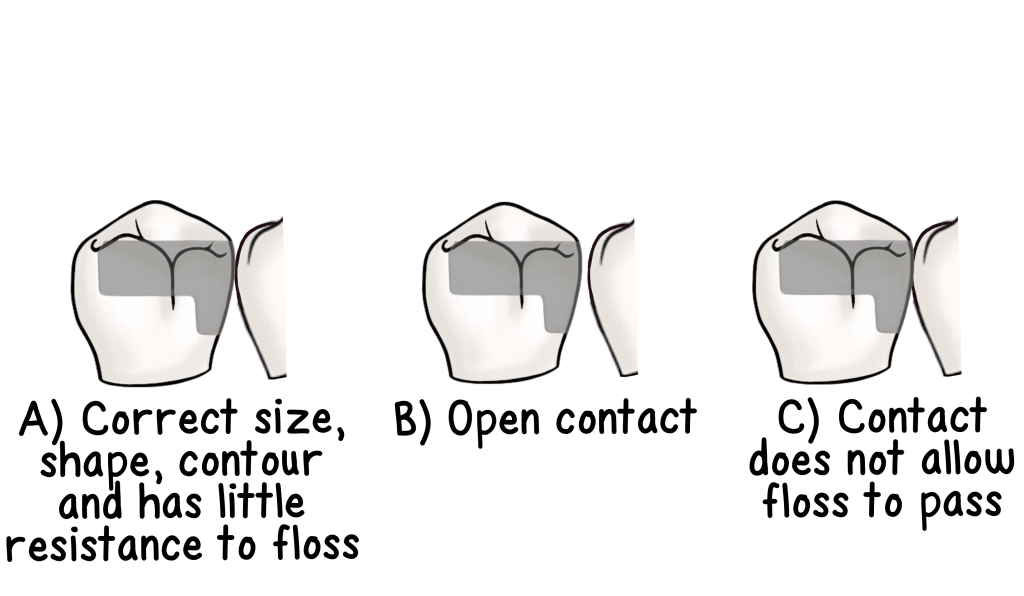
marginal ridge should be at the appropriate height proximal contour and contact area should be correct
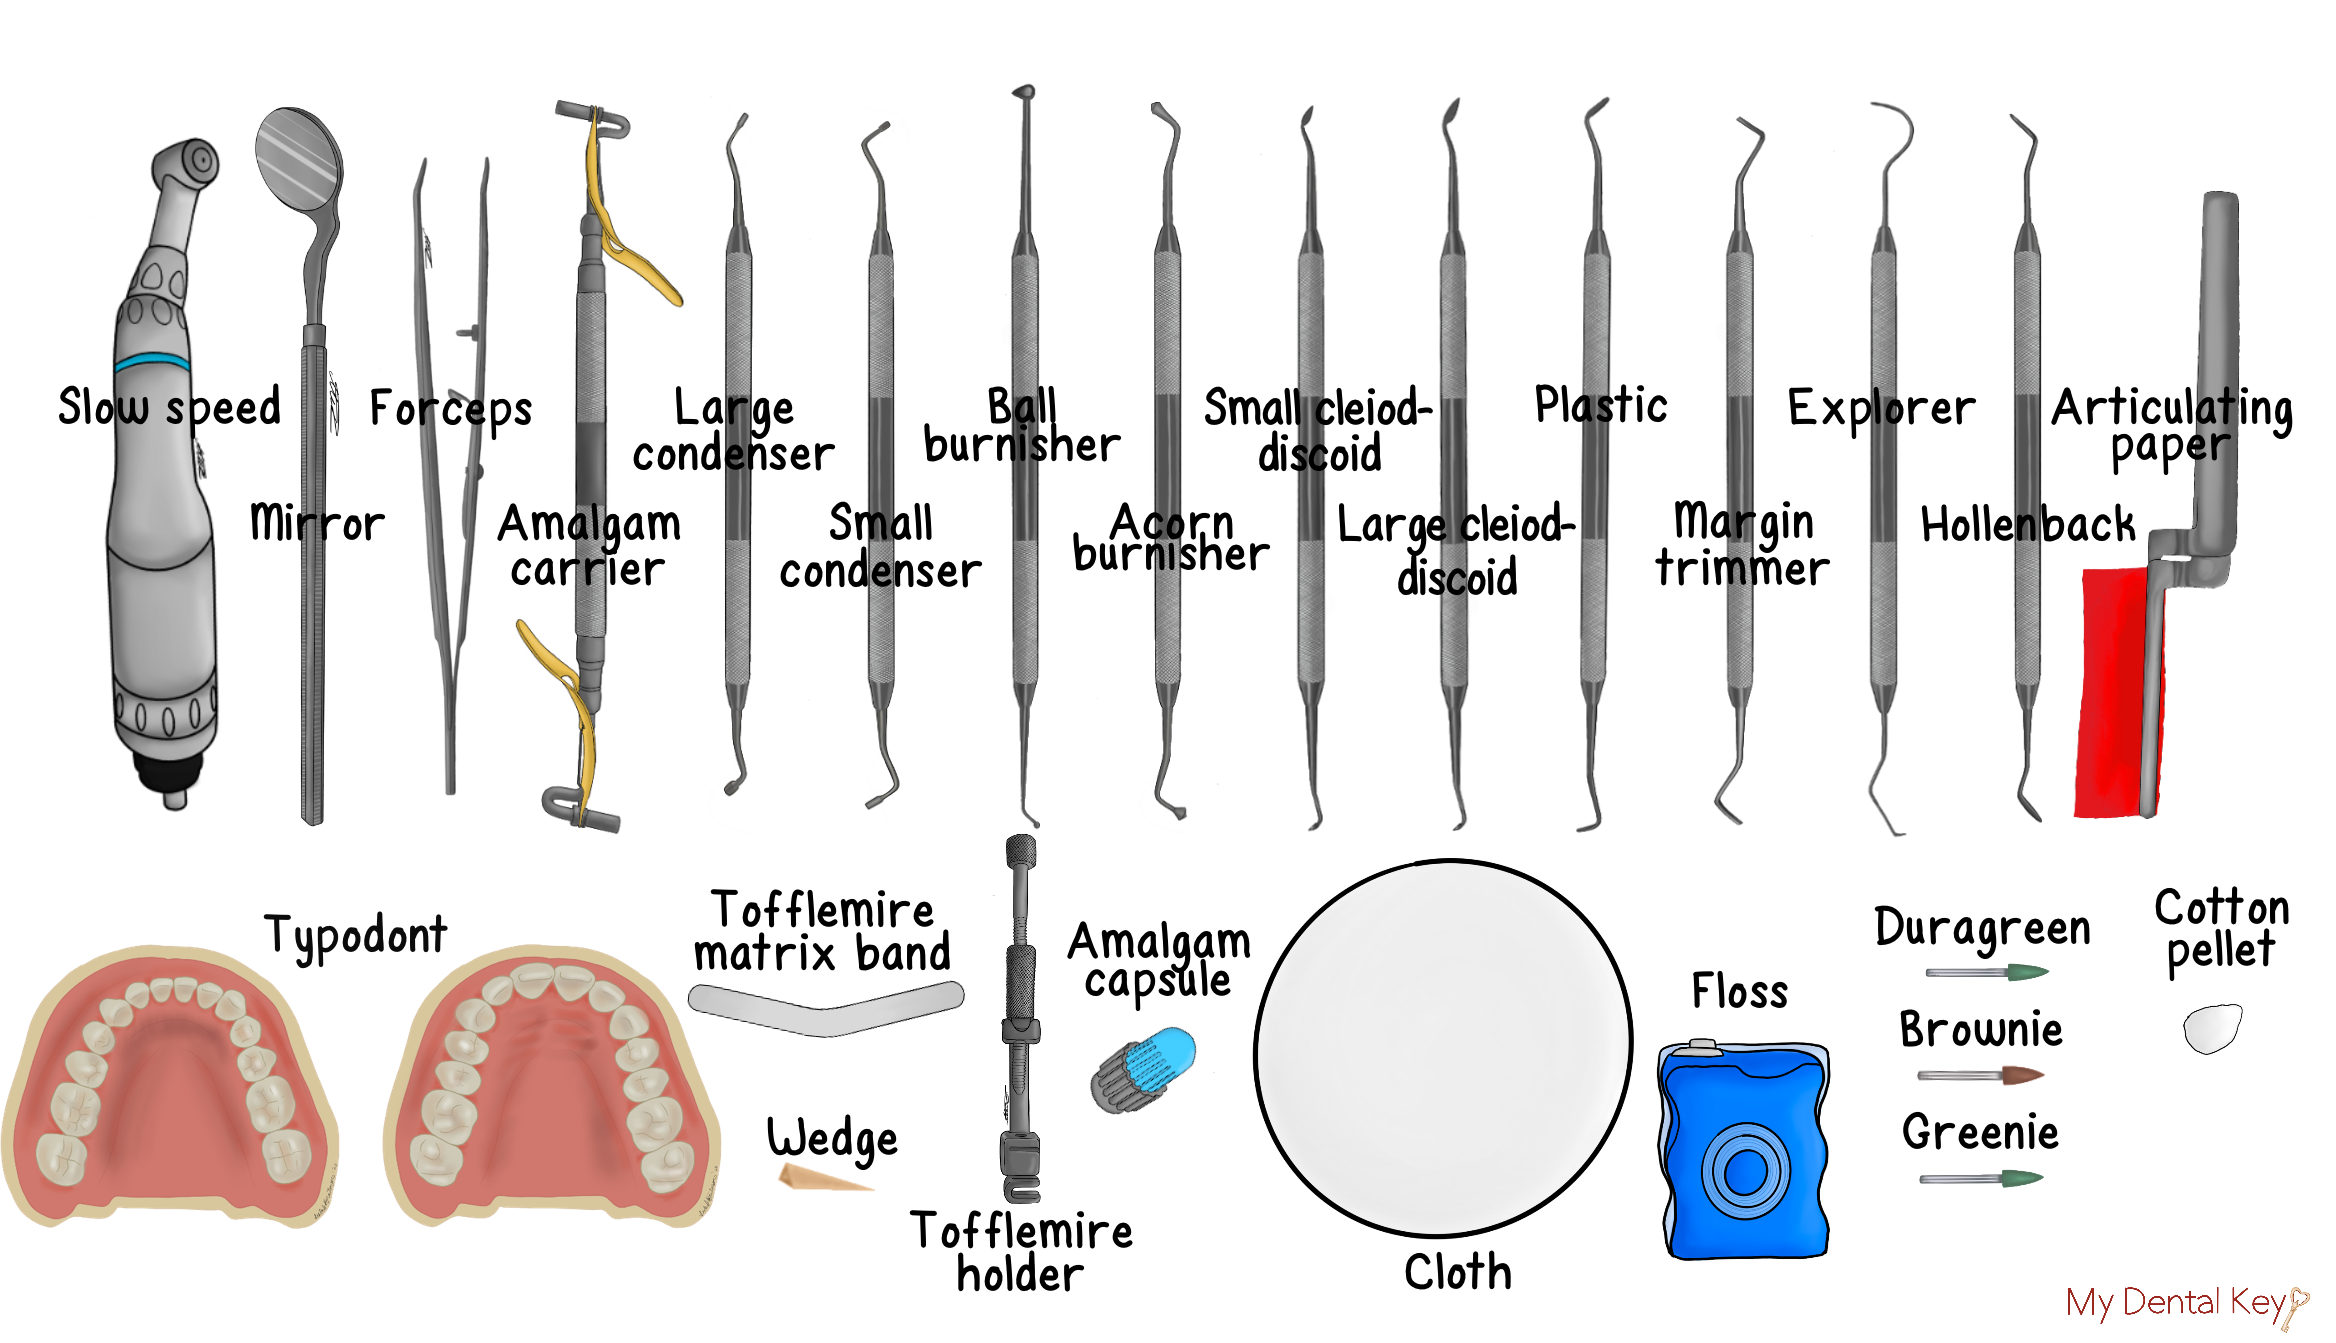
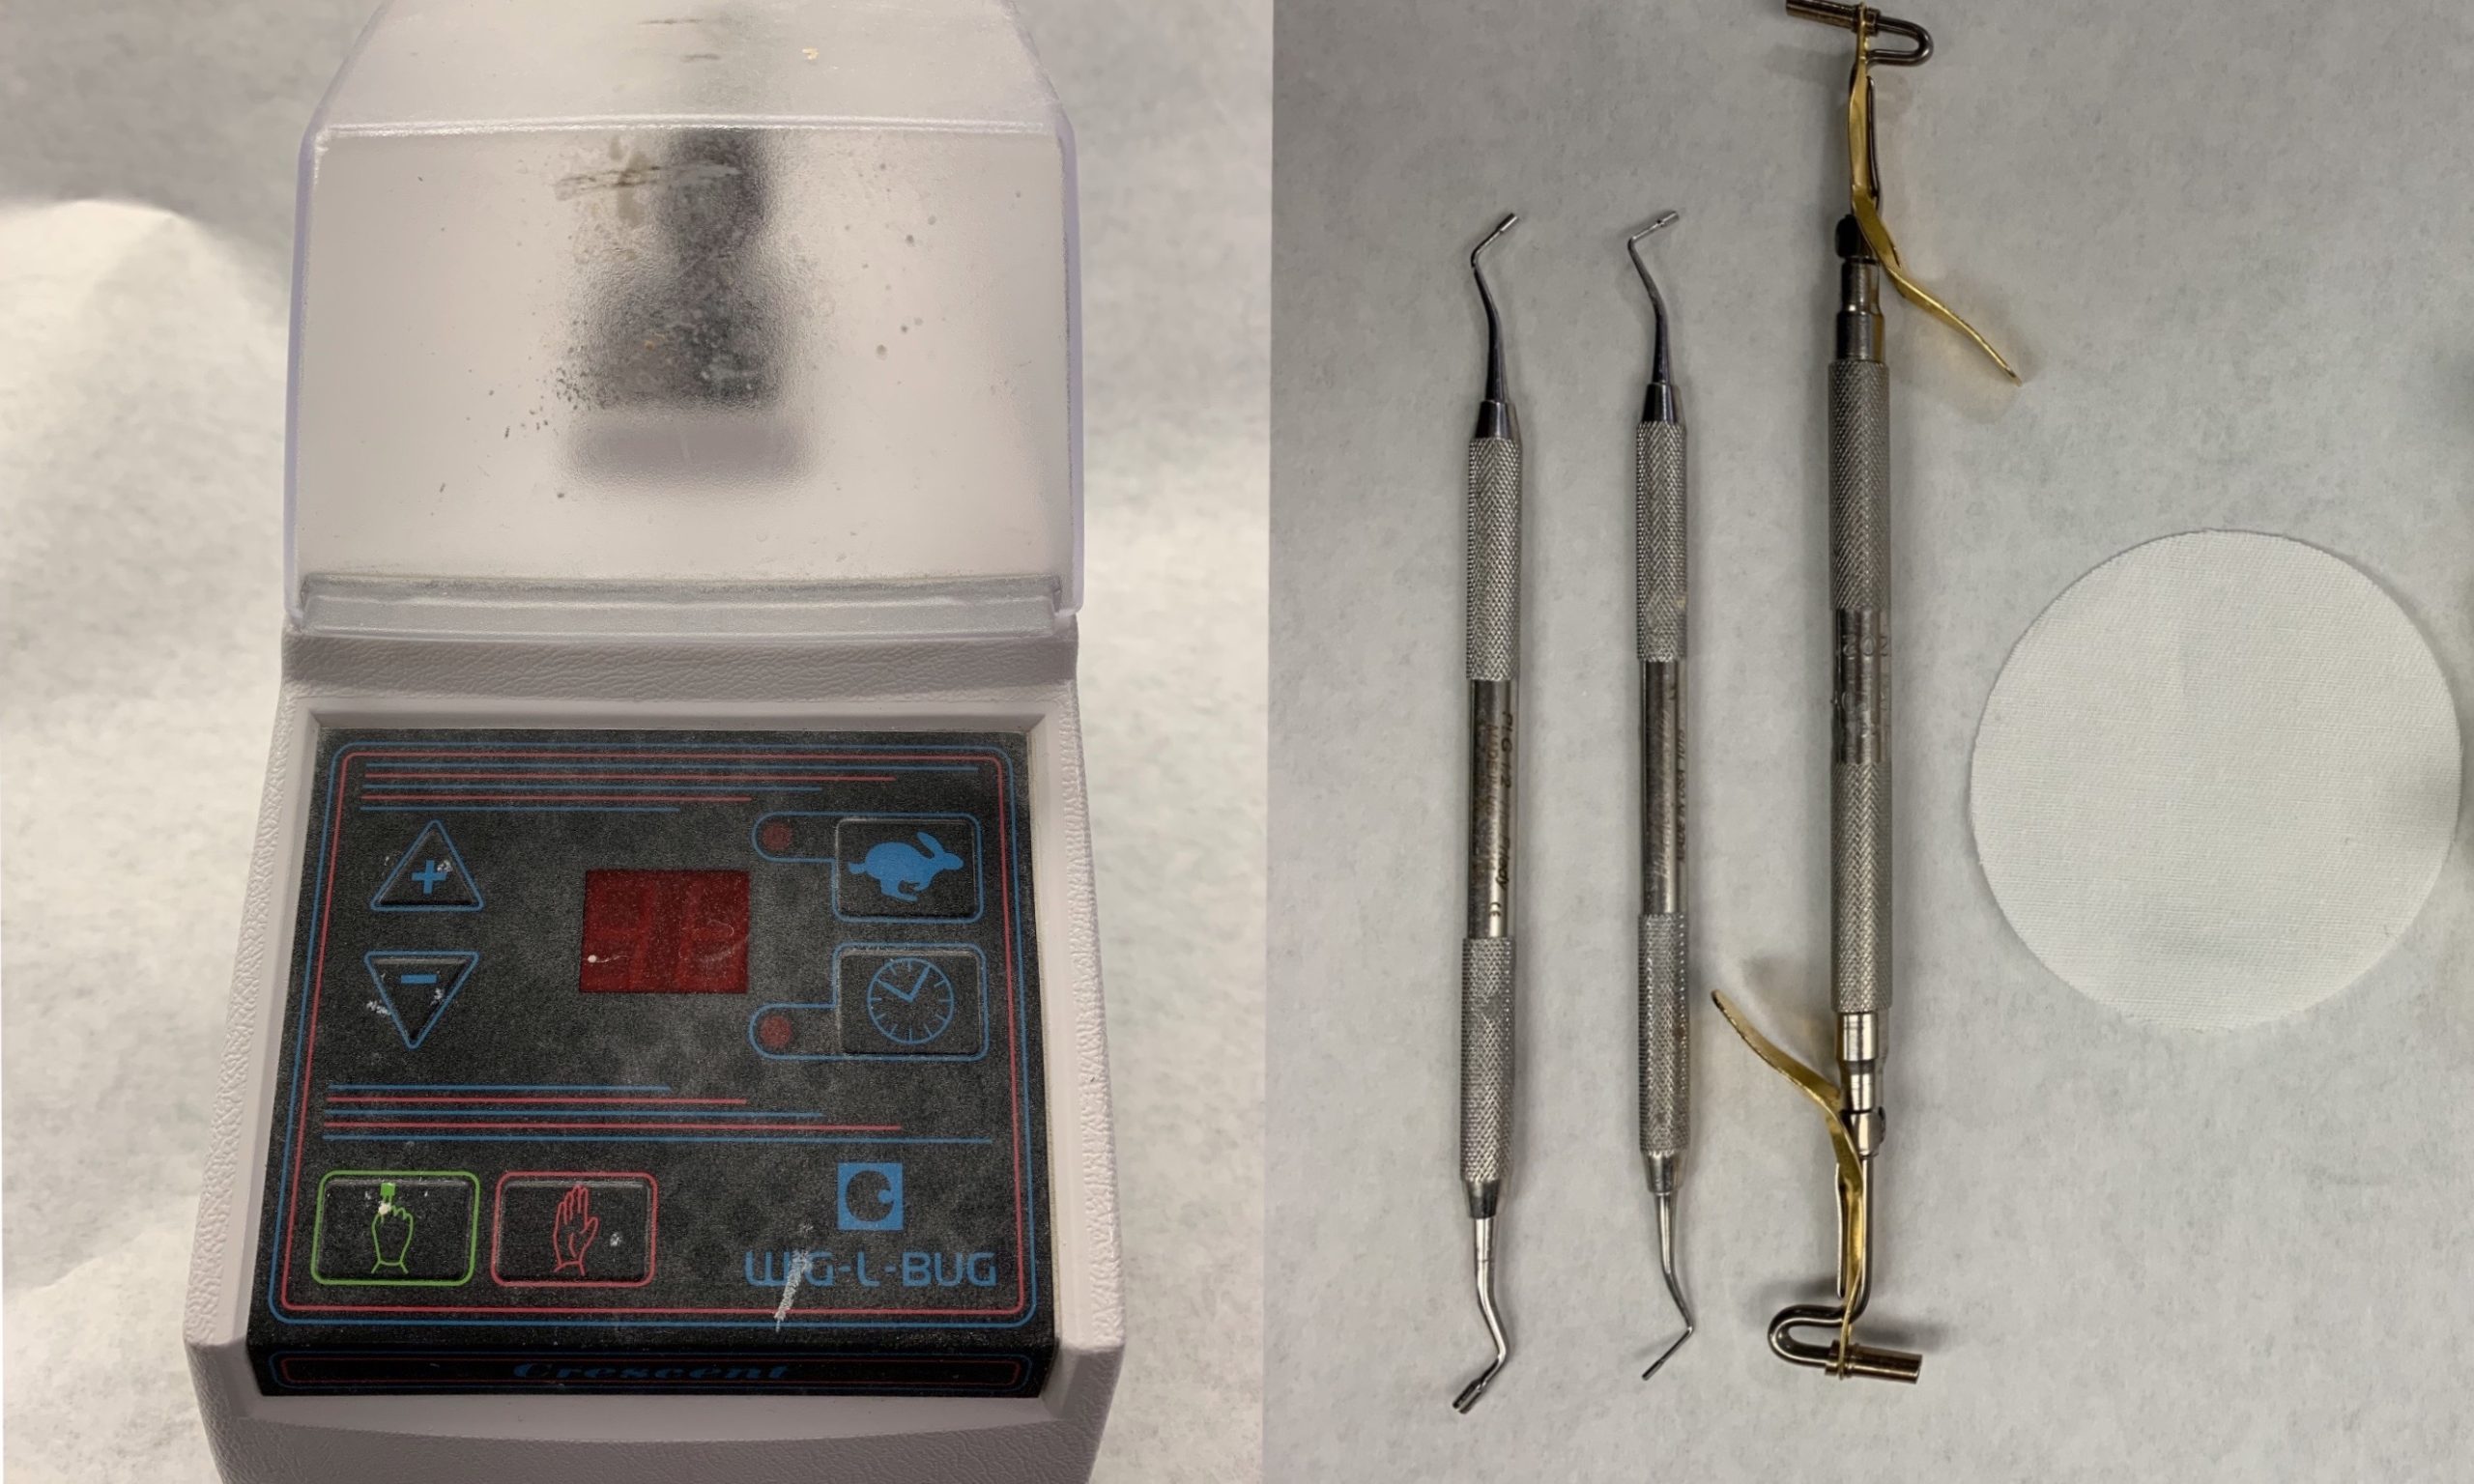
Armamentarium
Instruments and Materials
Video Demonstration
Procedures
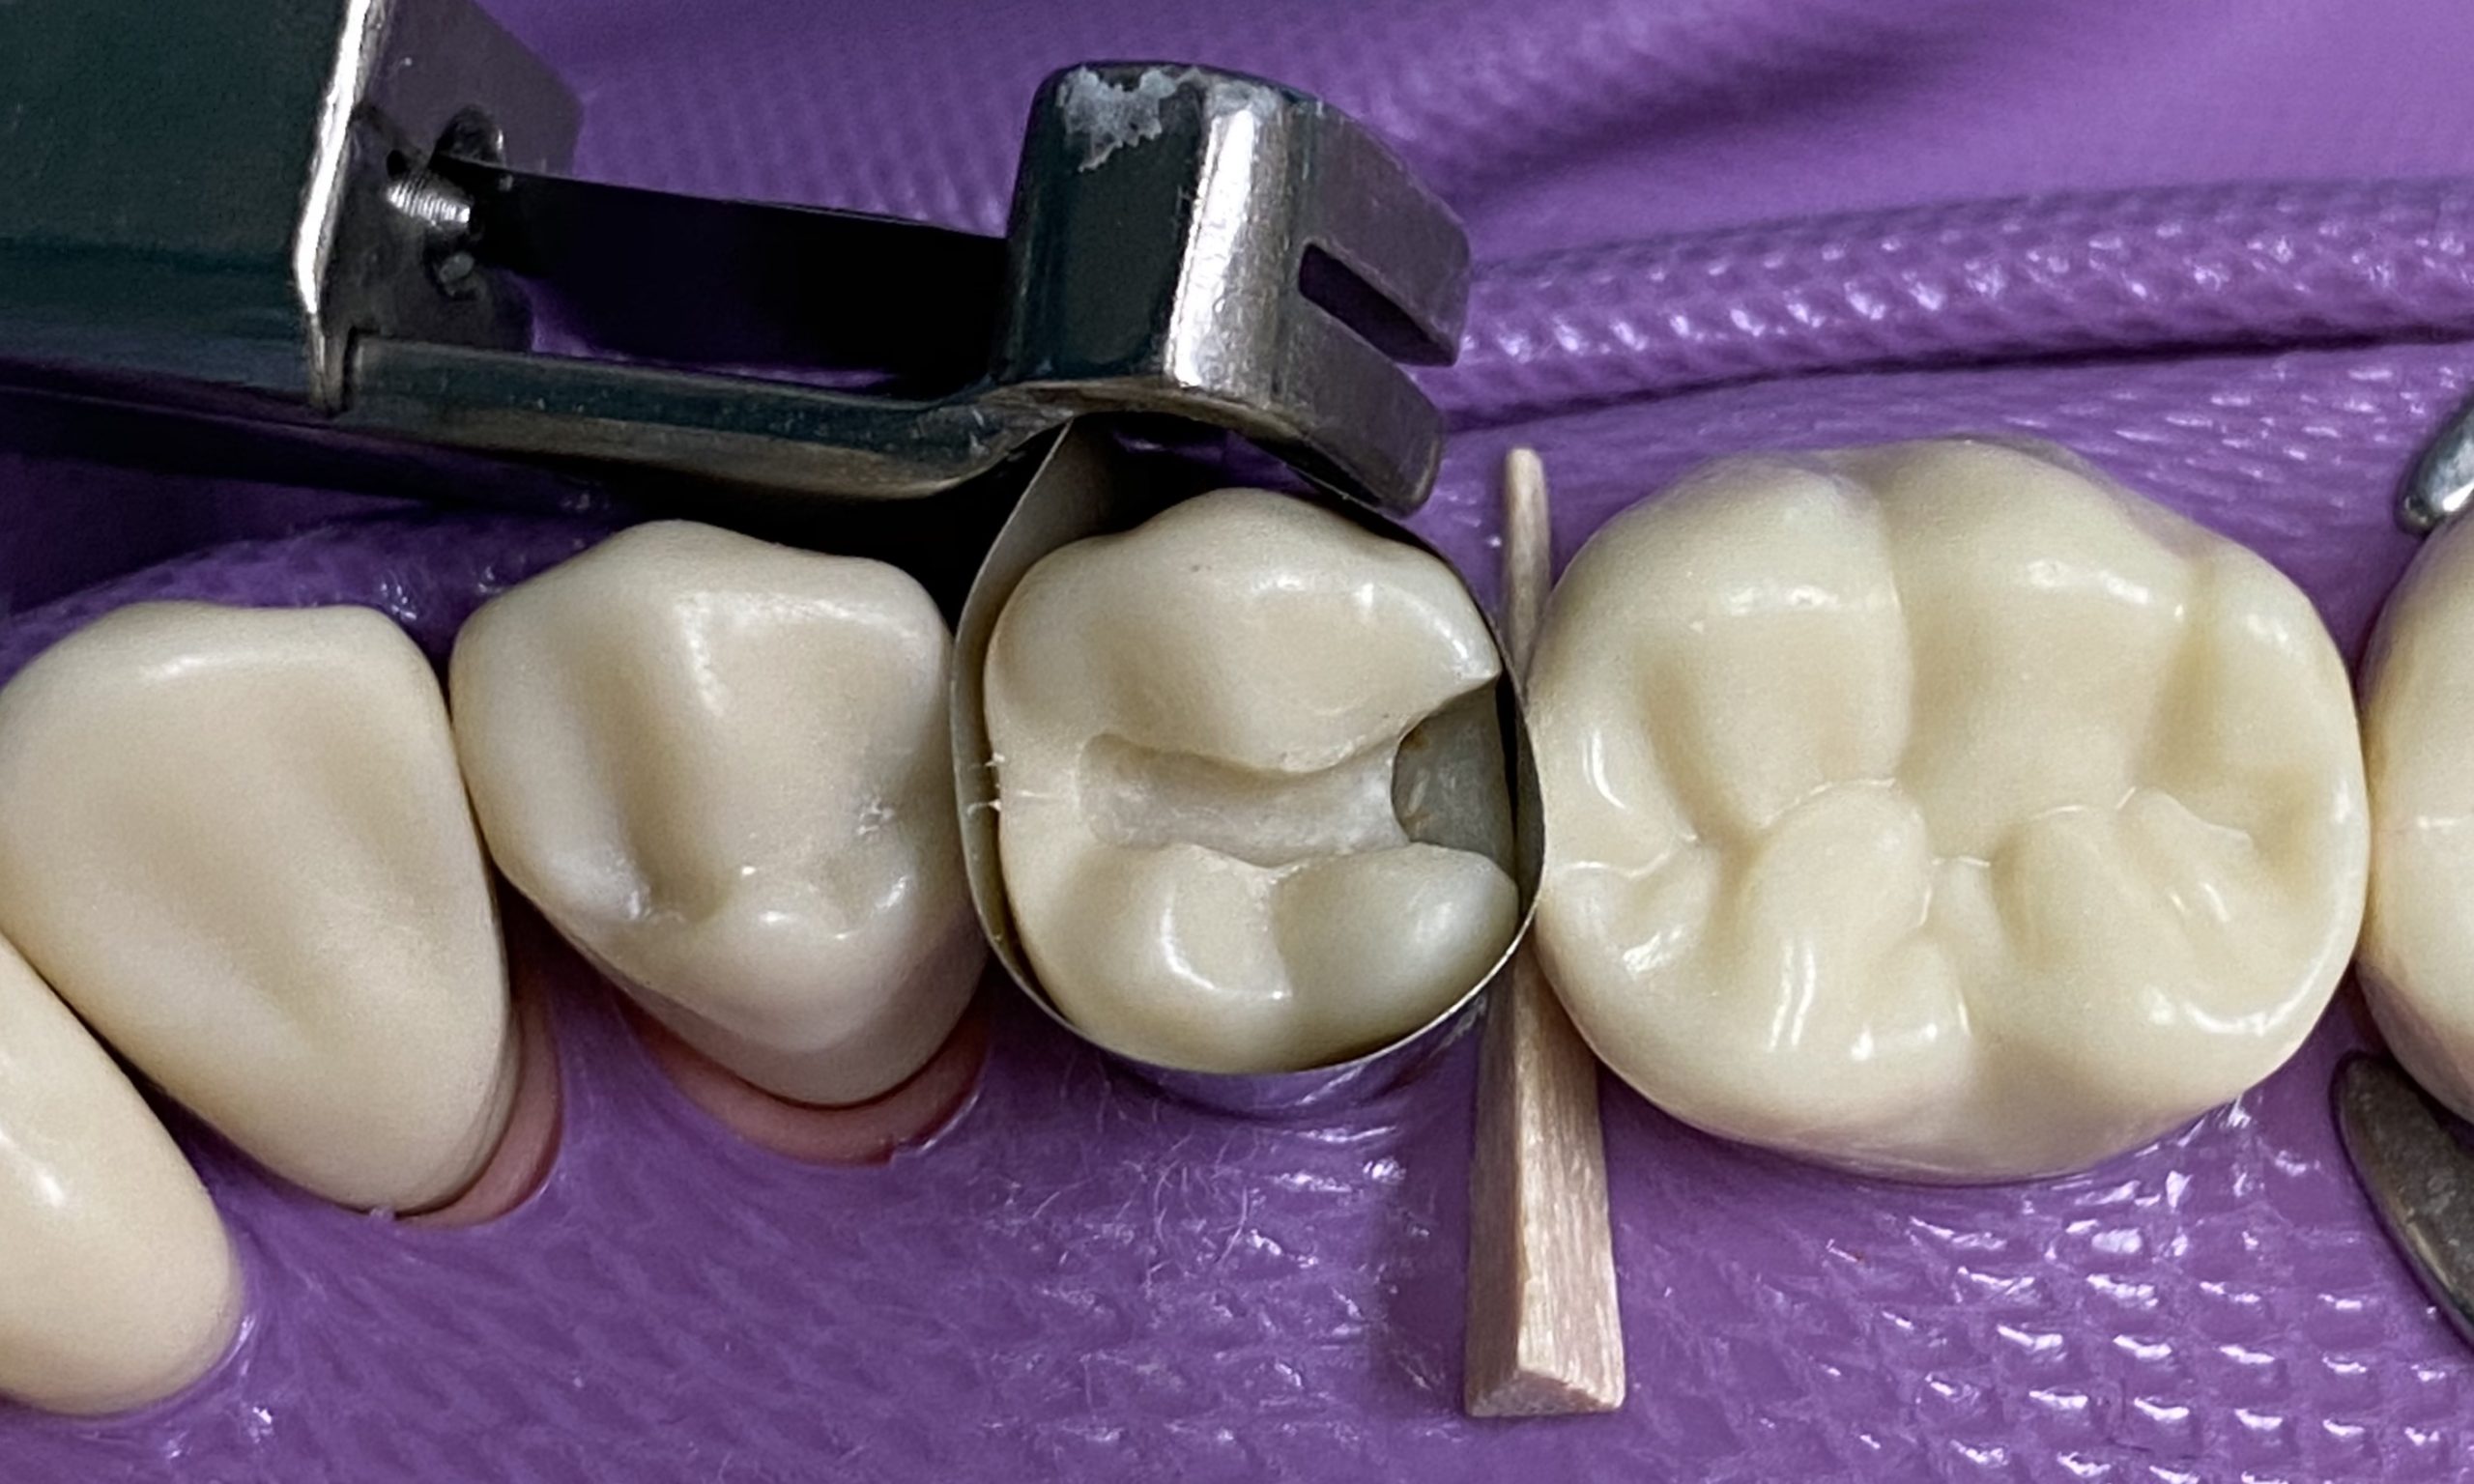
- Ensure the matrix band rises 1mm over the marginal ridge
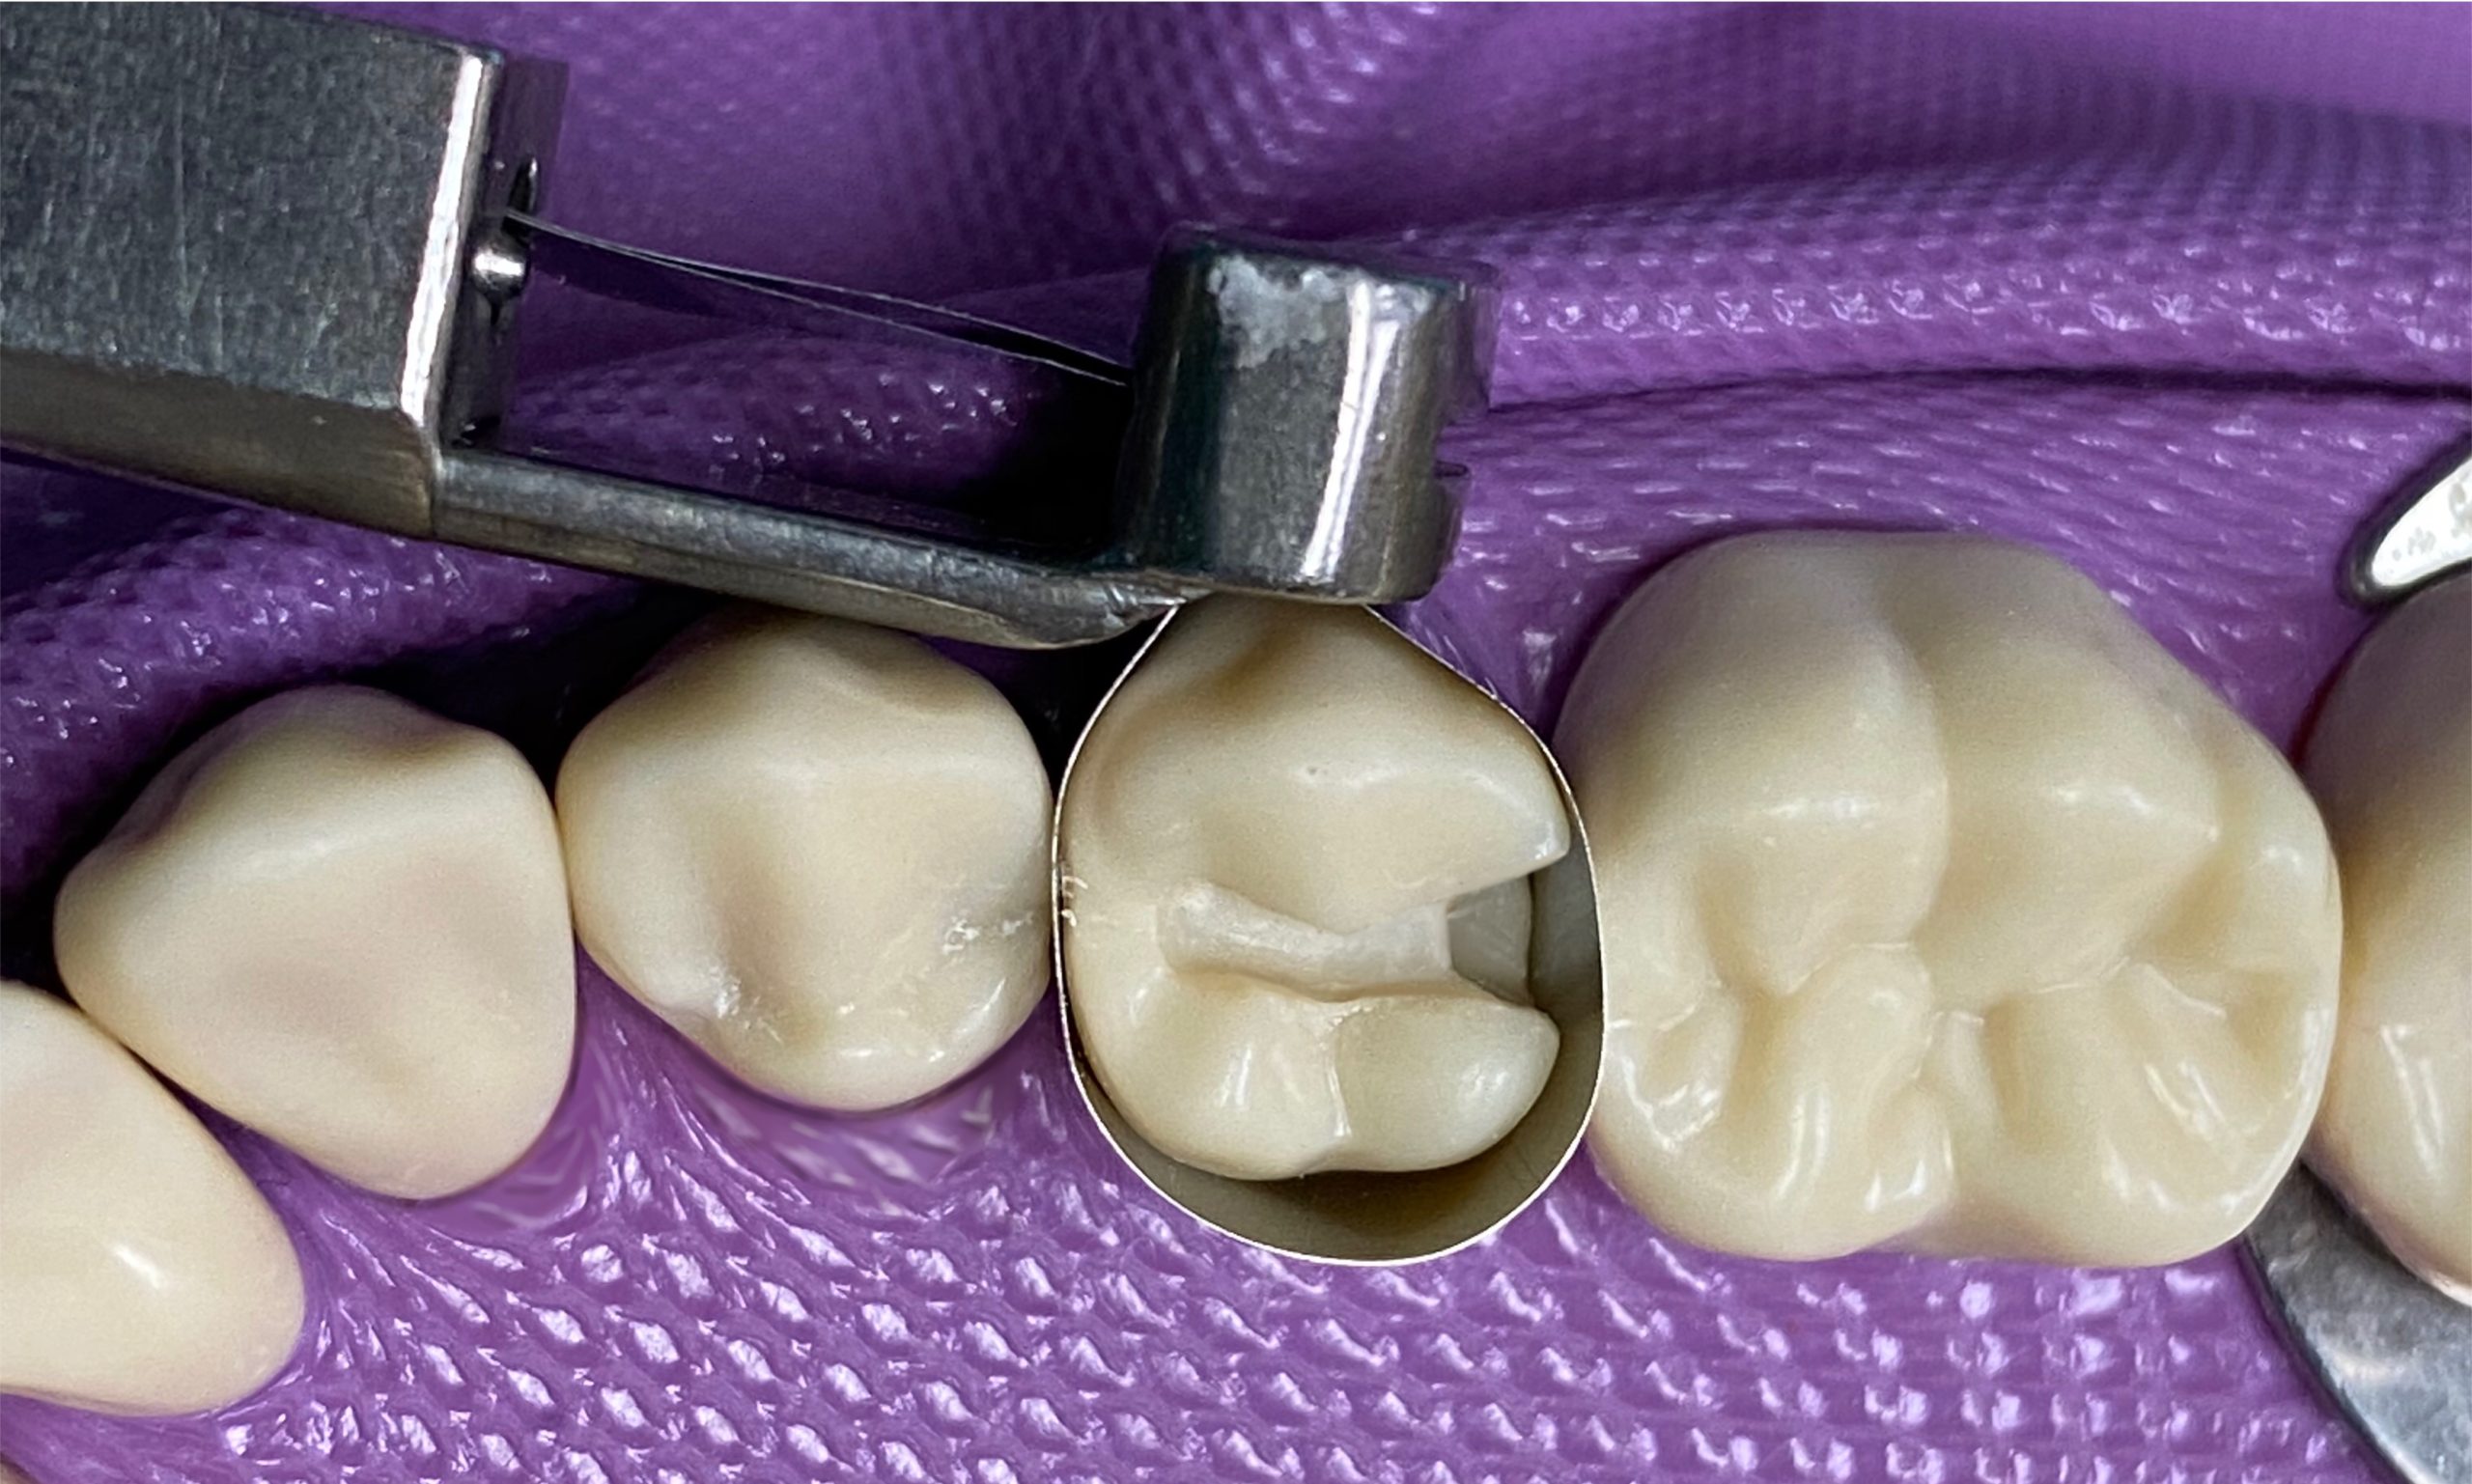
- Insert the wedge from the lingual using the forceps
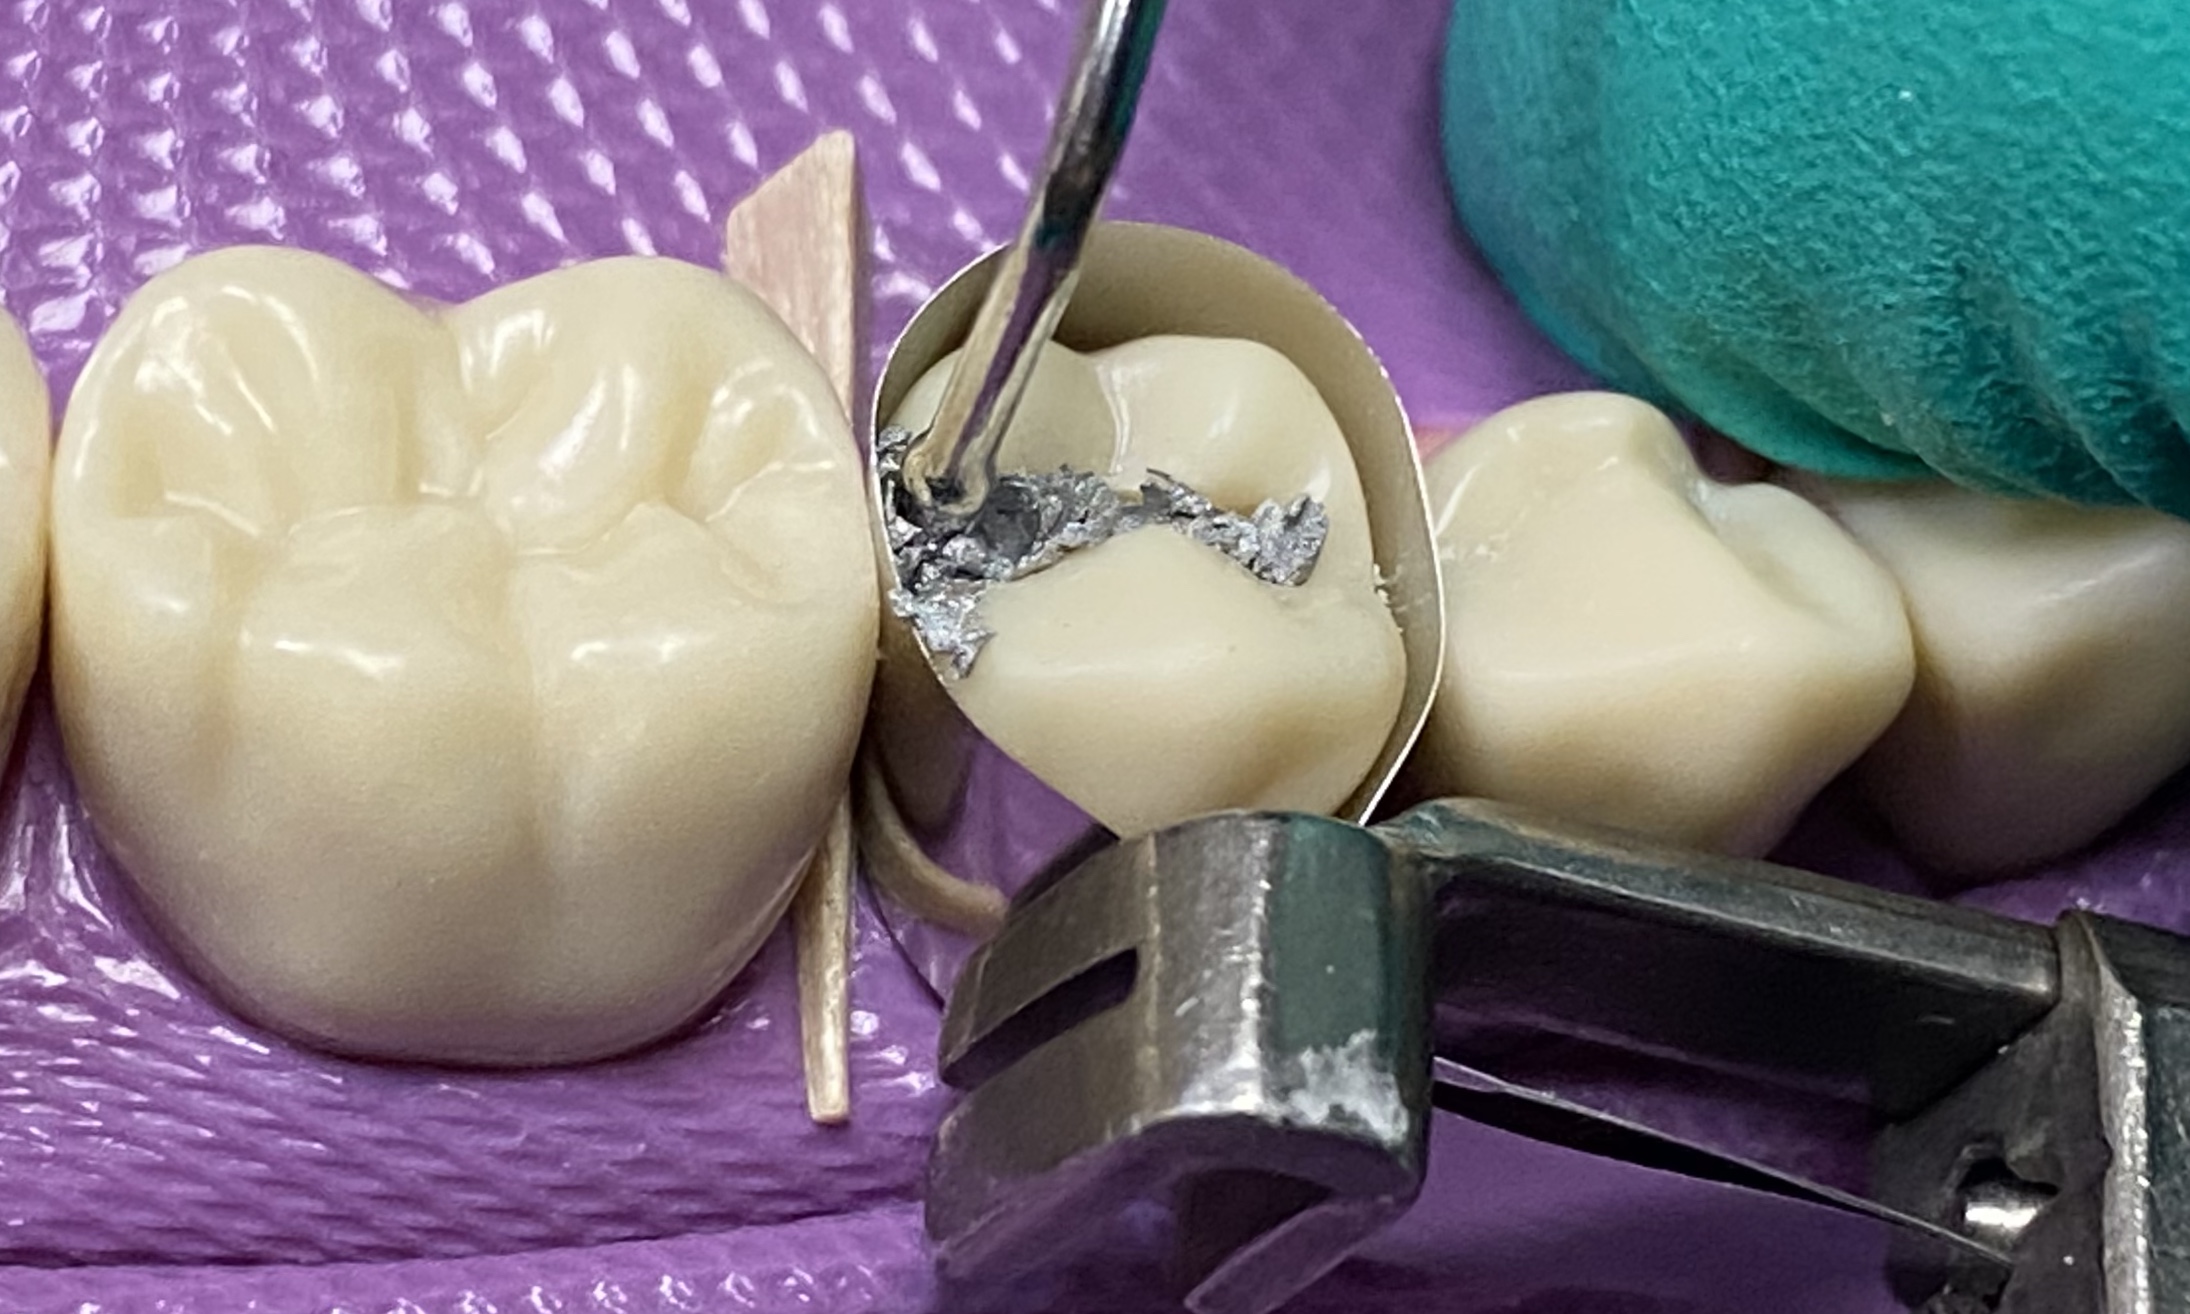
Instrument suggestions: ball burnisher, amalgam condenser
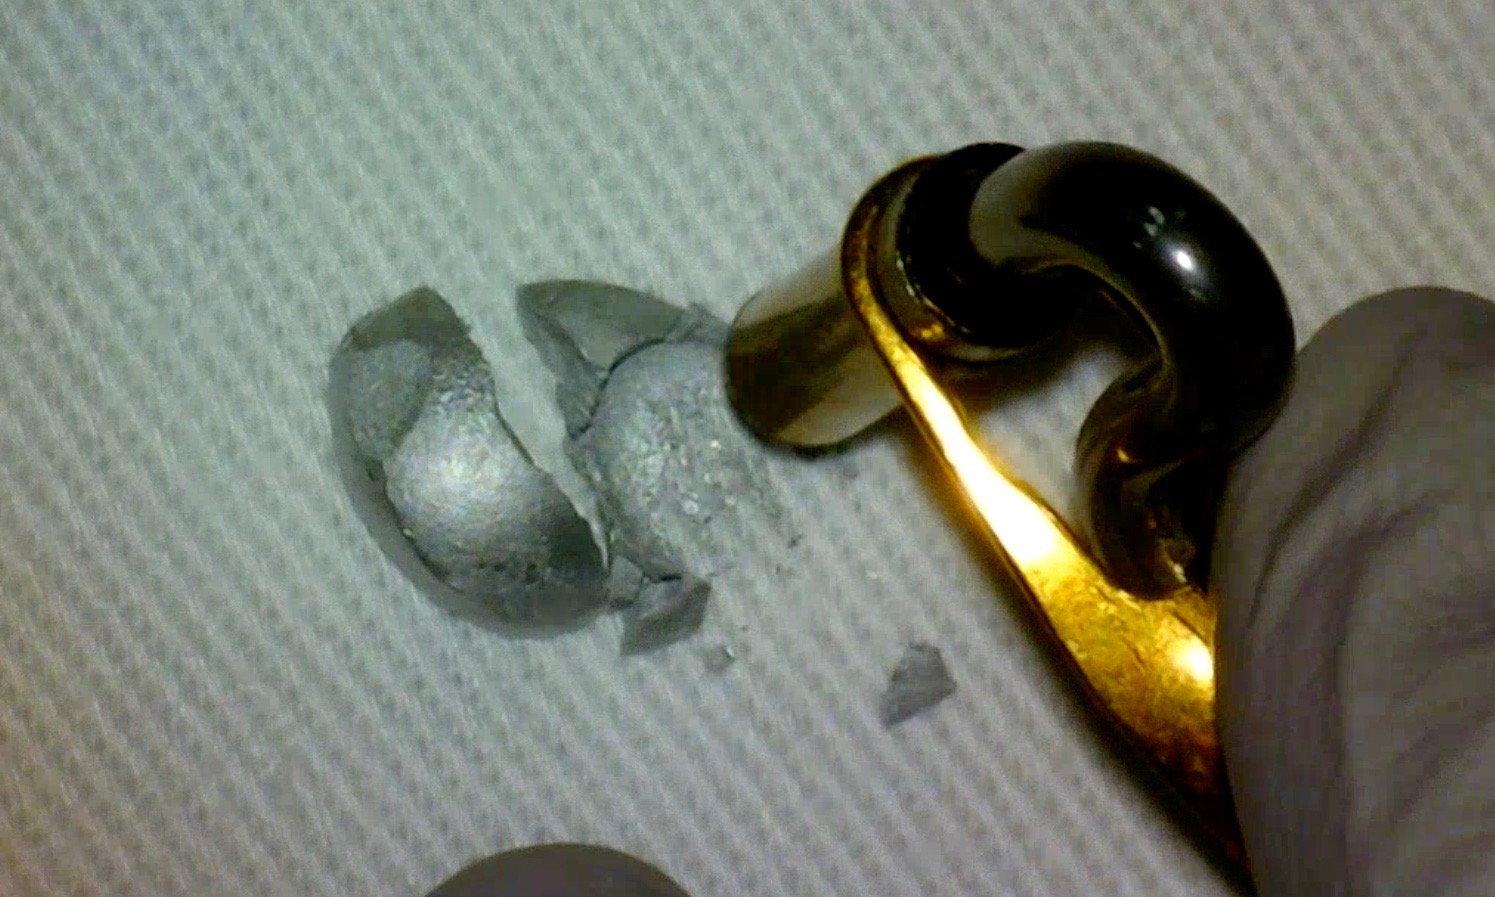
- Properly triturated amalgam: homogenous consistency
- Over triturated amalgam: hot, shiny, soupy, stick to the wall of the capsule, and will set quickly
- Under triturated amalgam: dry and crumbly
Caution: do not touch amalgam with bare hands
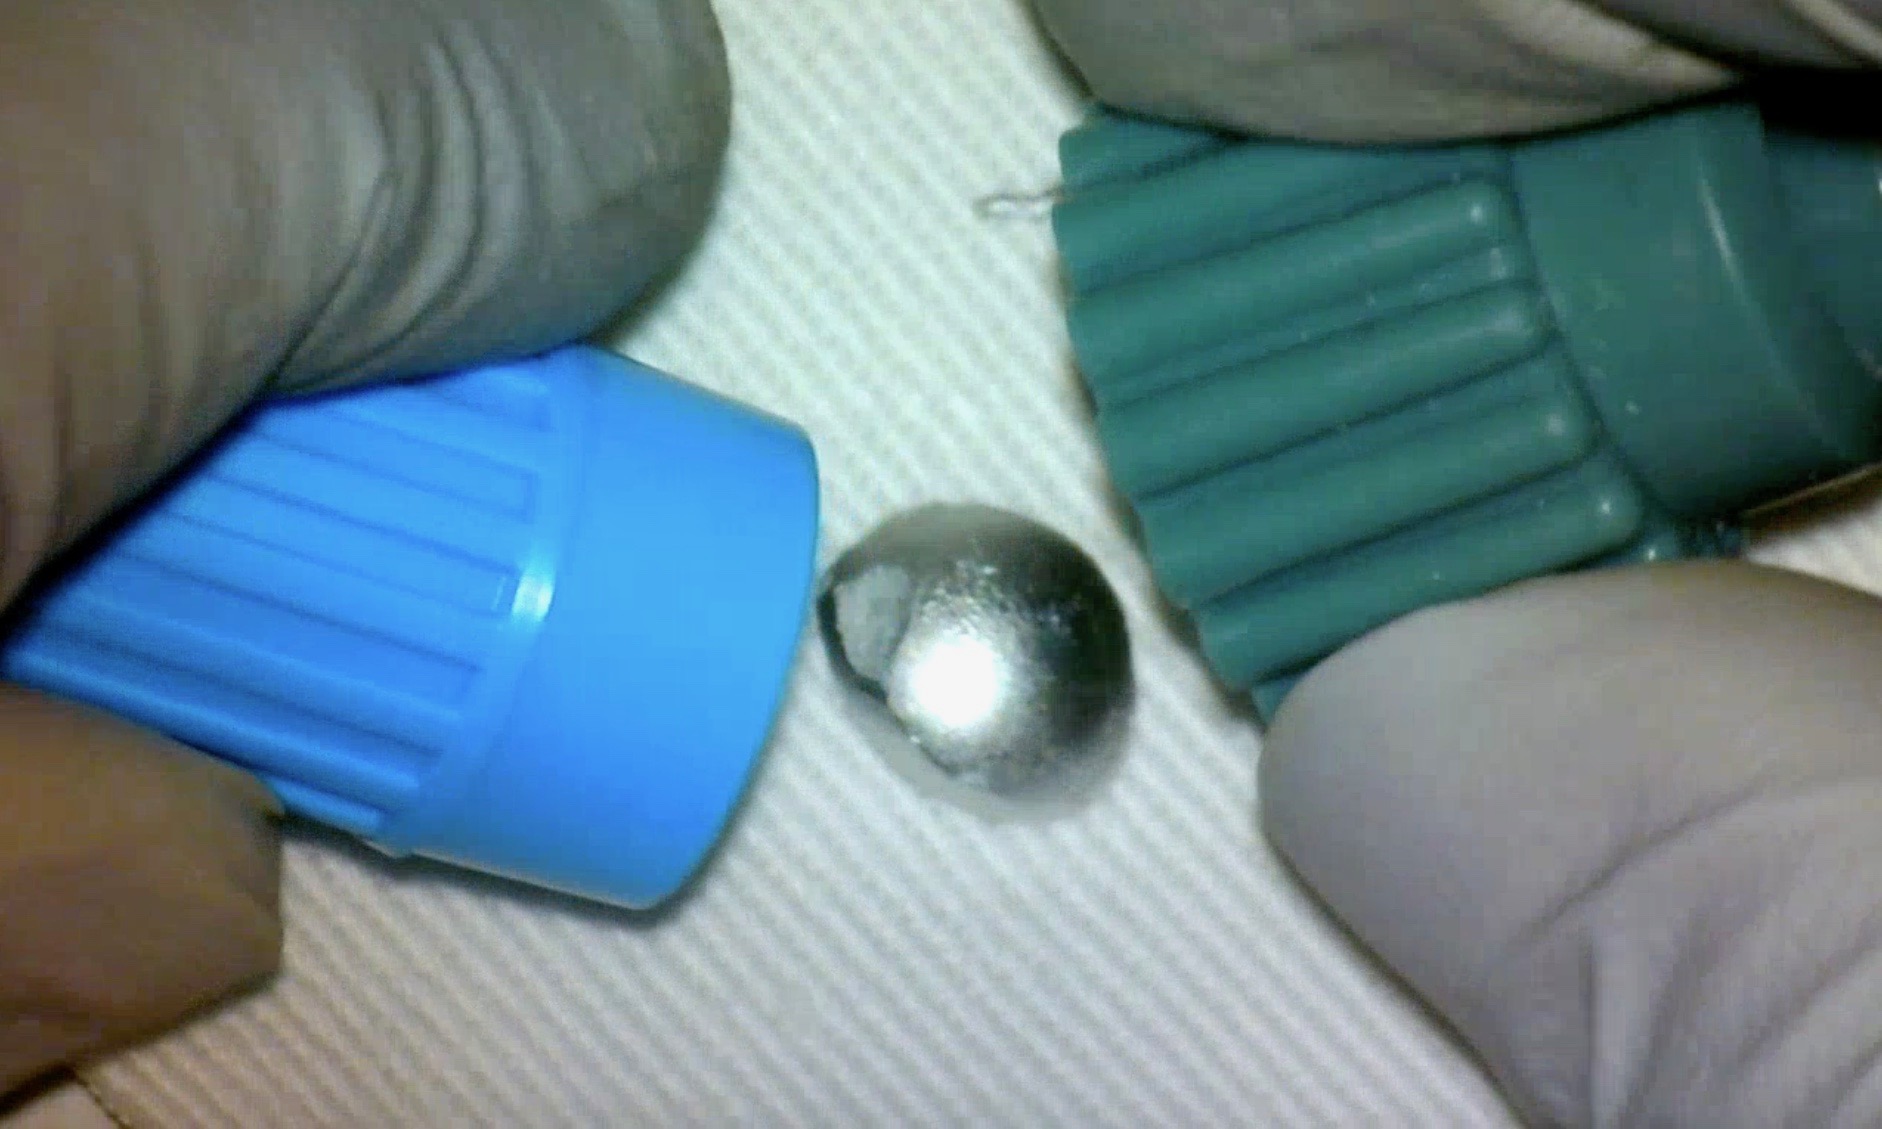
Work swiftly as amalgam sets fairly quickly
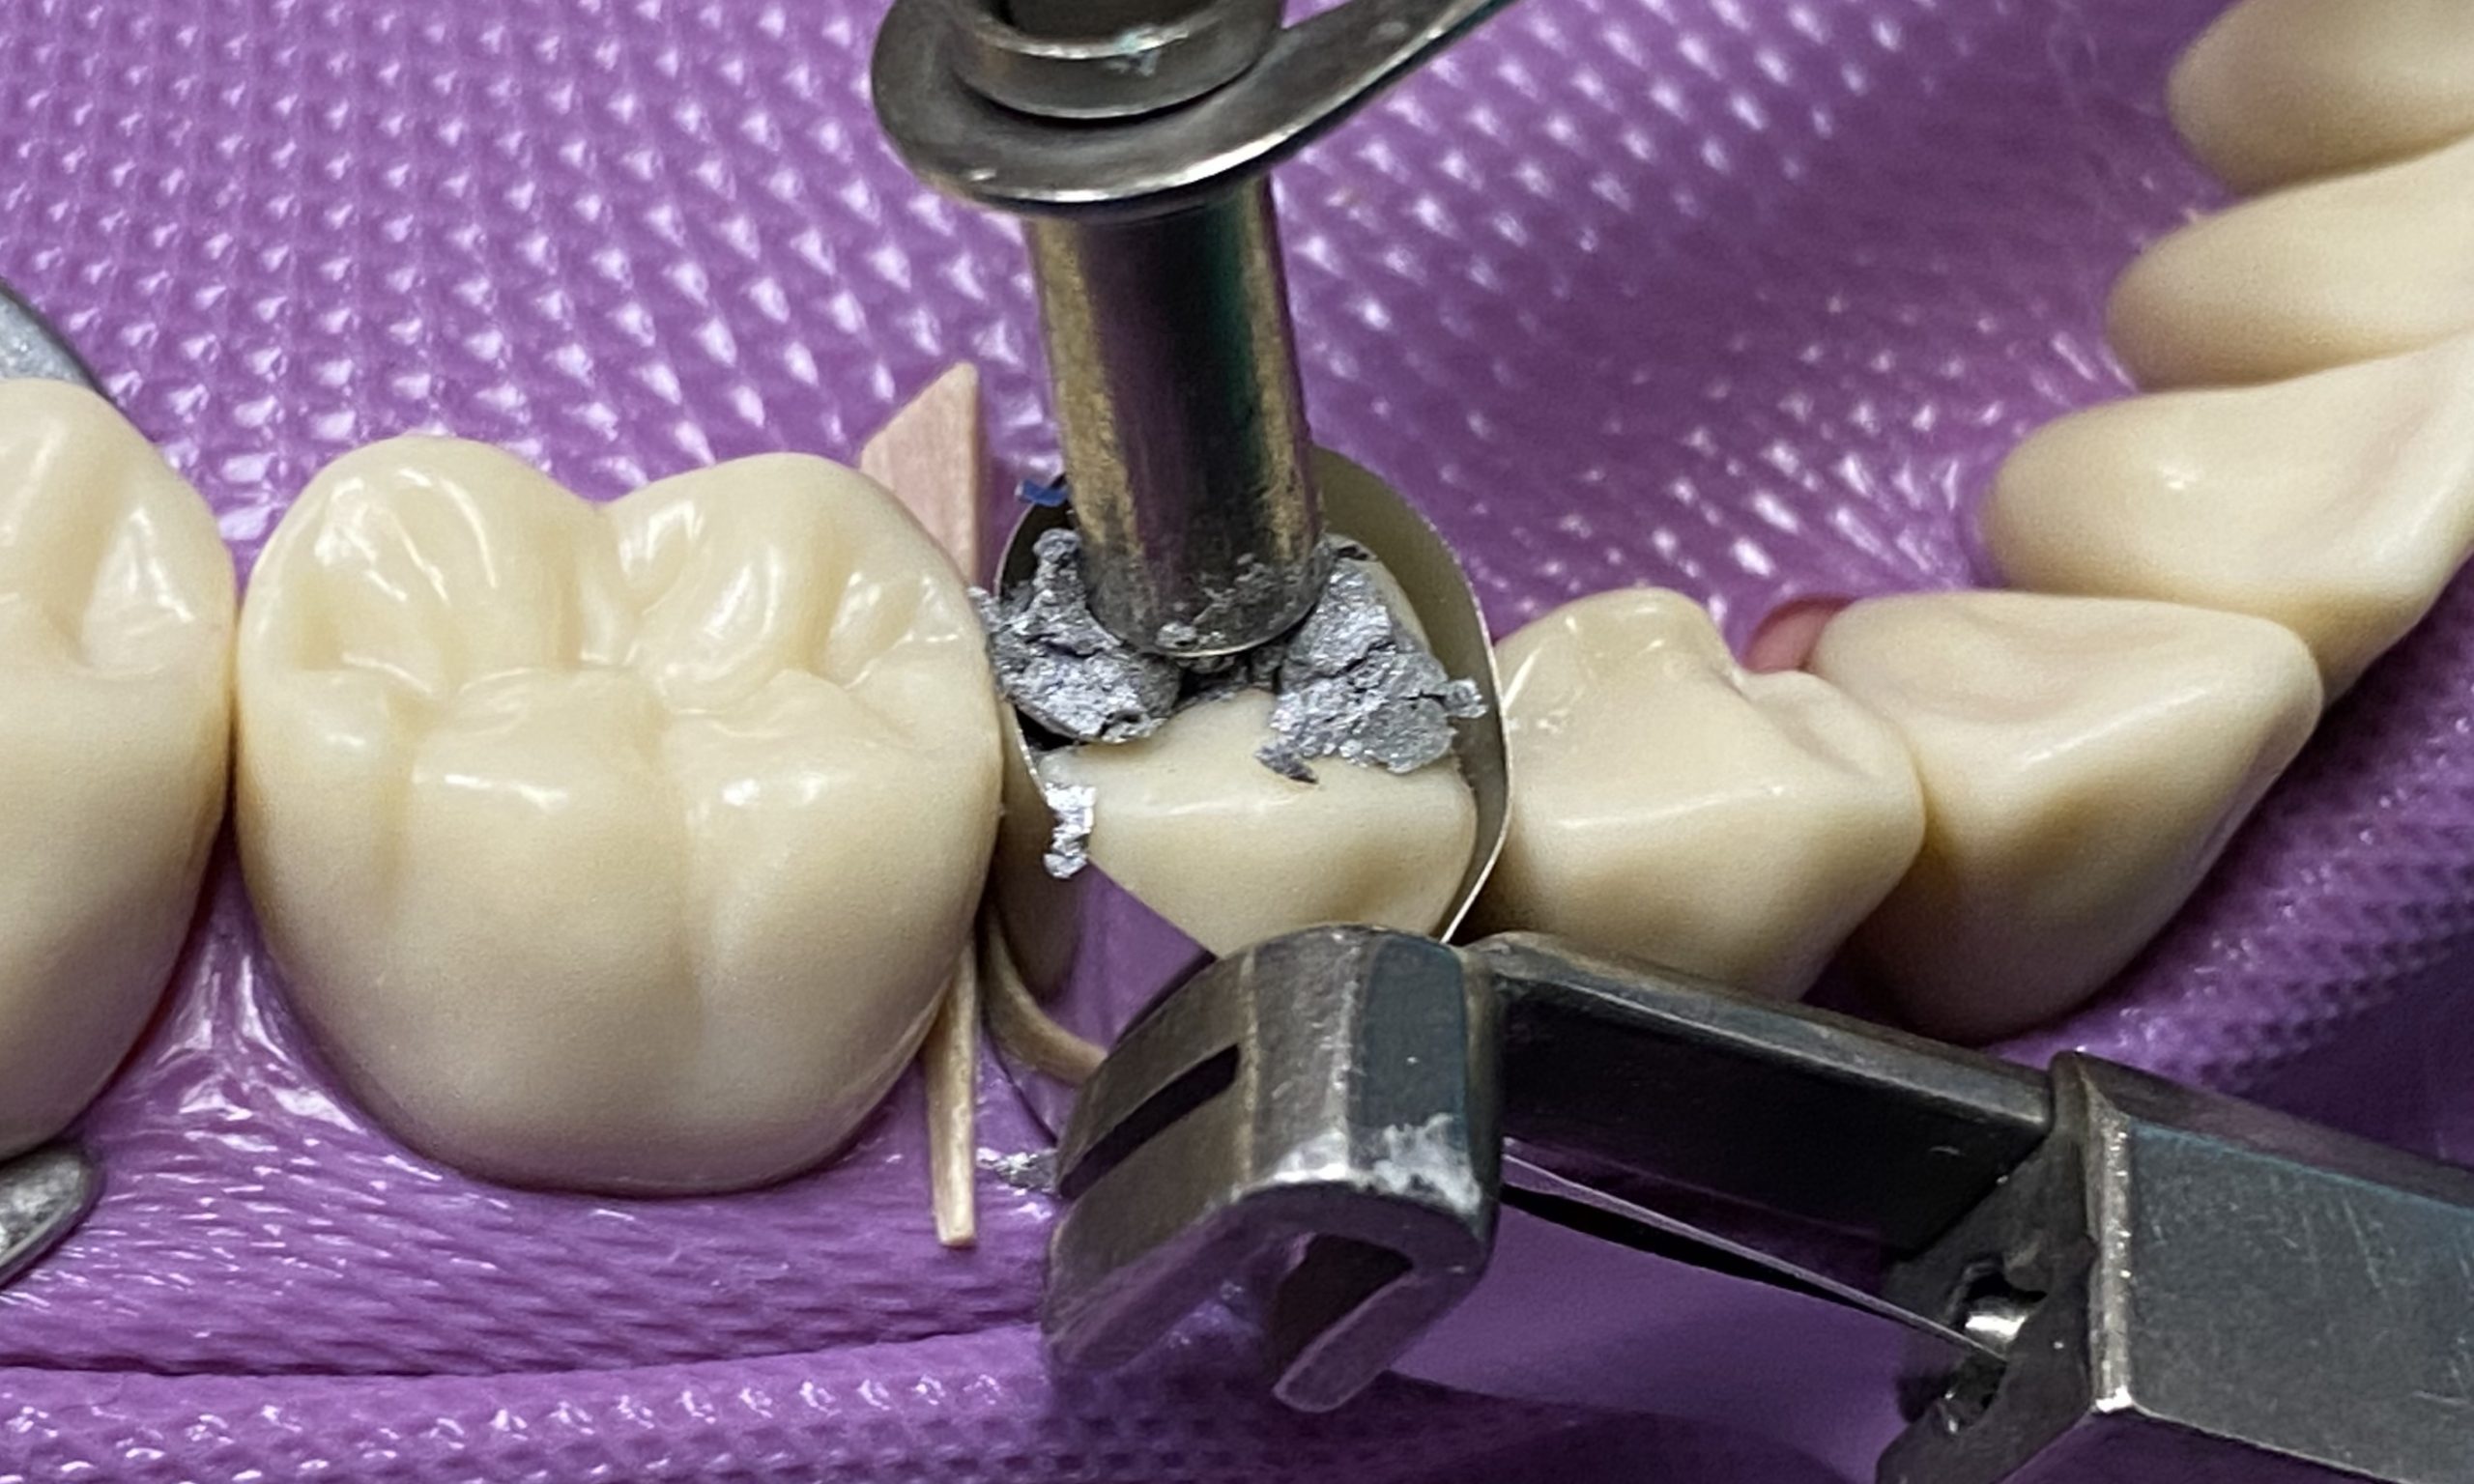
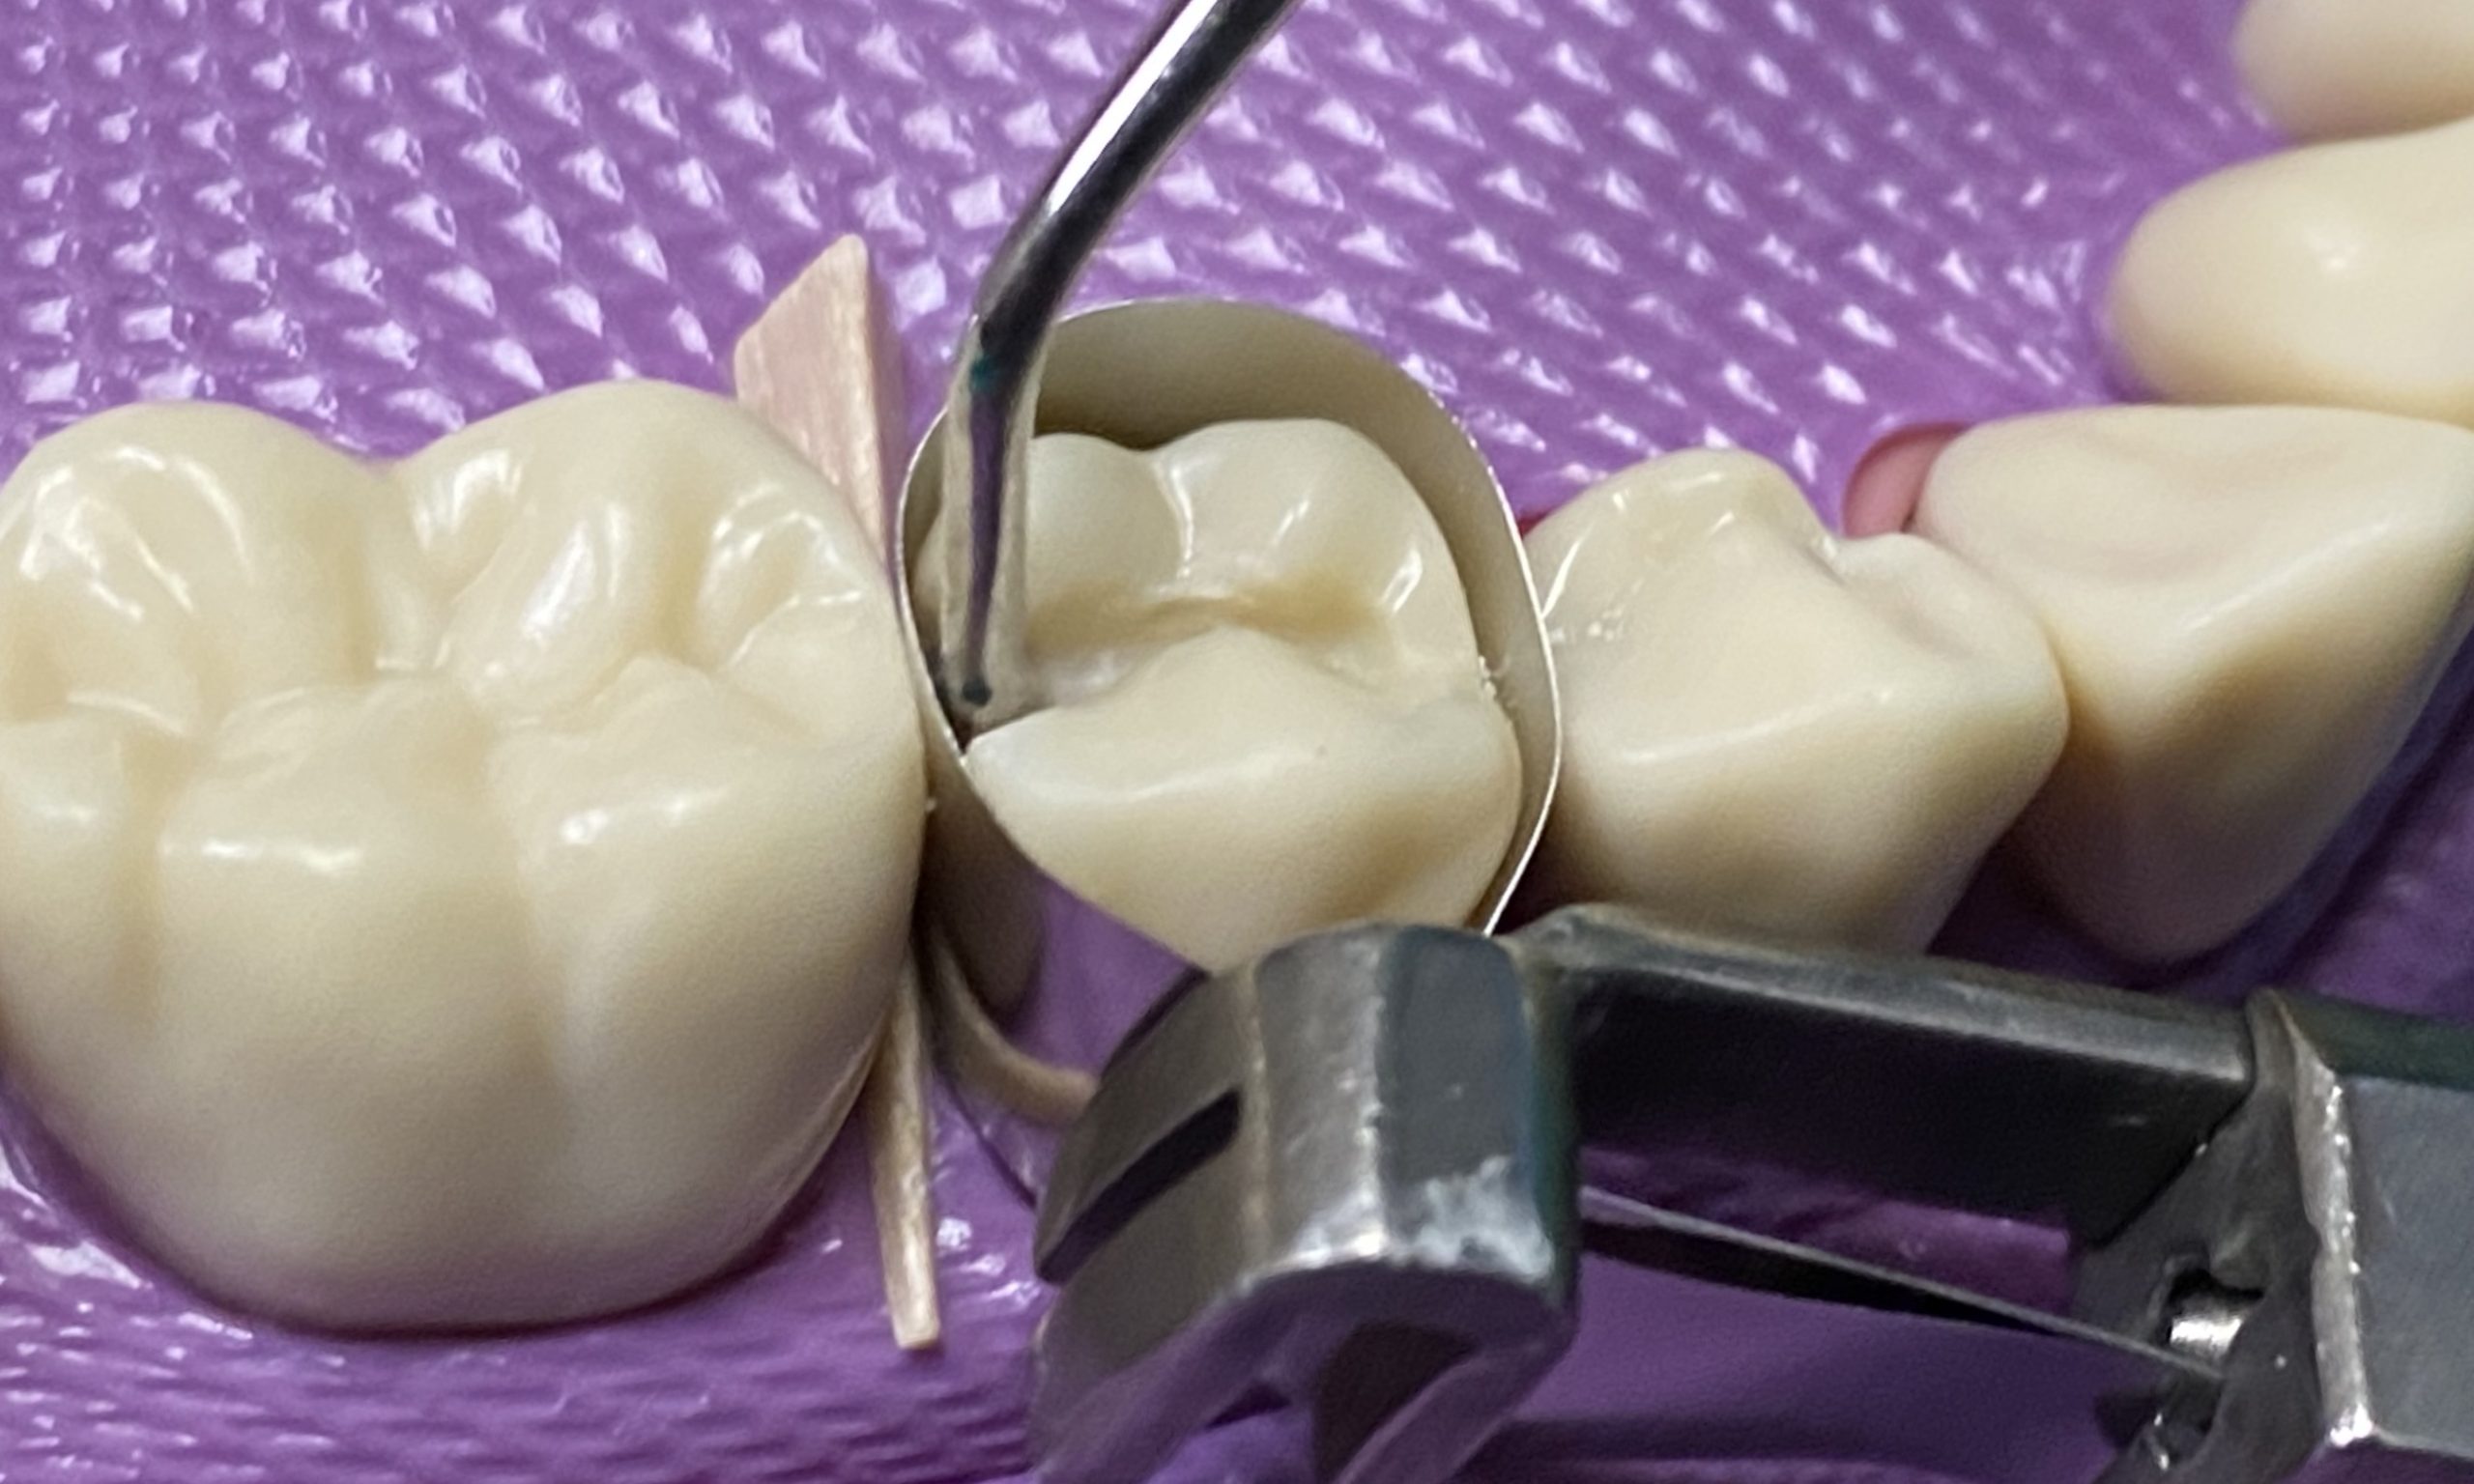
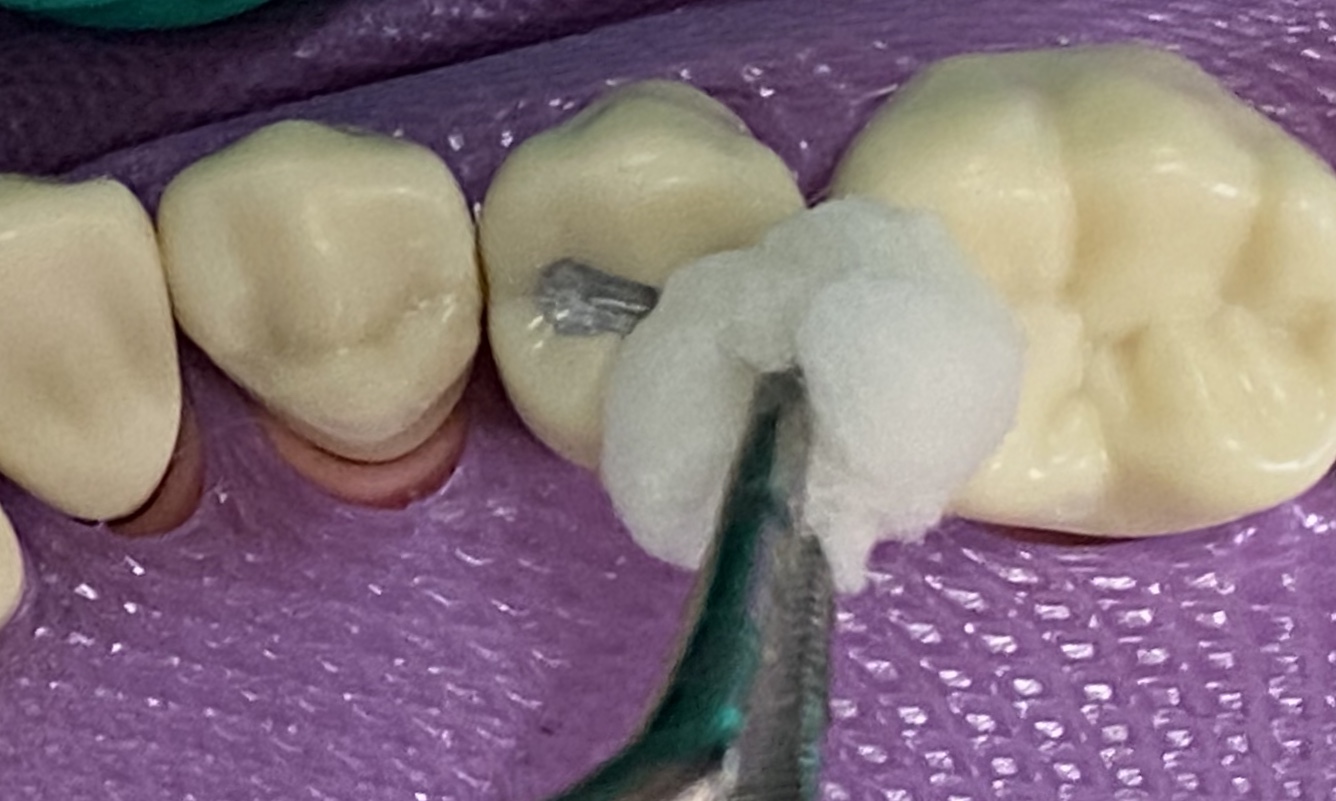
- Begin condensing in the proximal box
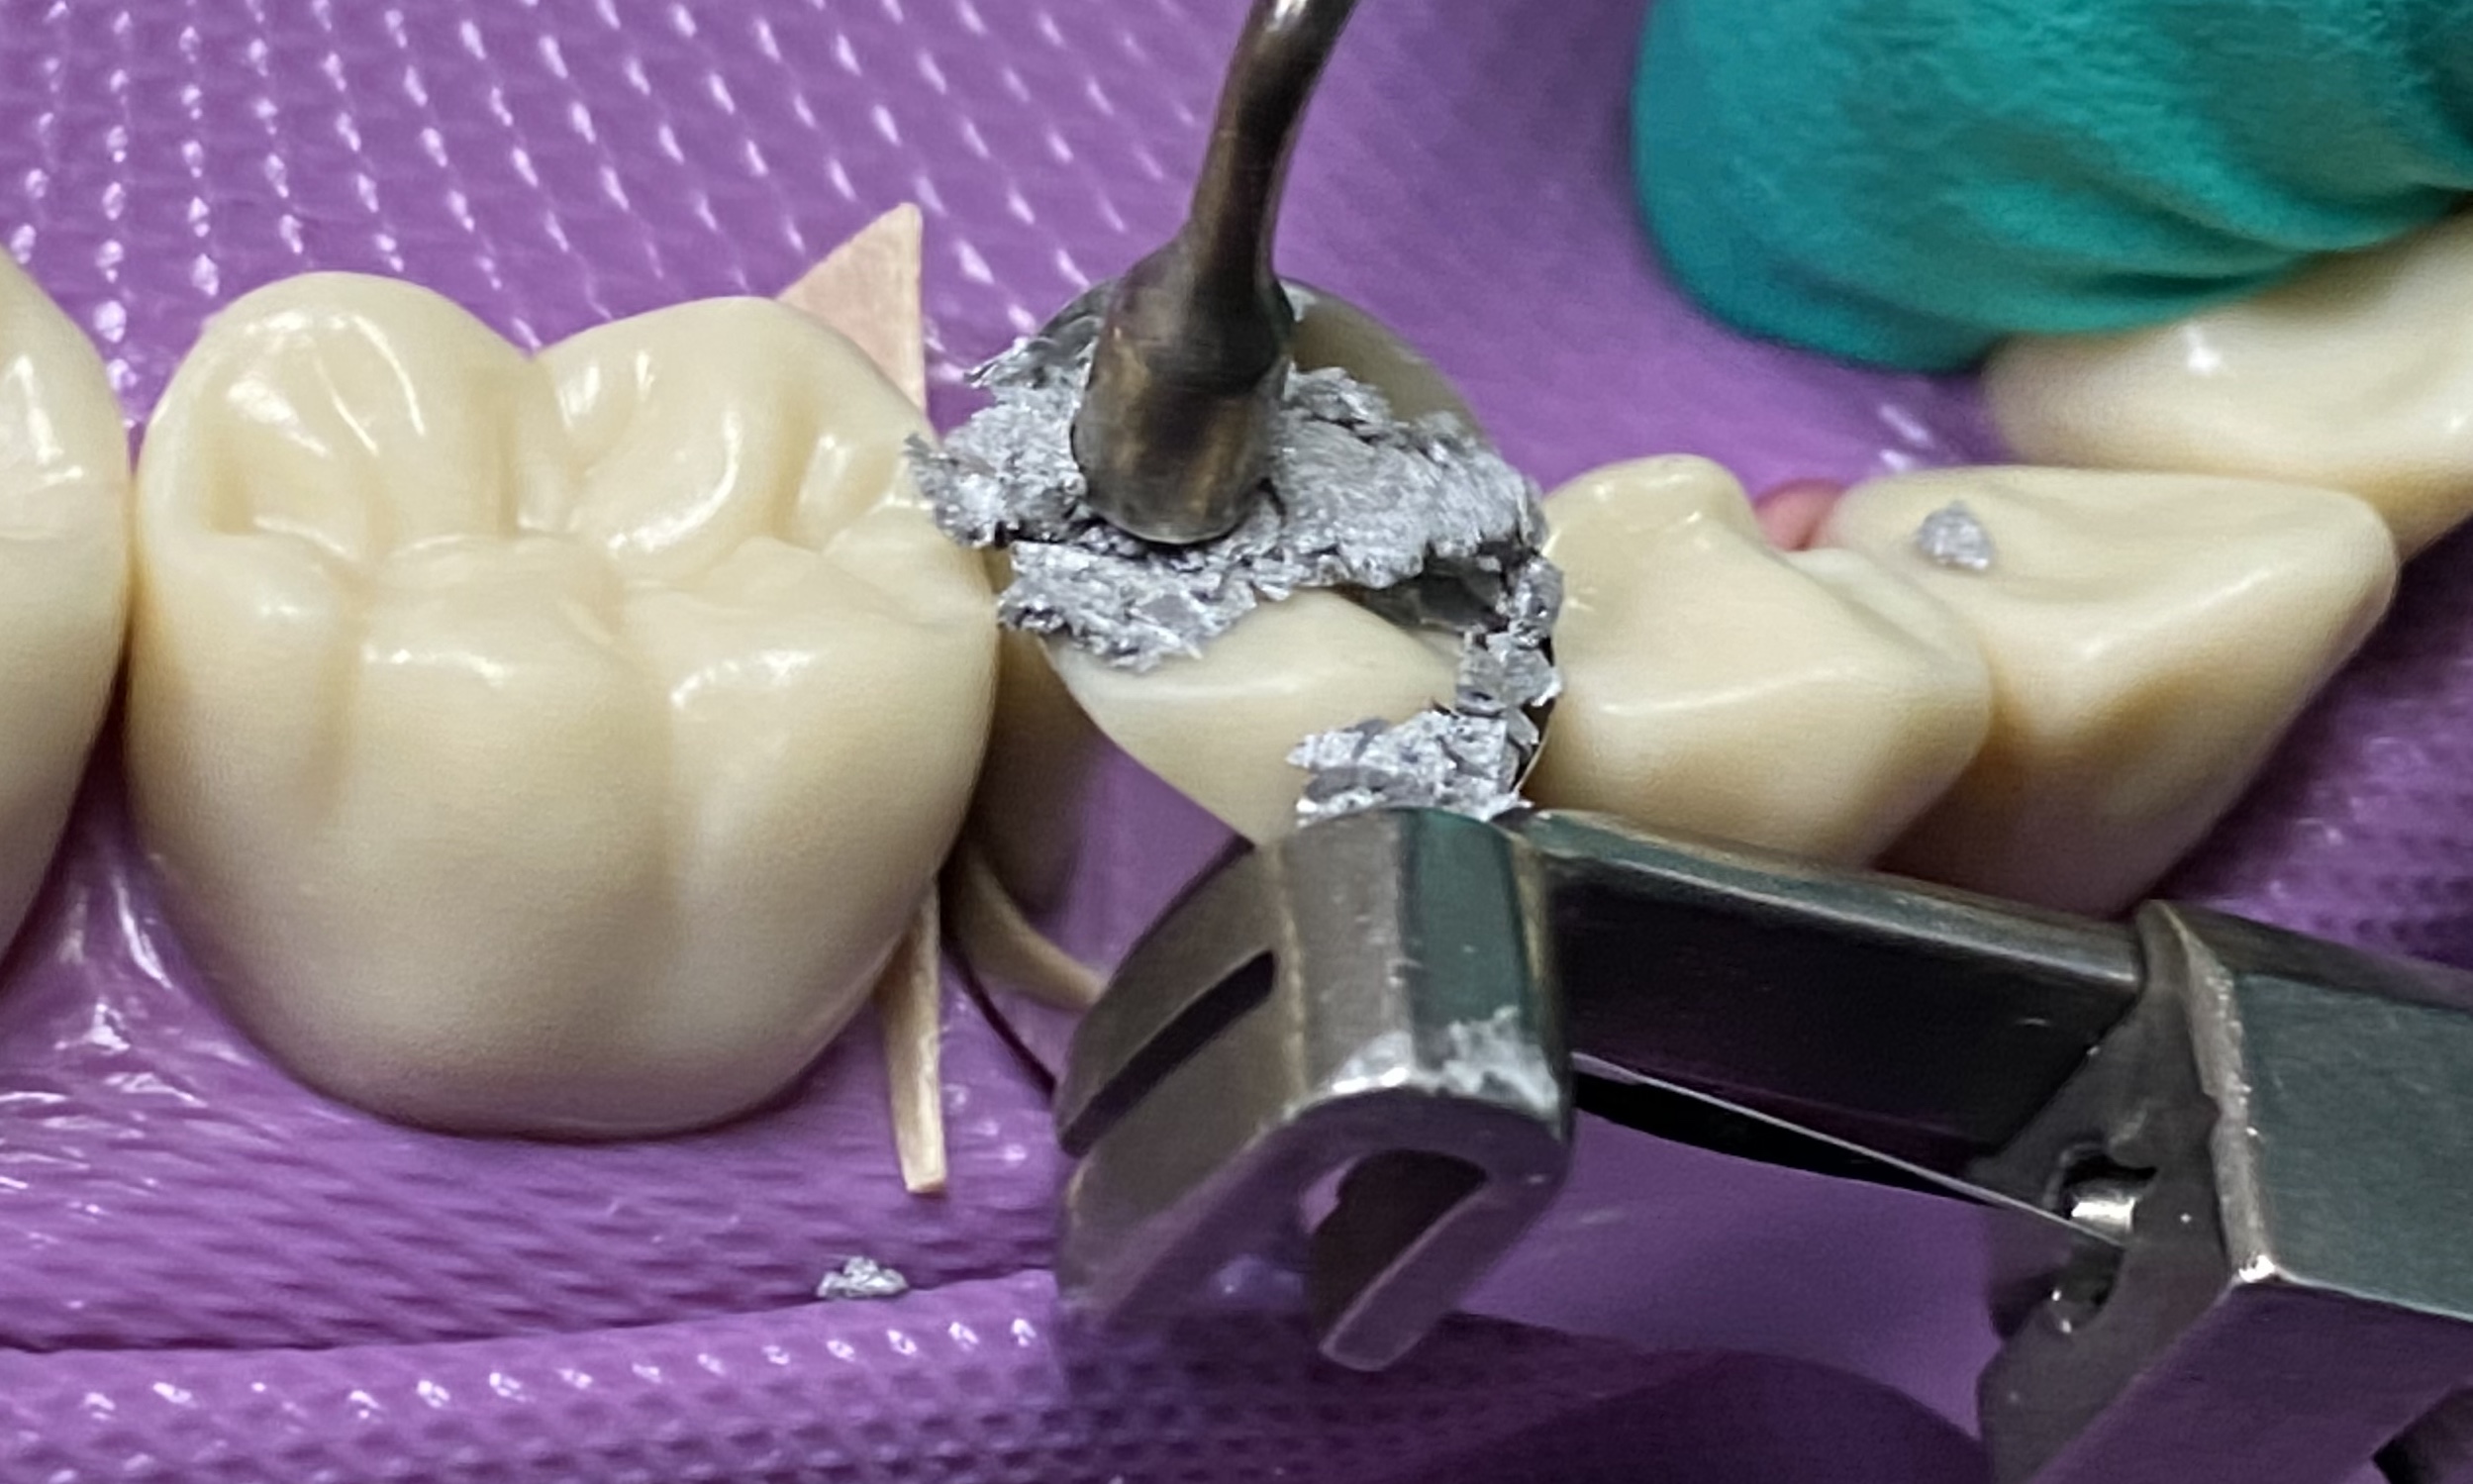
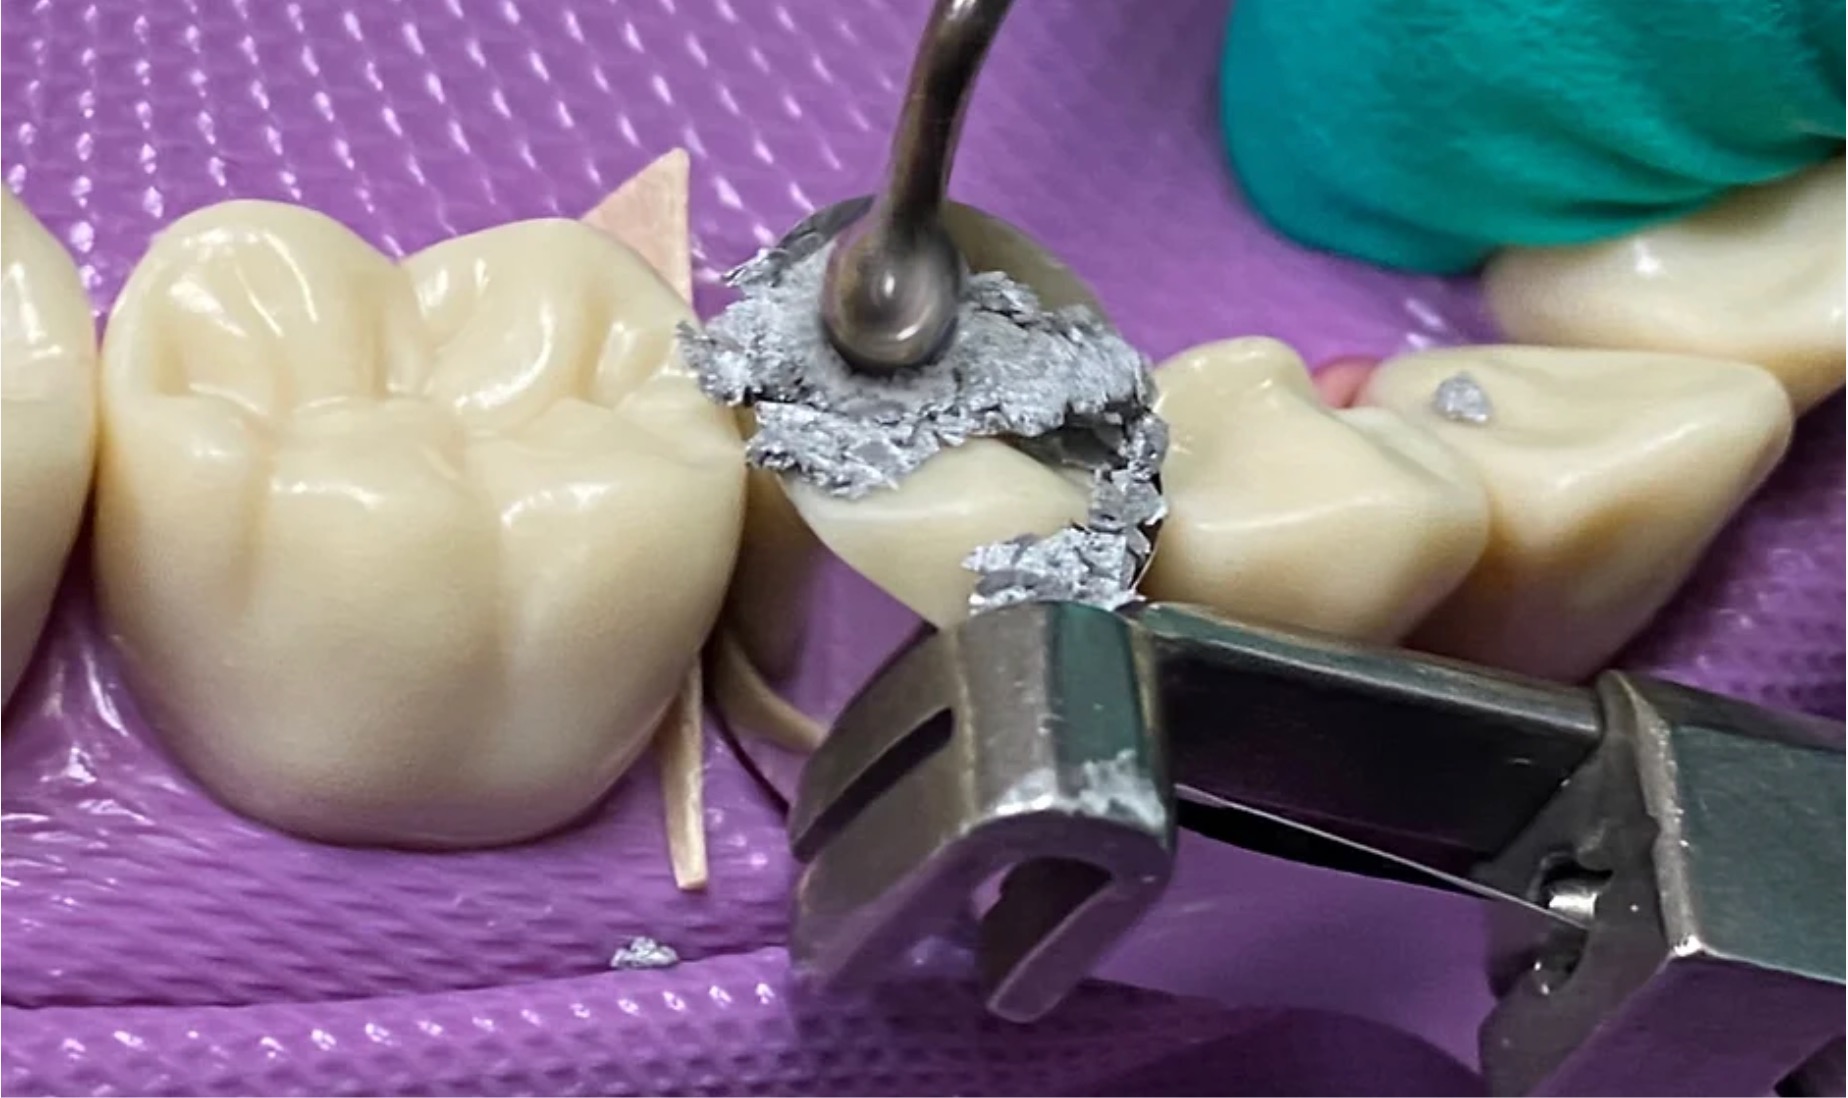
- Apply sufficient force when condensing amalgam
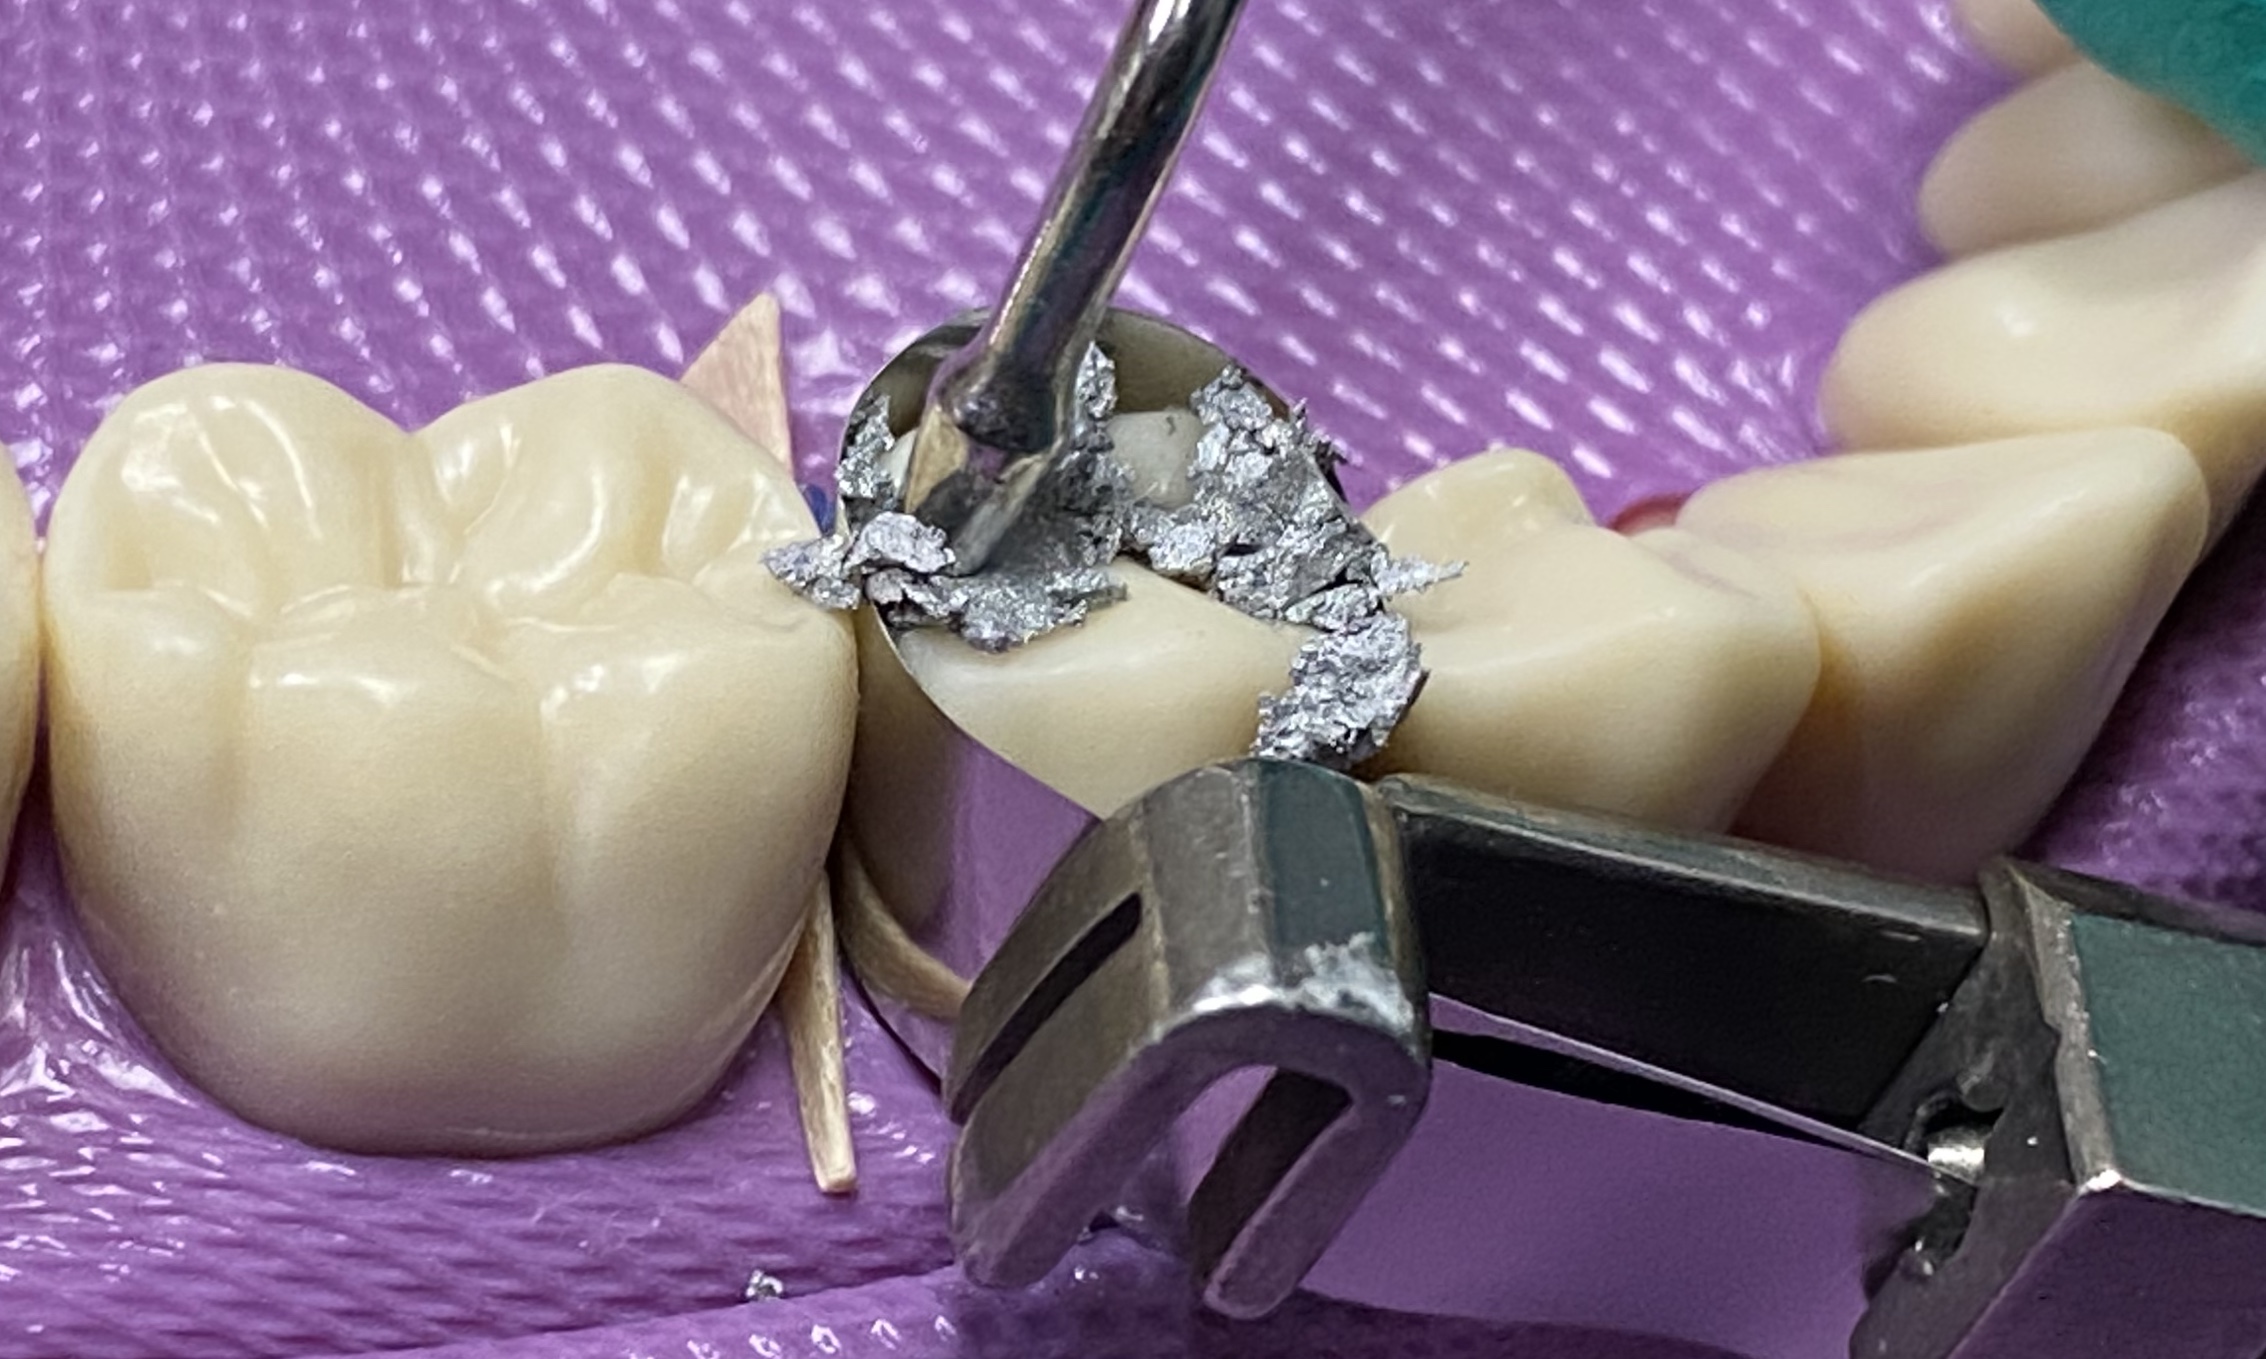
Use the larger amalgam condenser when the amalgam fill reaches the occlusal surface
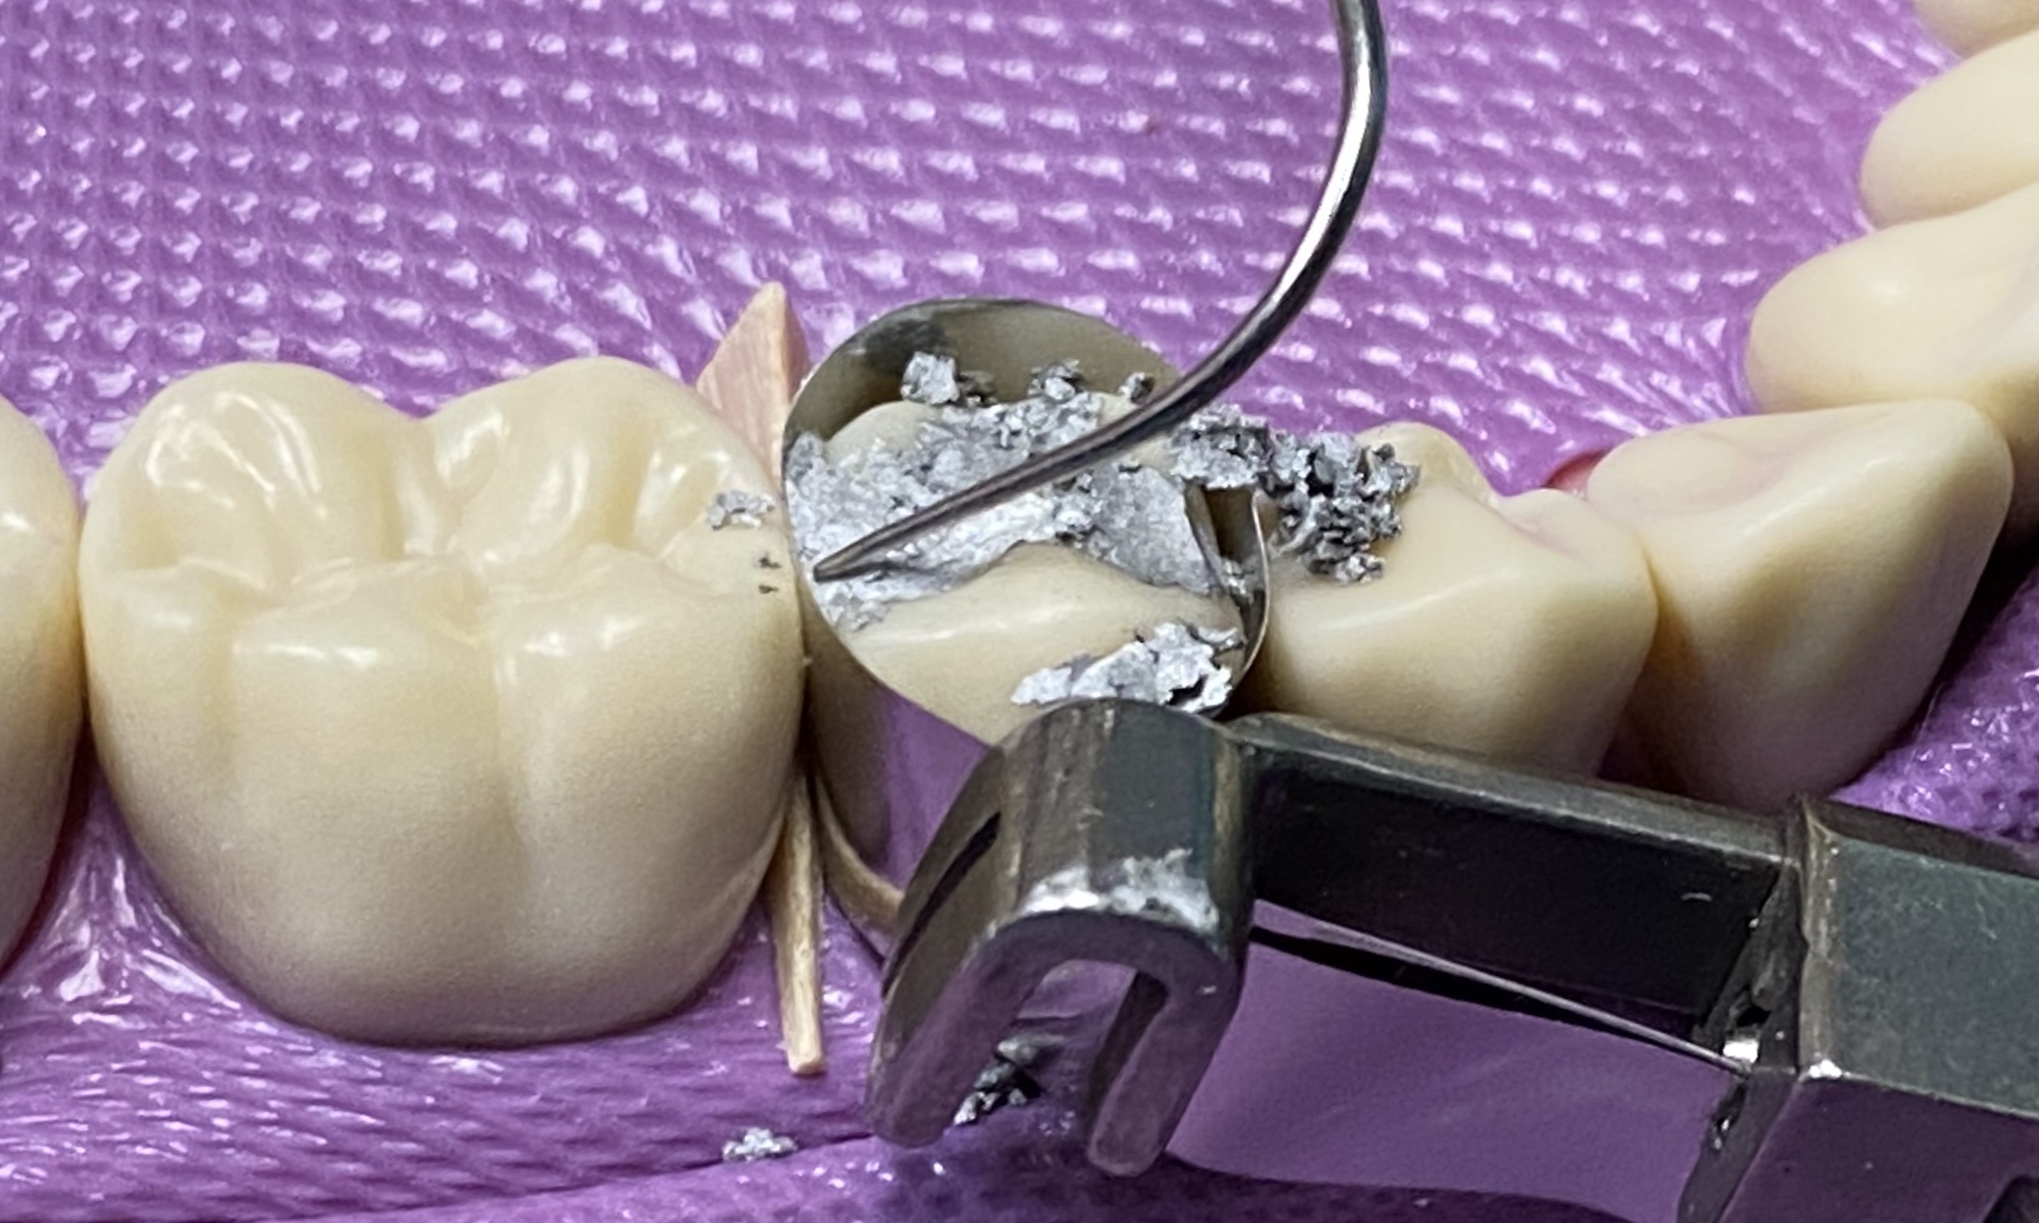
- Loosen the short swivel to release the matrix band from the matrix band holder
- Remove the interproximal wedge with forceps
- Remove the matrix band from the side opposite of the proximal box
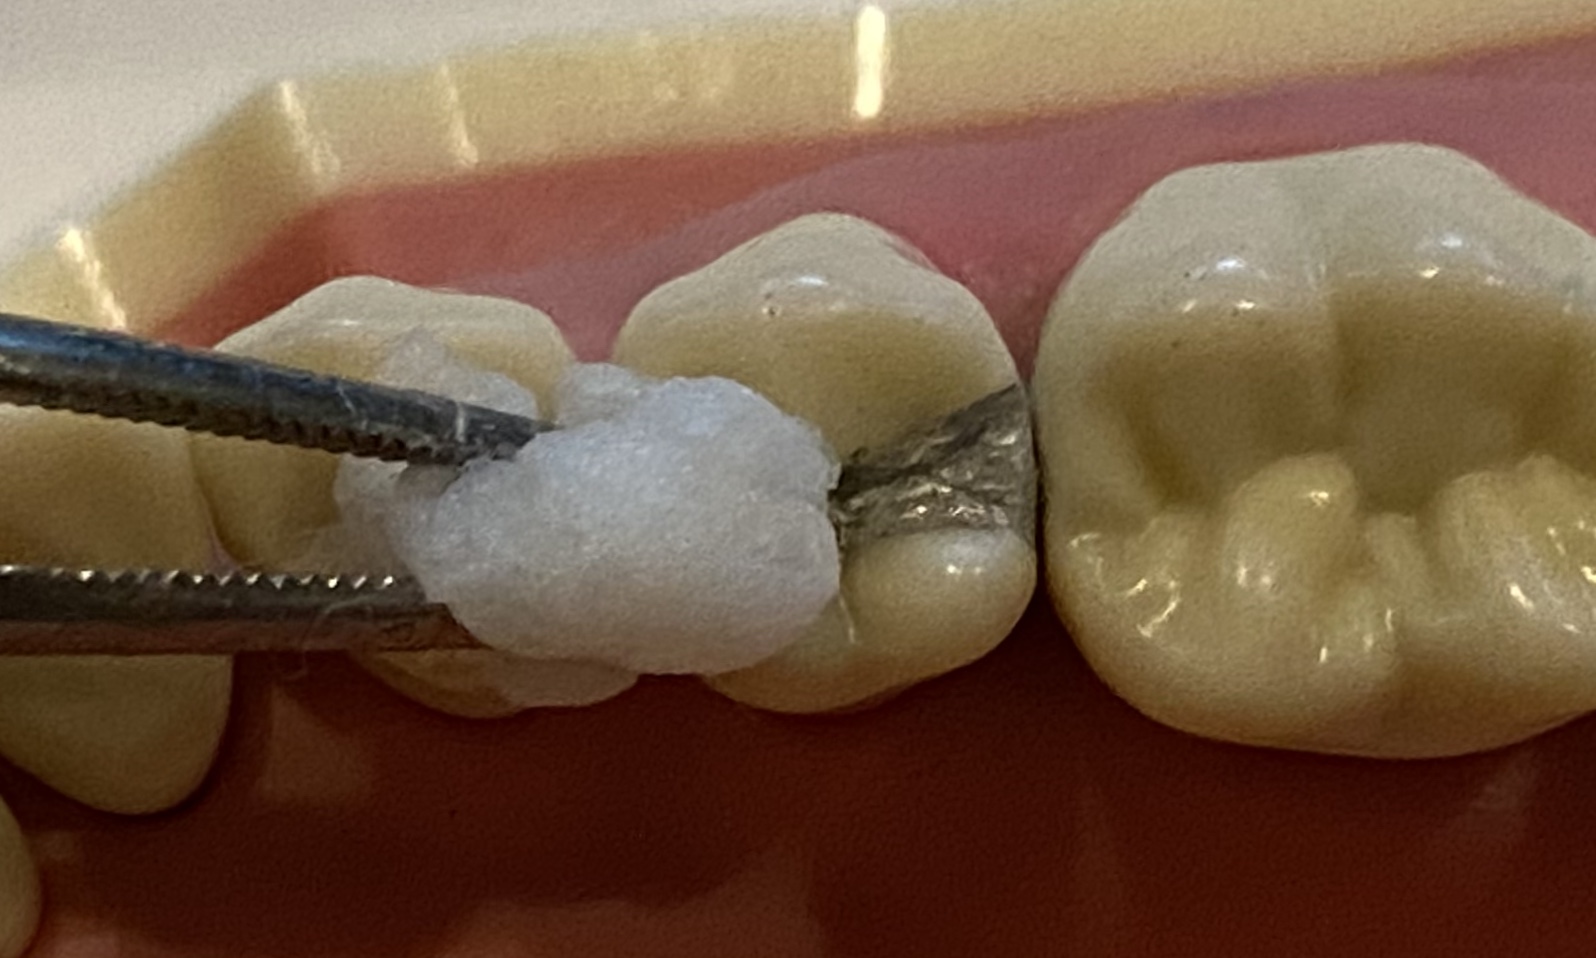
- Lightly hold down the amalgam with an instrument and carefully remove the remaining portion of the matrix band in the bucco-occlusal or linguo-occlusal direction
- Removing the matrix band in the occlusal direction may dislodge the restoration
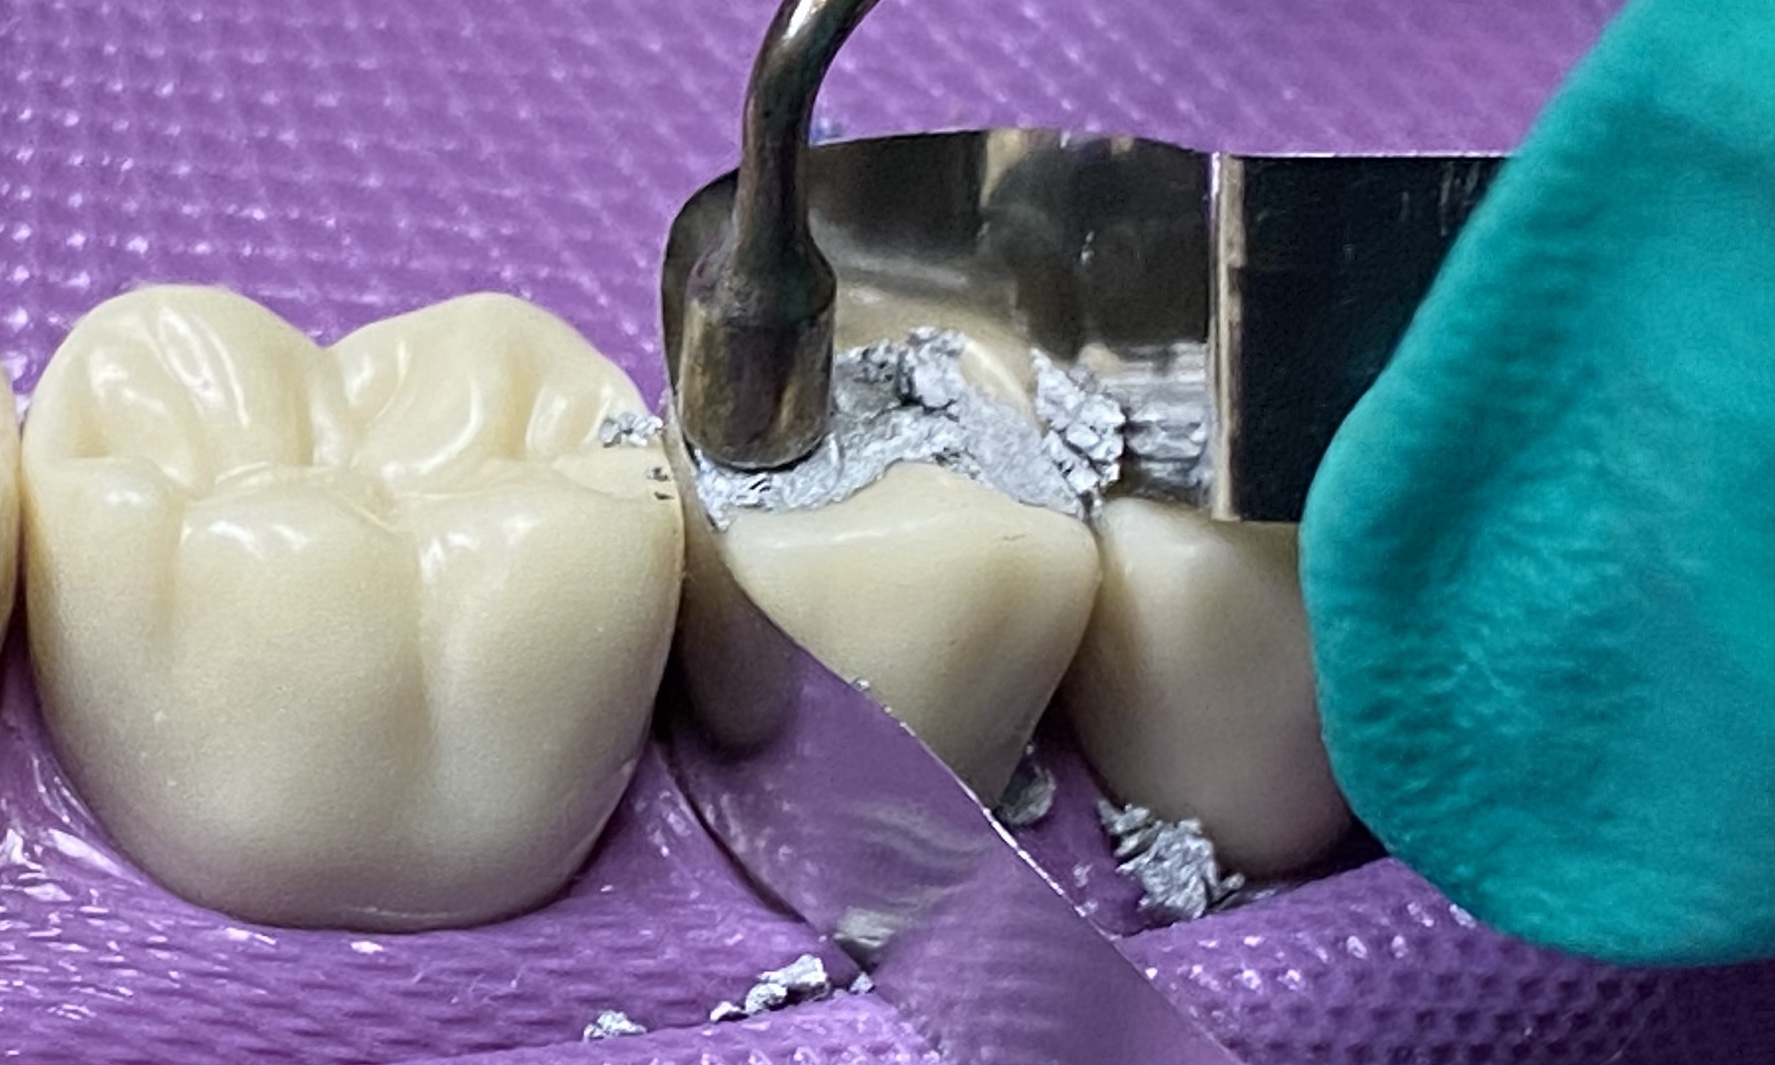
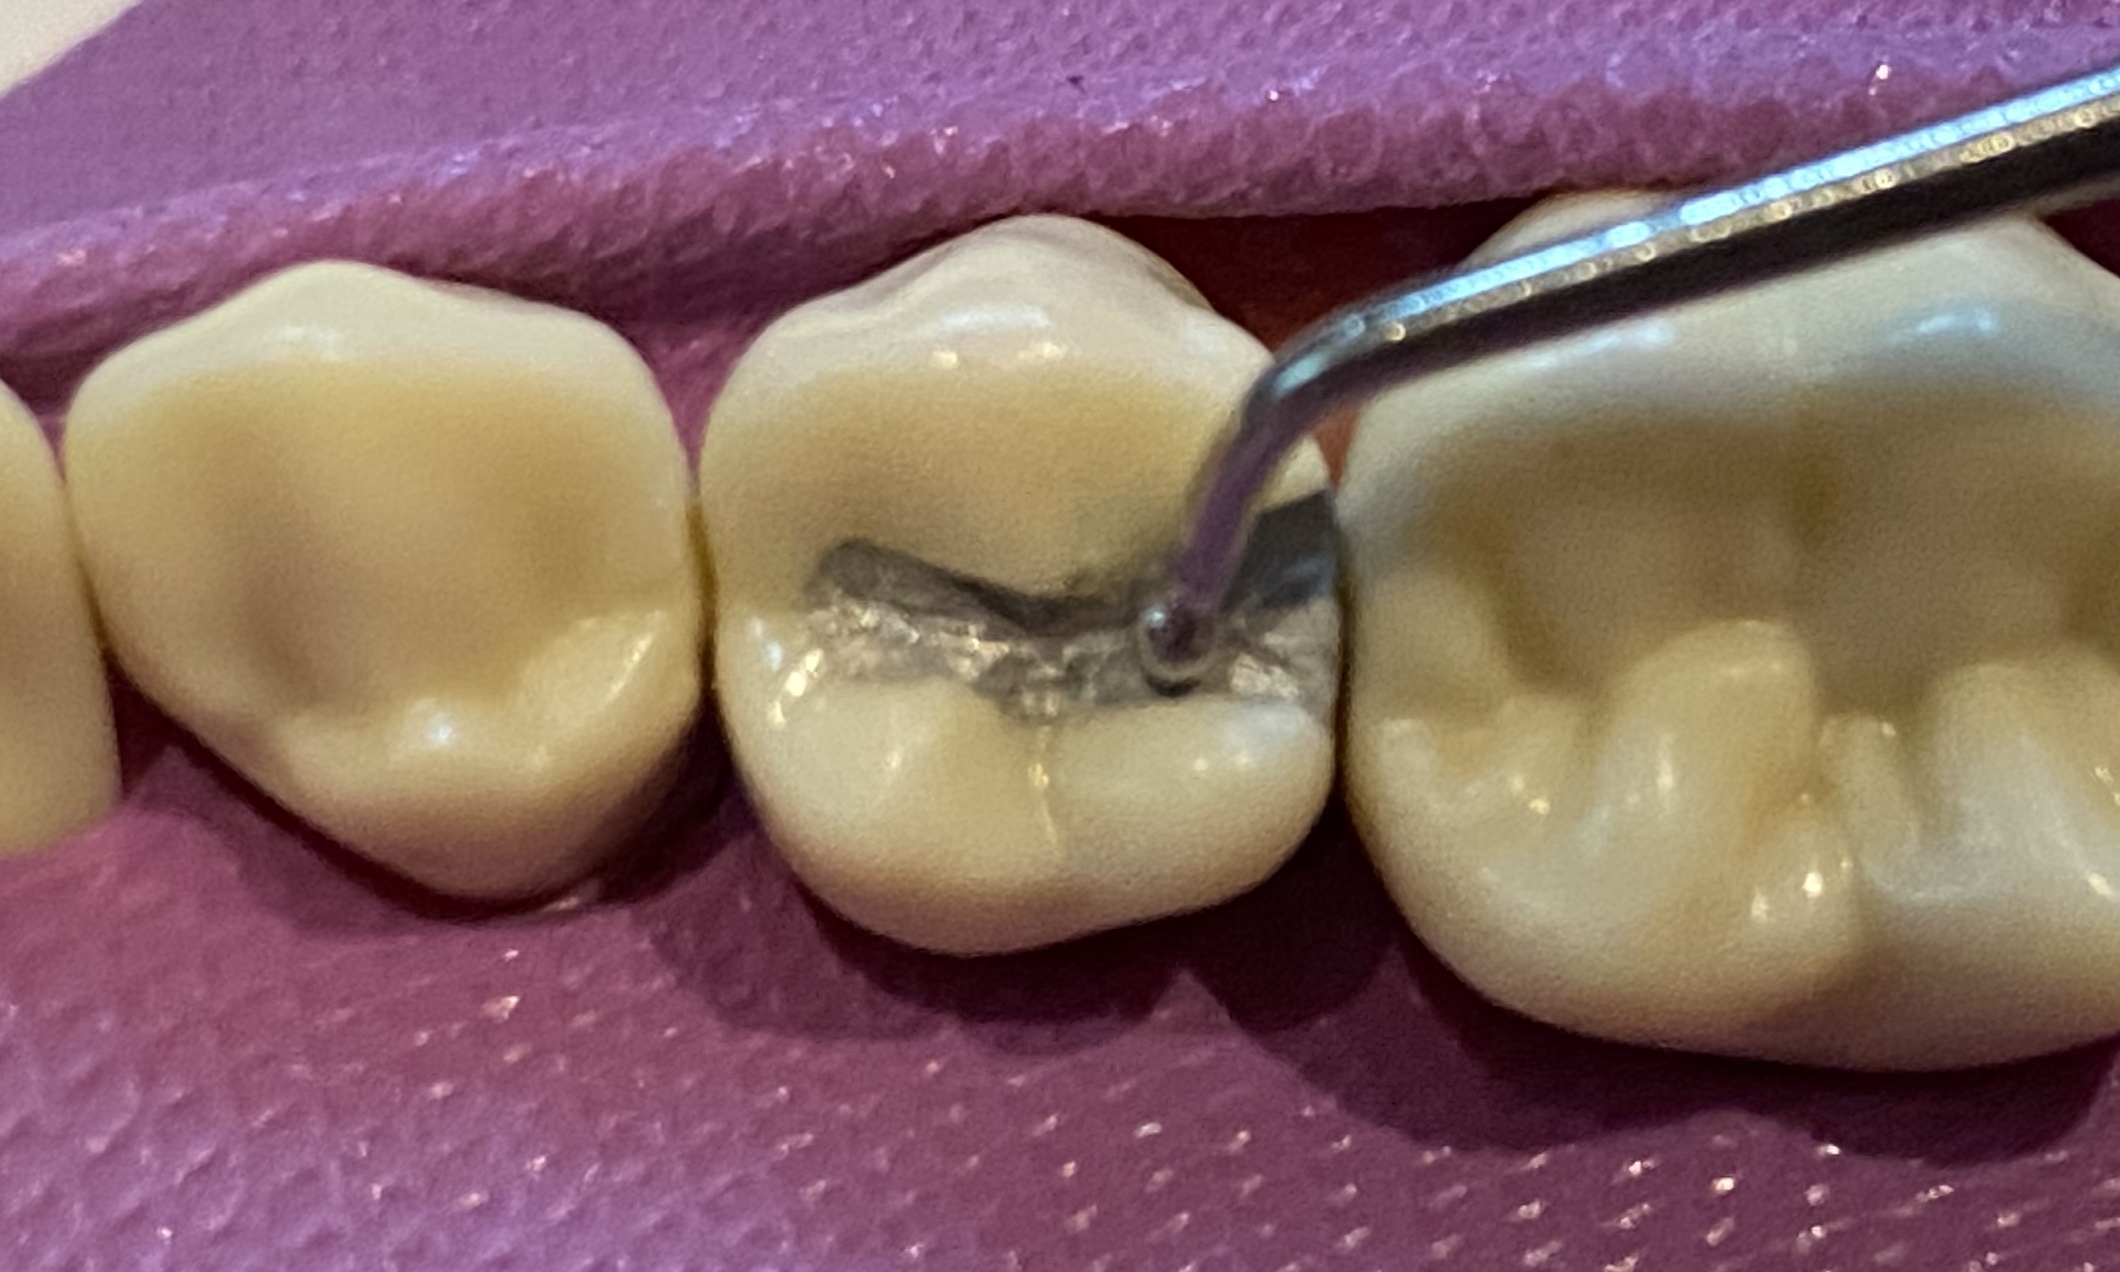
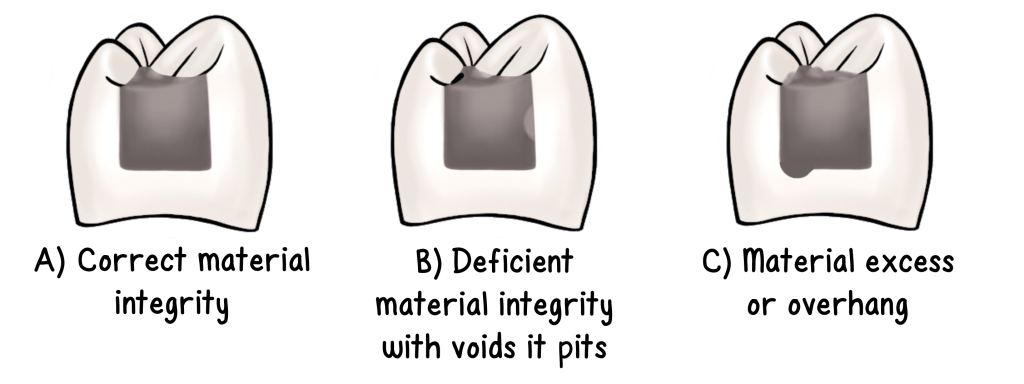
- Remove excess amalgam from the proximal aspect and overhang at the gingival margin
Instrument options: explorer, proximal carver
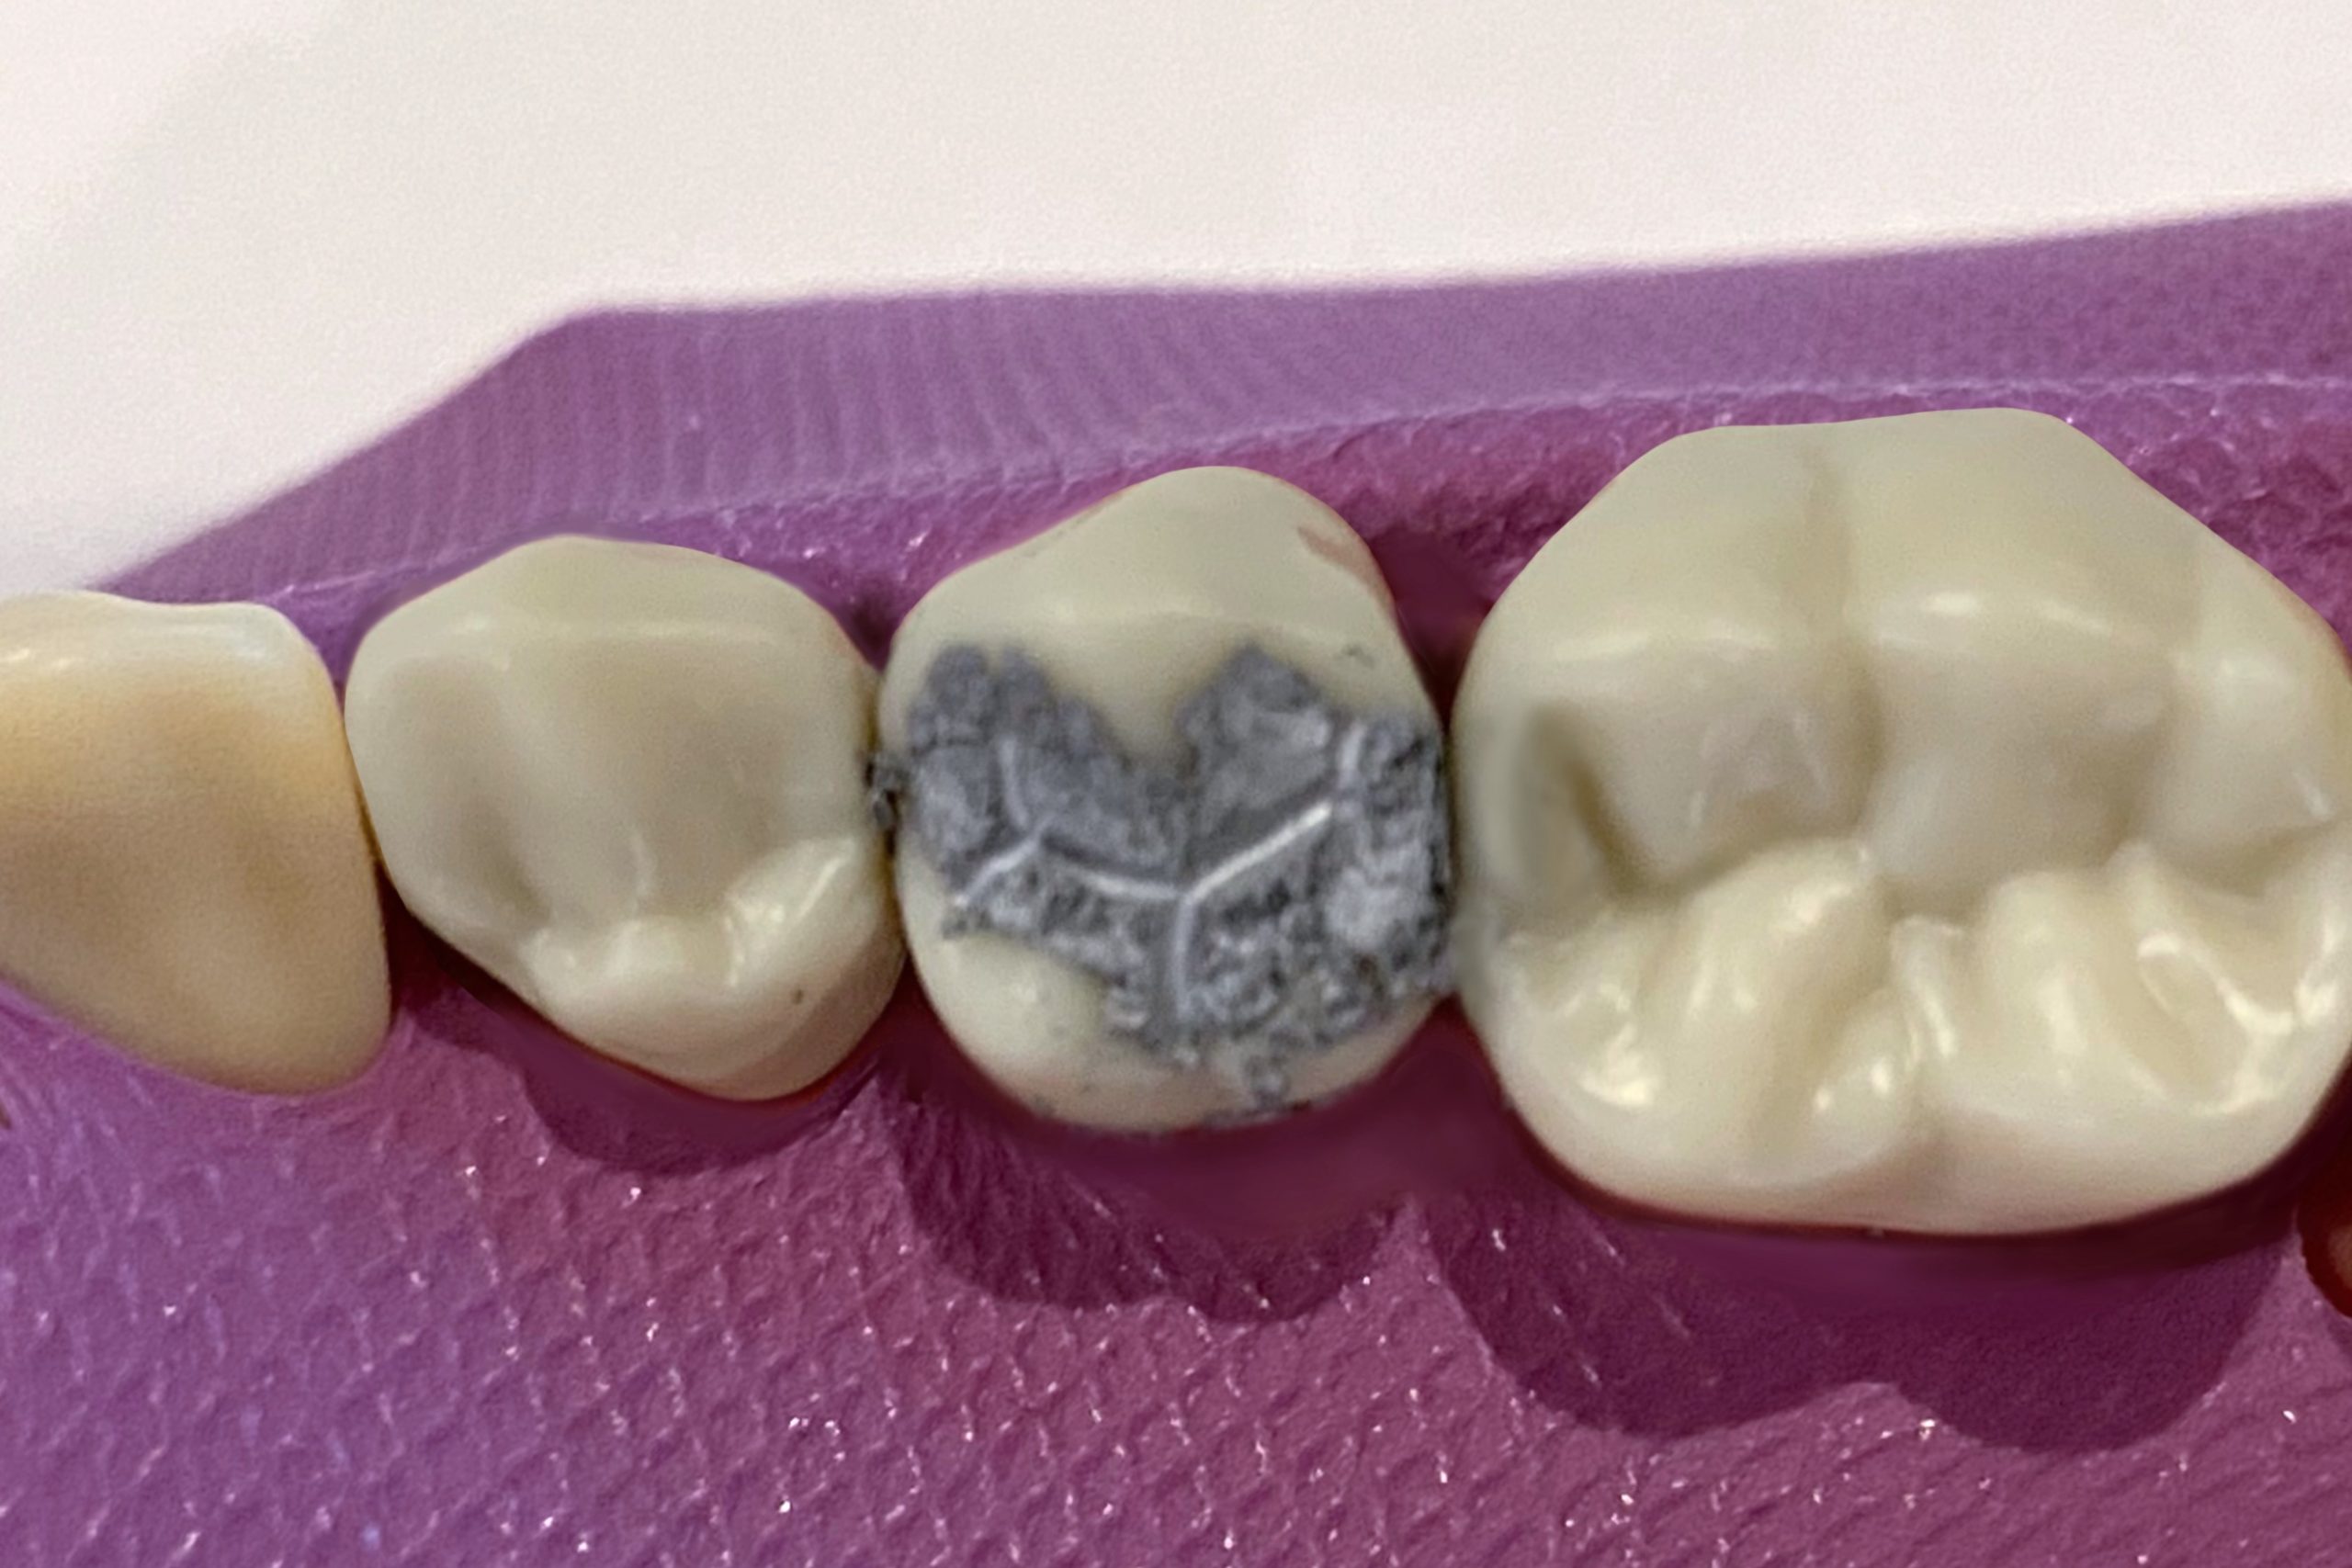
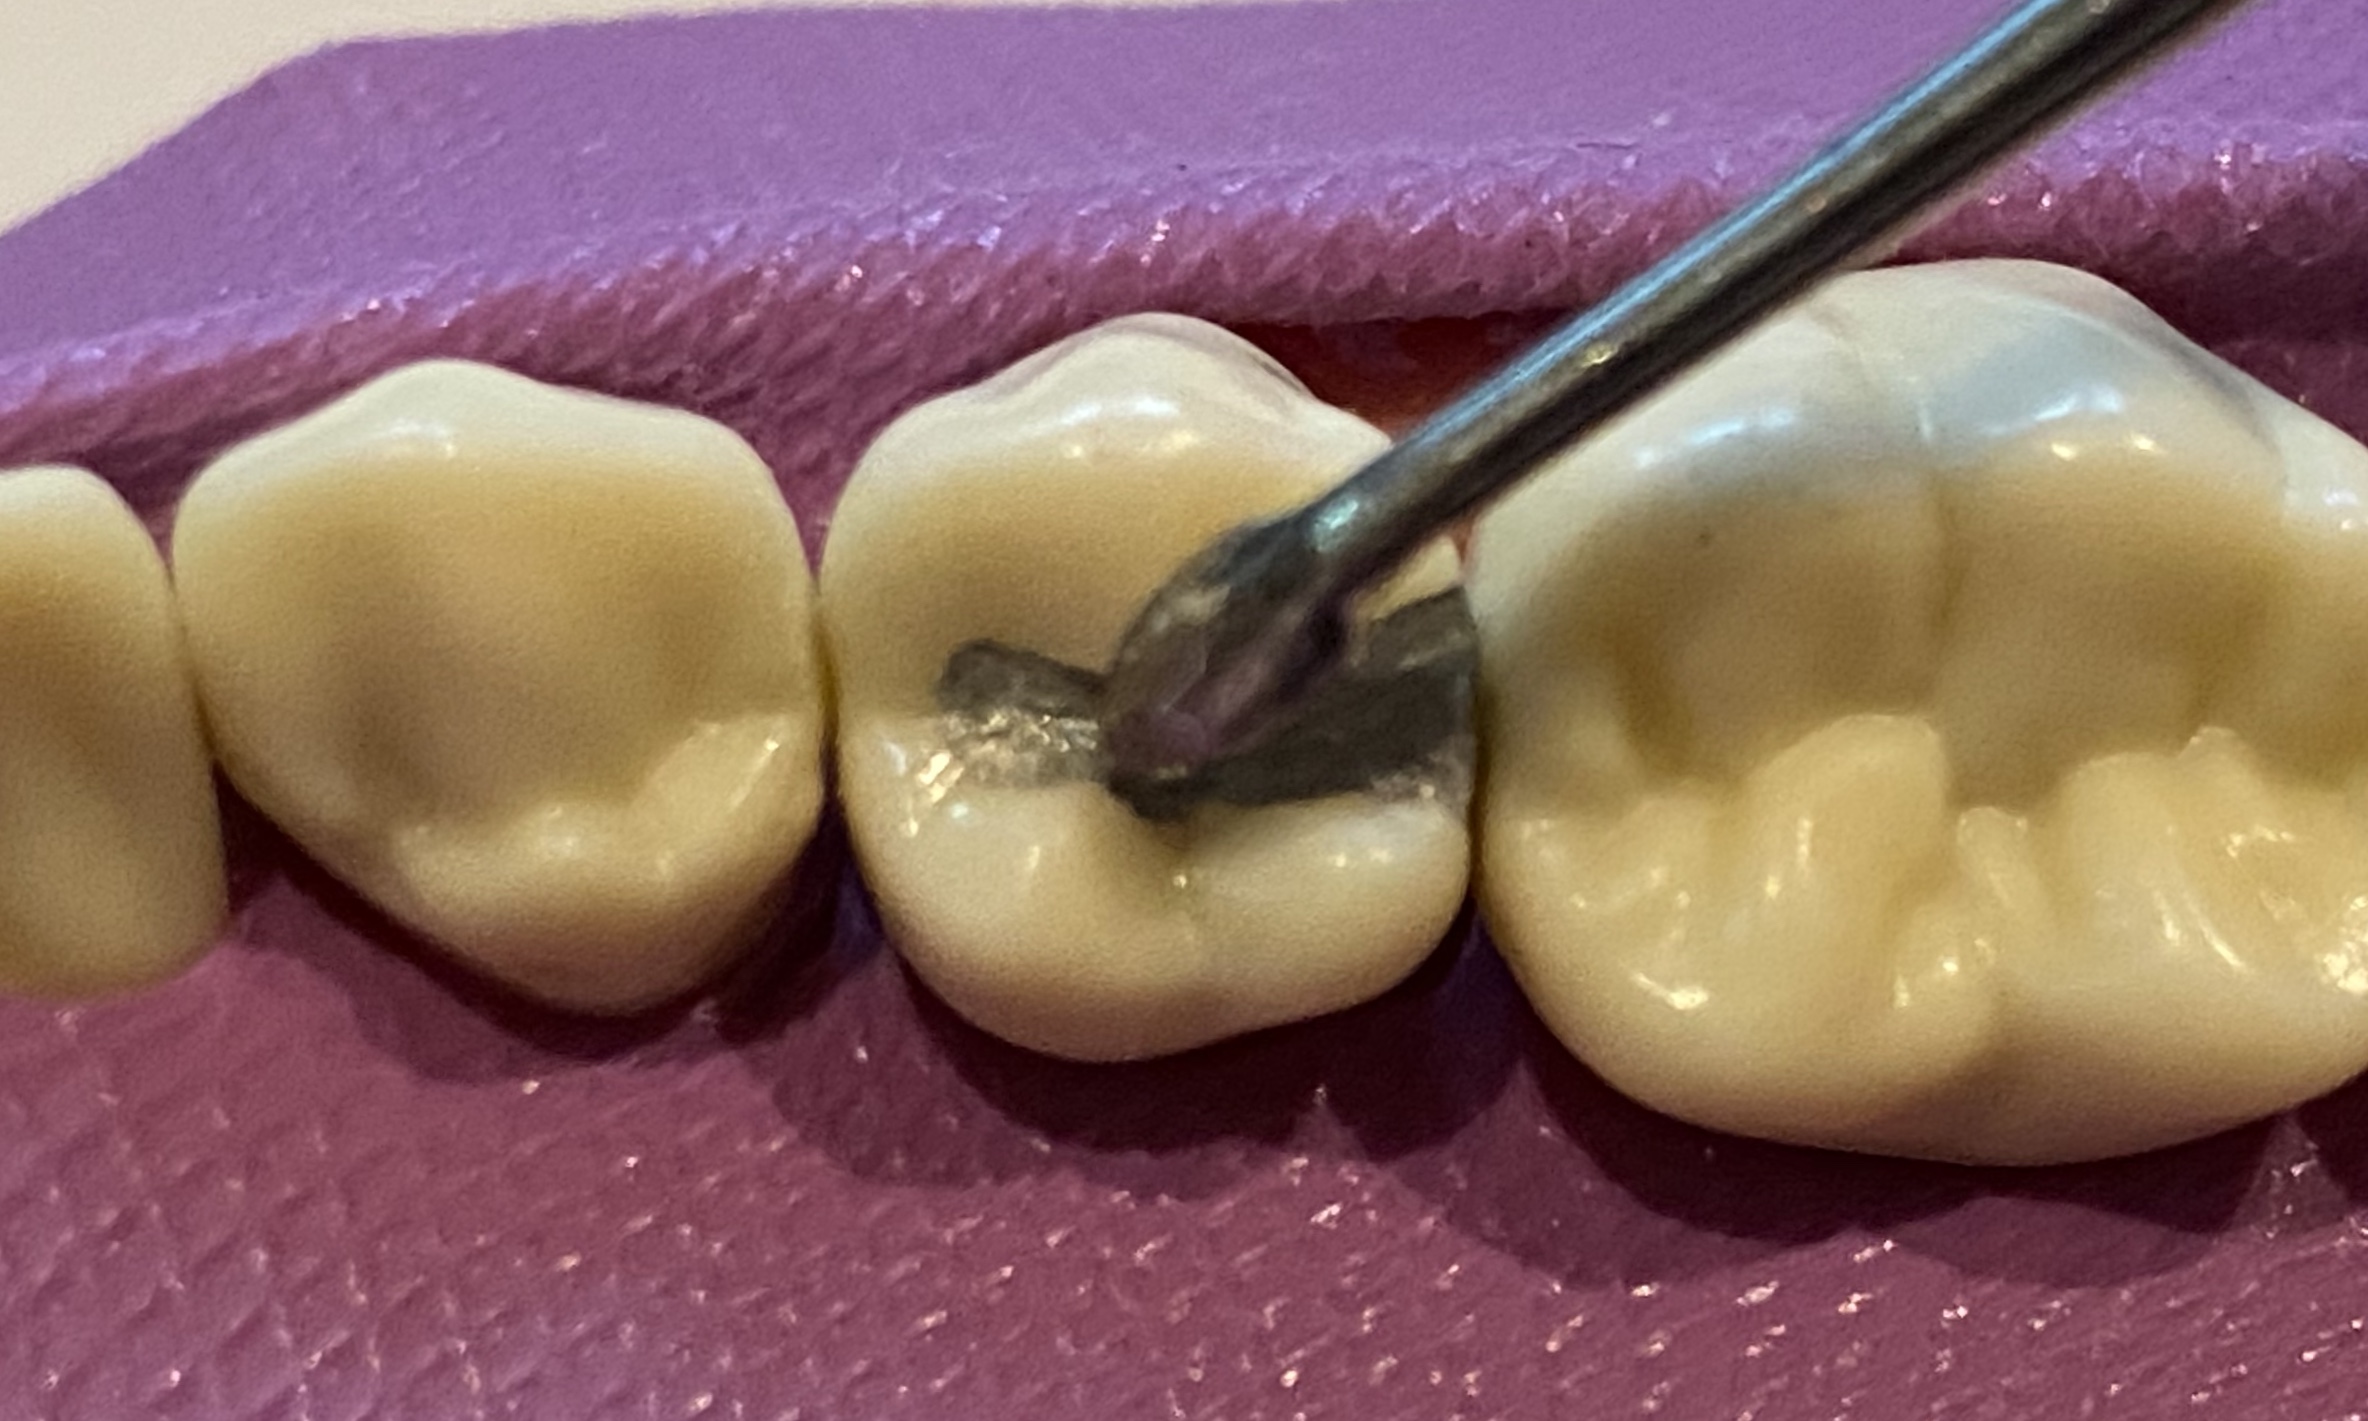
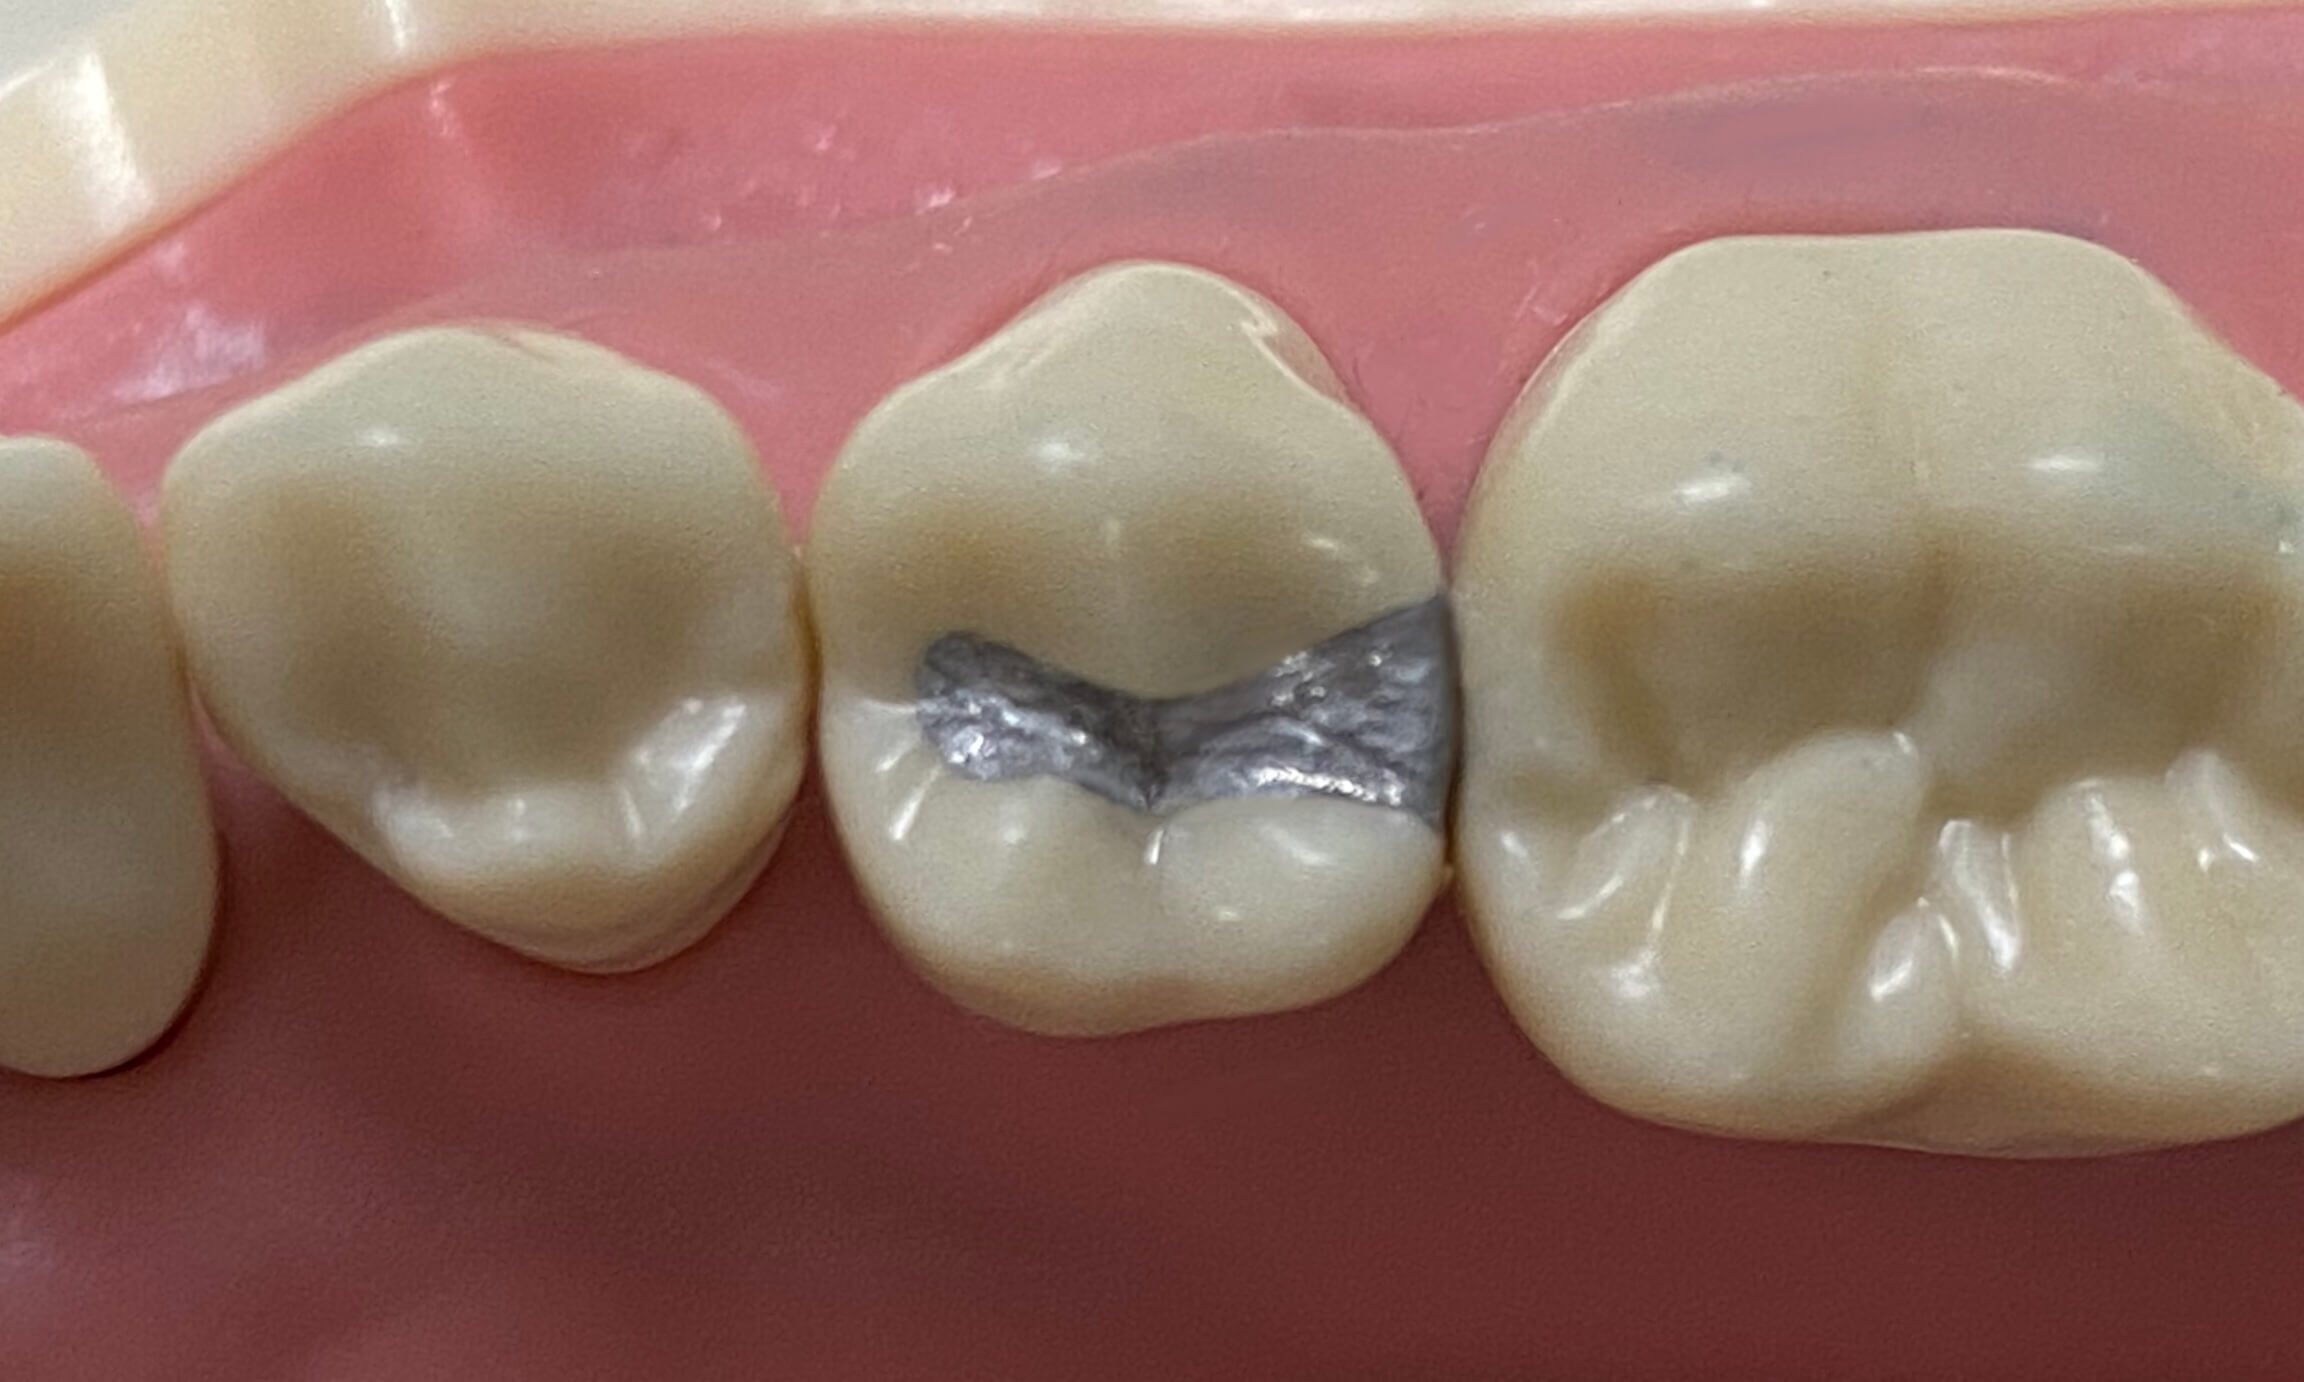
- Develop occlusal anatomy by guiding the instruments along the remaining tooth structure to create grooves and correct cuspal inclines
Instrument options: acorn burnisher, cleoid-discoid, Hollenback carver
Instrument options: explorer, Hollenback
Instrument options: small ball burnisher
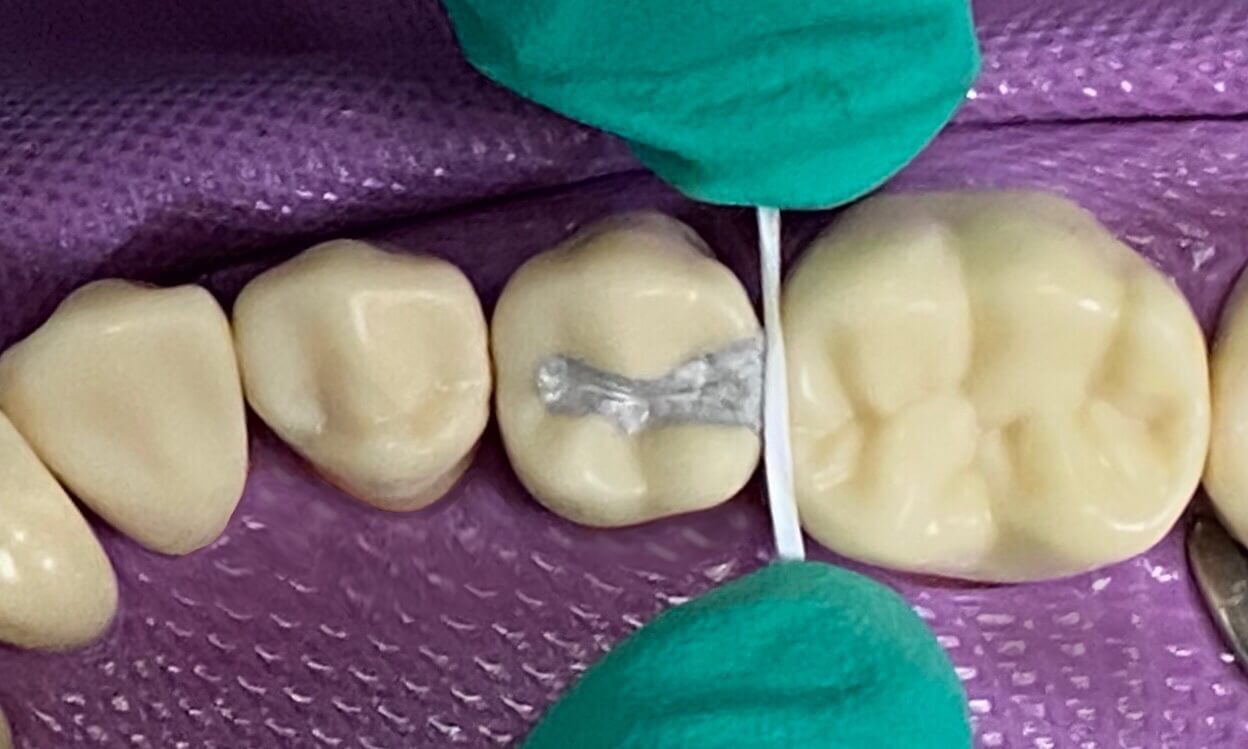
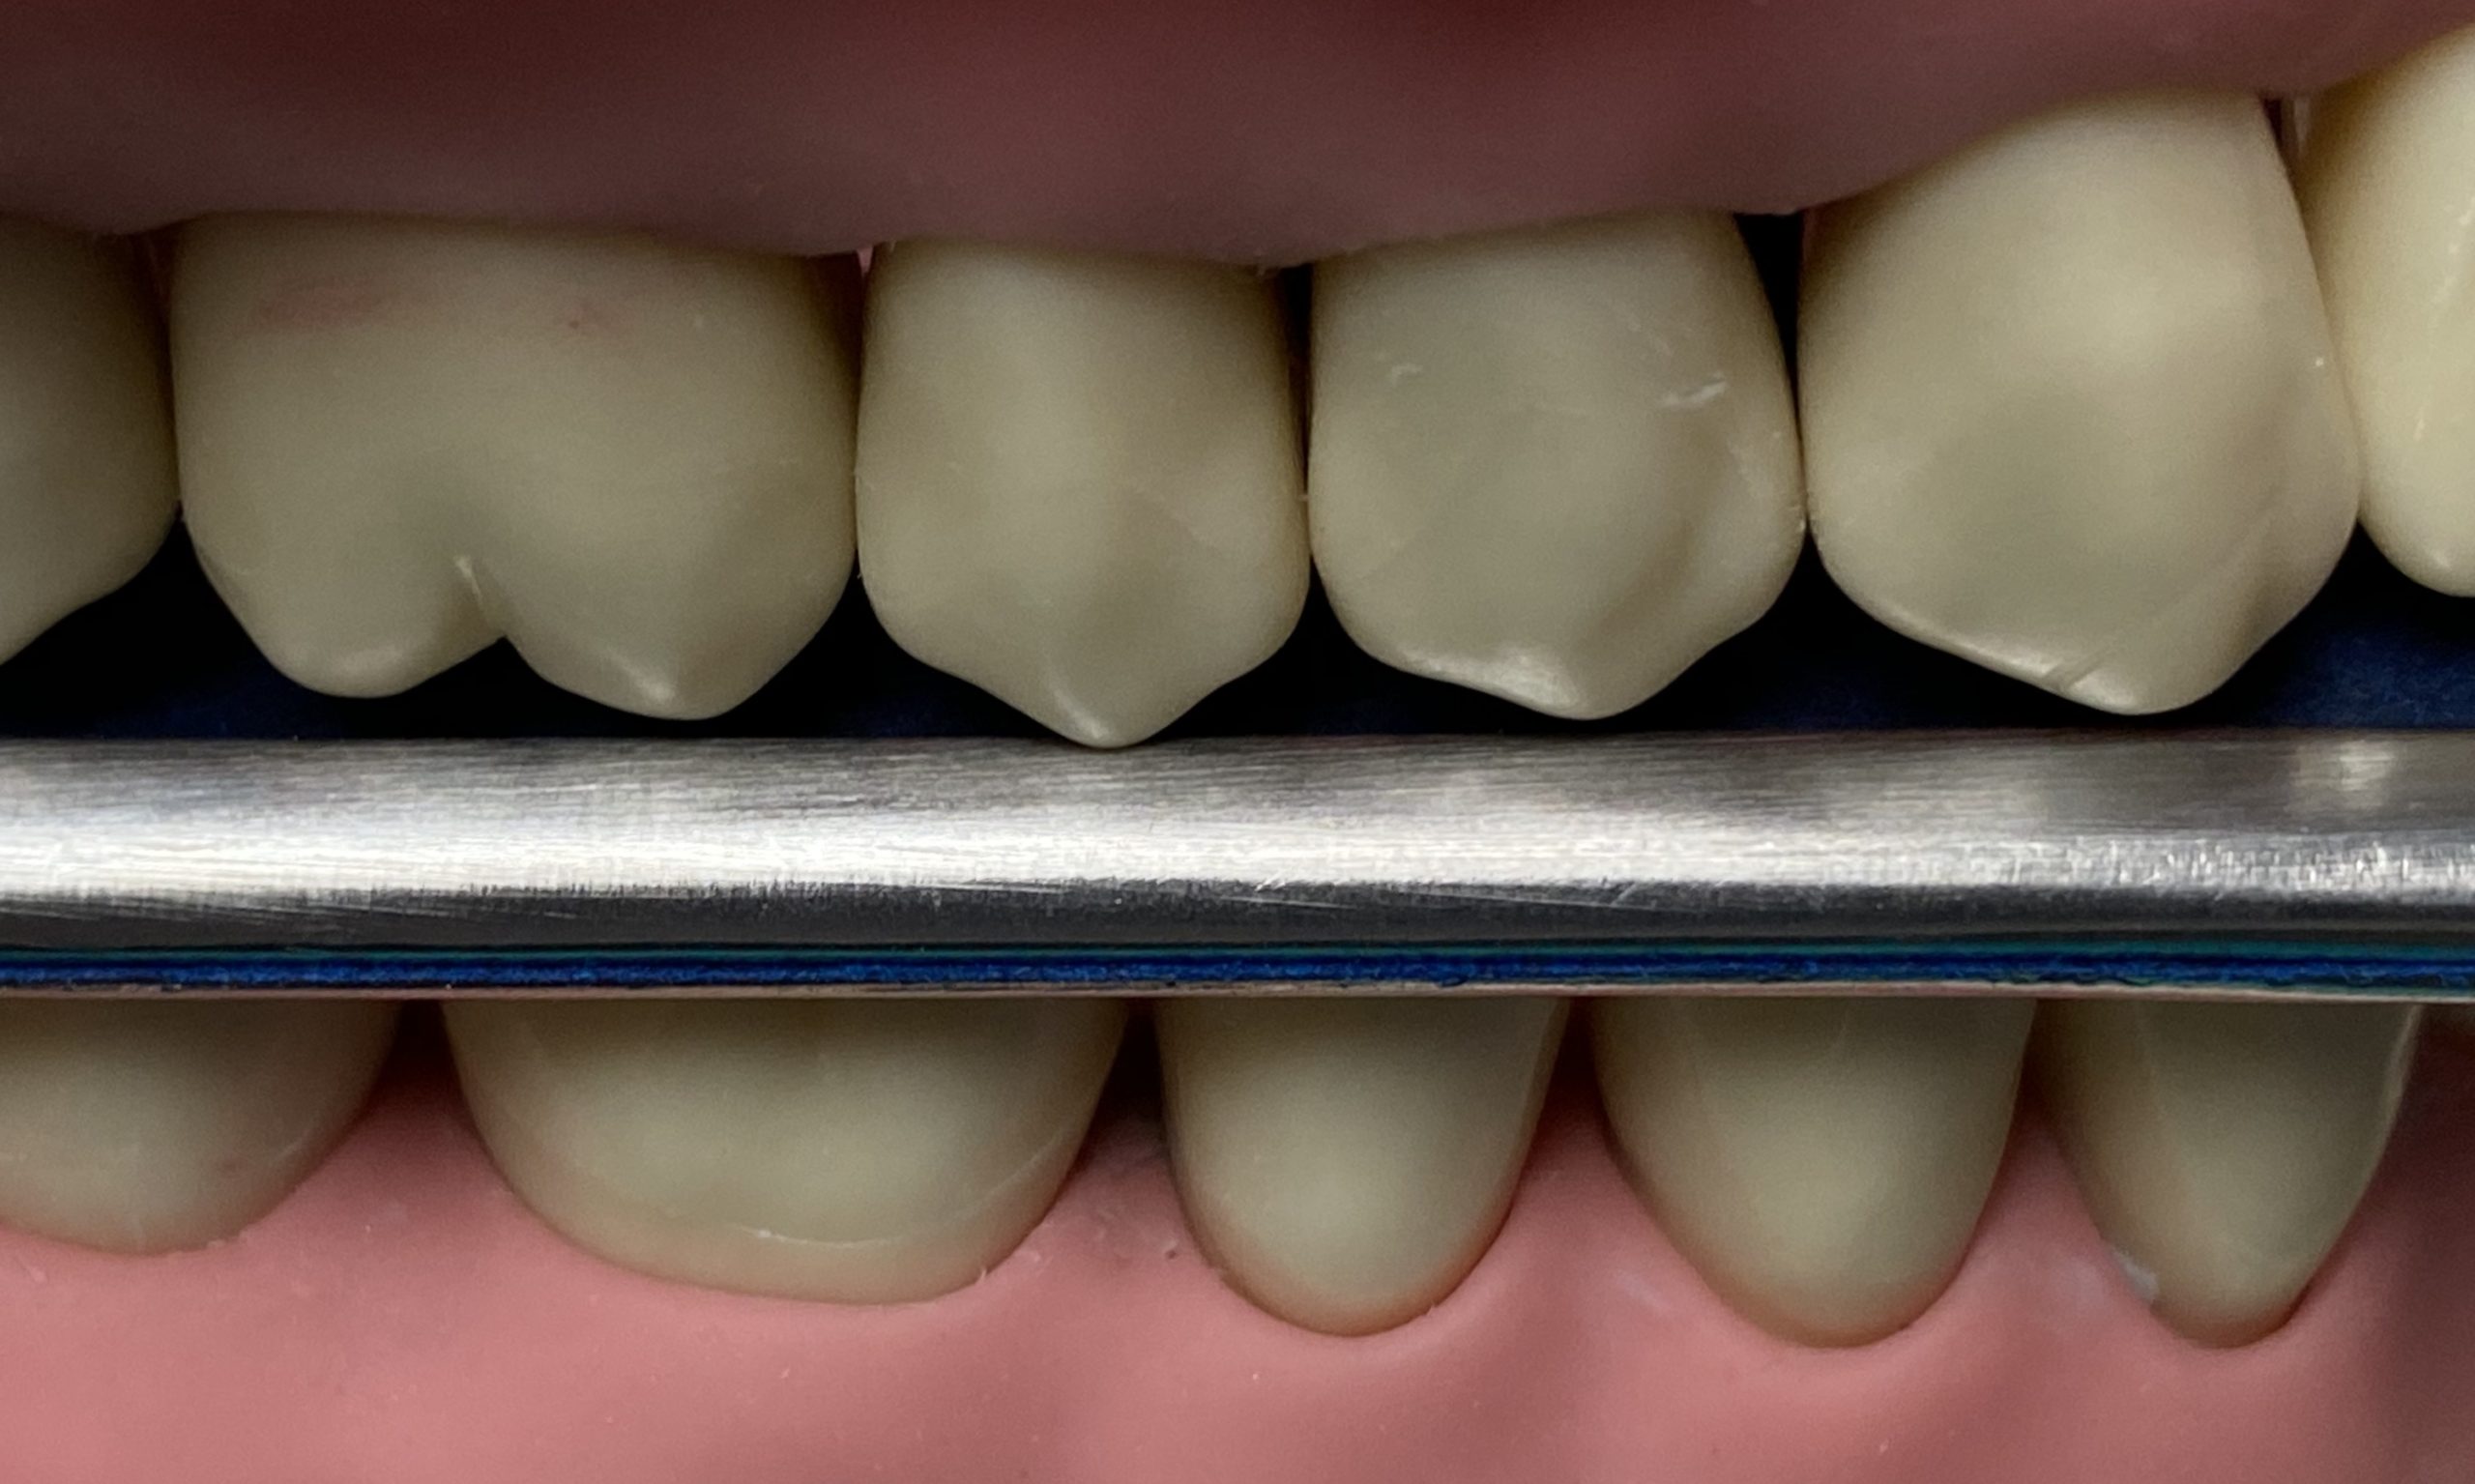
- Floss in the gingival direction and pull laterally through embrasure to avoid dislodging the restoration <br>
- Proper contact should give light resistance and create slight “snap” sound
- Areas of hyperocclusion will mark heavily with the articulating paper <br>
- Adjust areas where the restoration is “high”
Instrument options: amalgam carver or cleoid-discoid
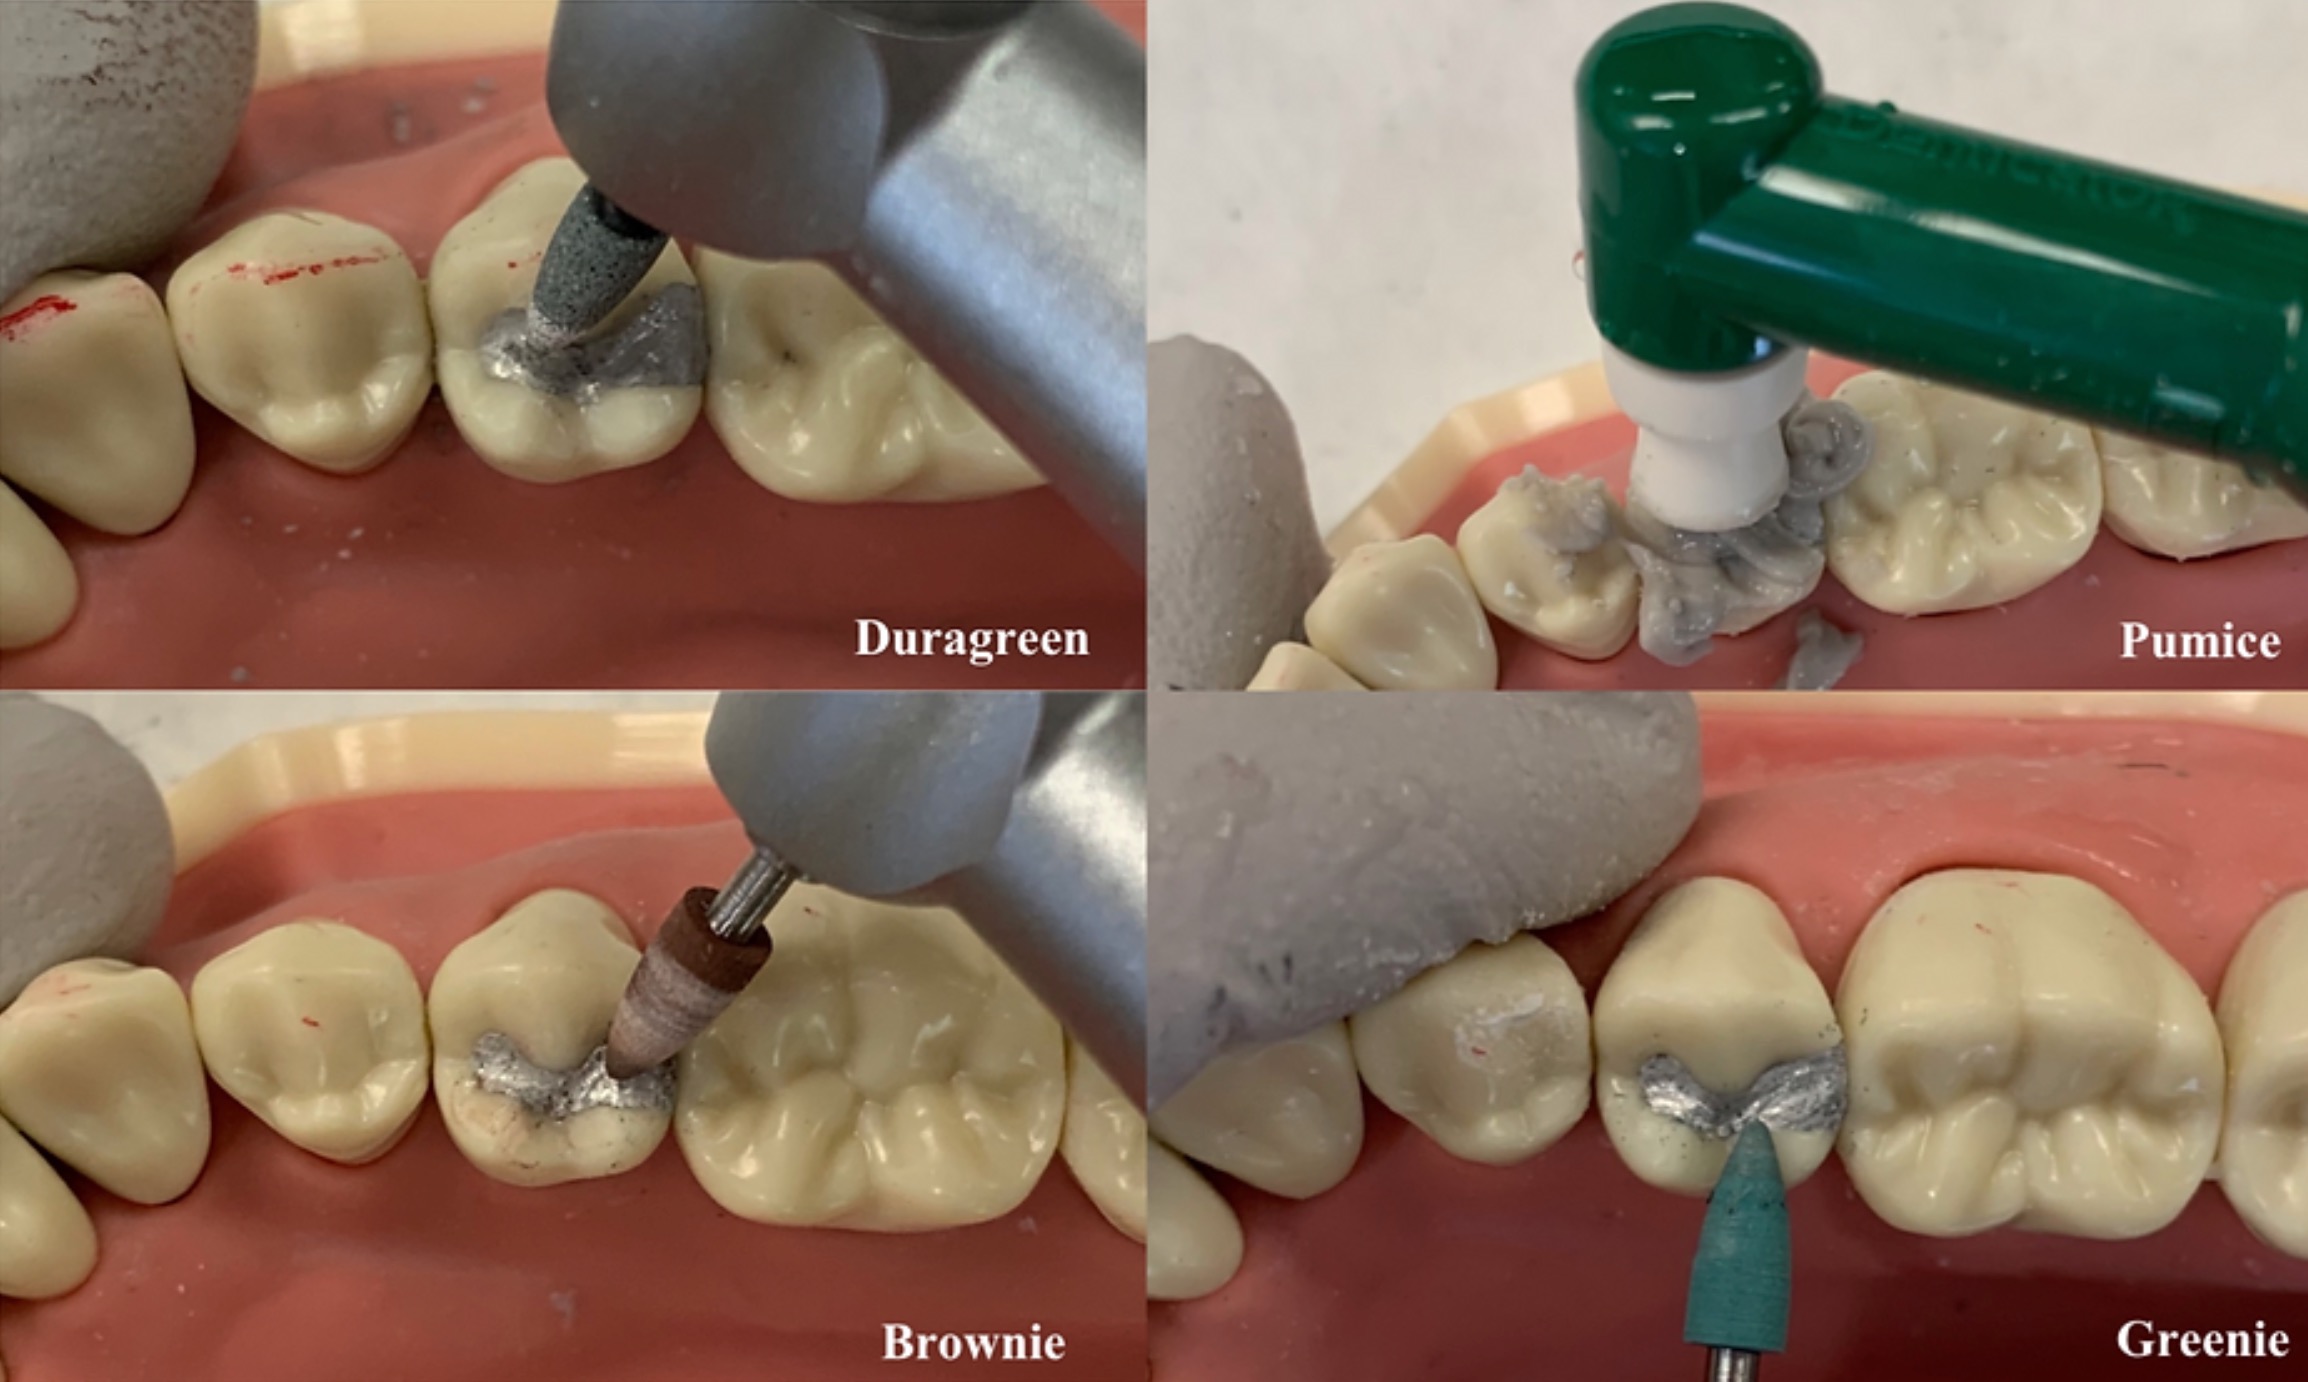
- Polishing is performed after amalgam has set, according to the manufacturer’s instructions
- Smooth the surface using rotary instruments (slow speed)
Bur options: rubber cup and pumice, Duragreen polishing bur or Brownie polishing bur
- Shine the surface using rotary instruments (slow speed)
Bur options: Greenie polishing bur
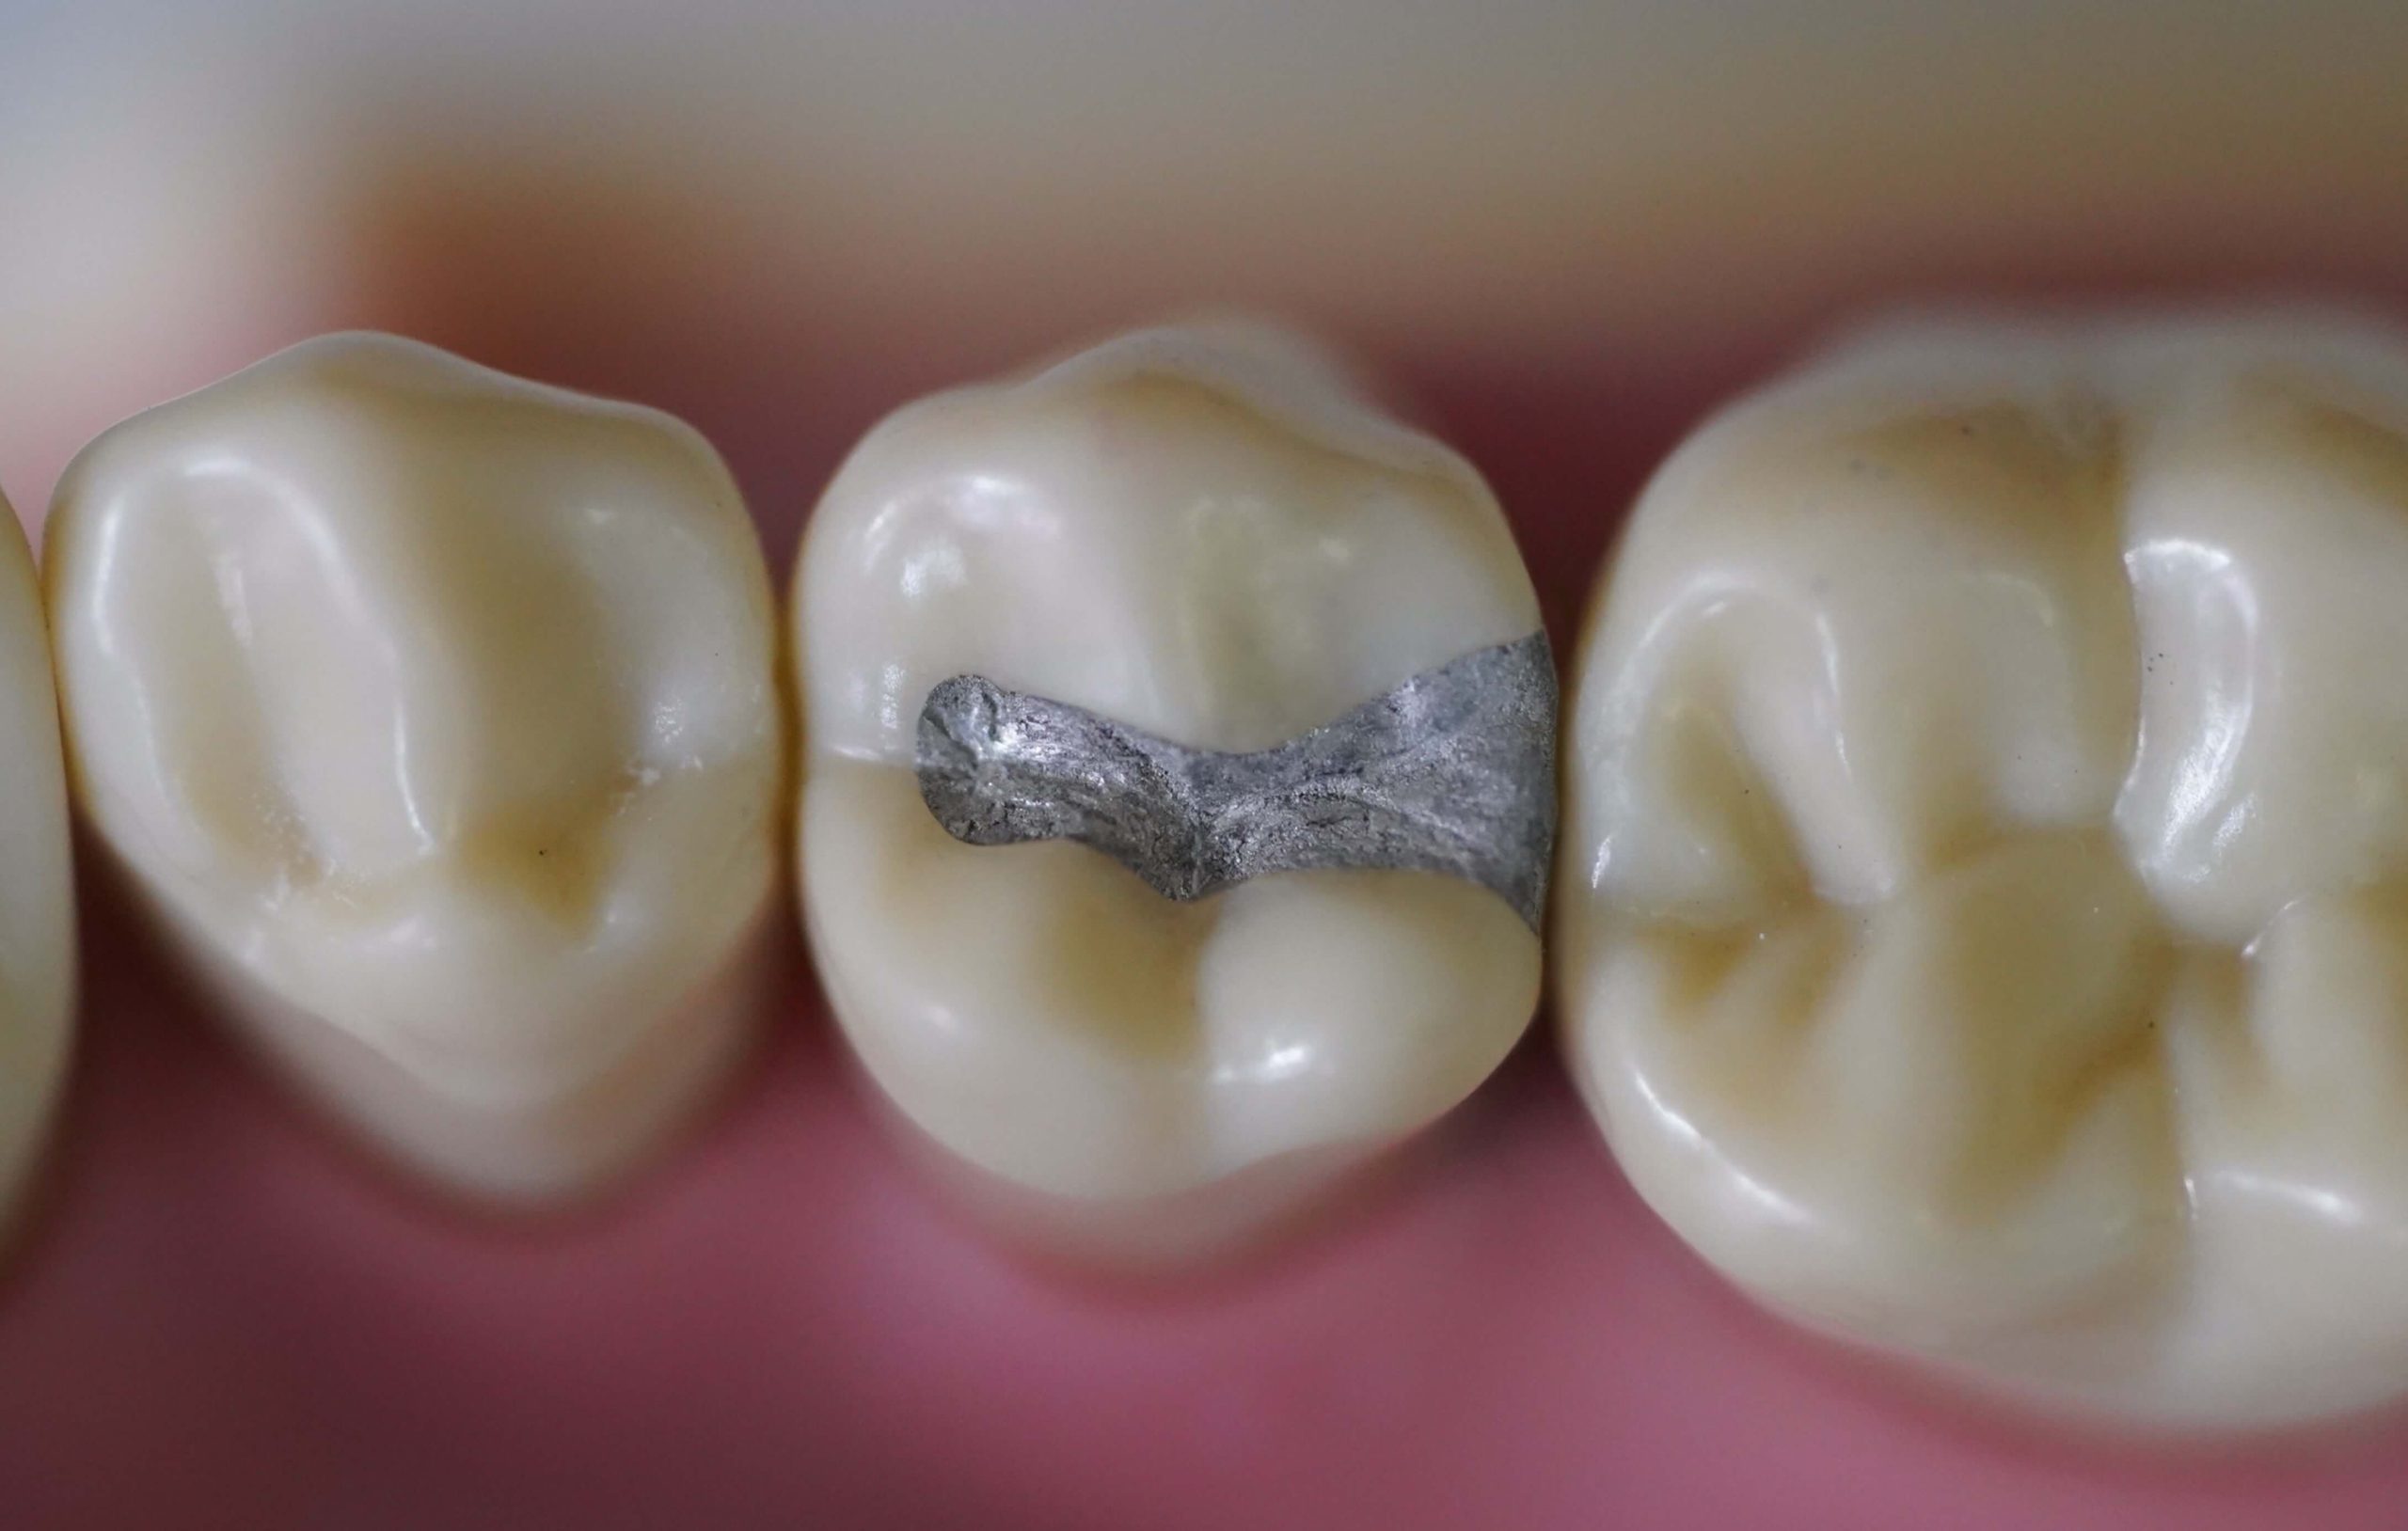
- Use the explorer to ensure that there is a smooth transition between the restoration and remaining tooth structure
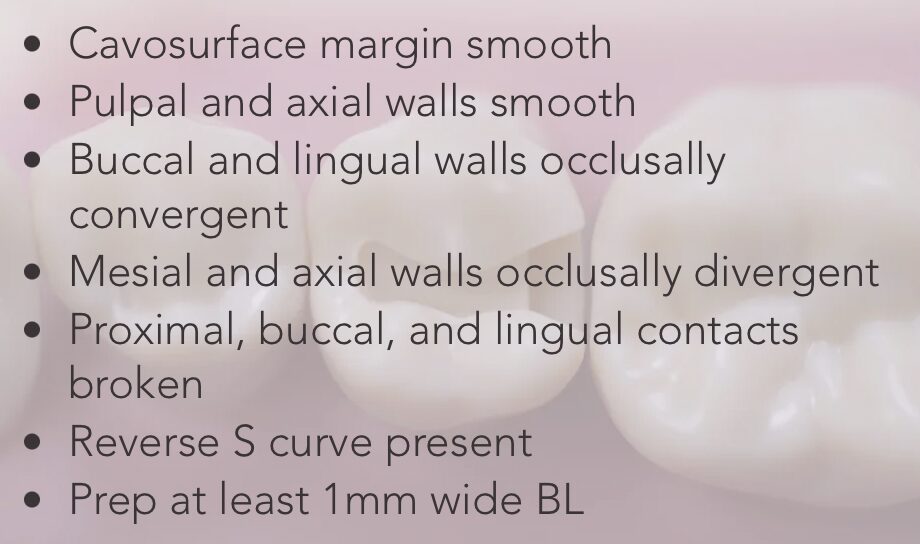
Checklist
Common Mistakes
Quiz Time!
Test your knowledge of this procedure by completing the following questions
References
Hilton, T. J., Ferracane, J. L., & Broome, J. C. (2013). Summitt’s fundamentals of operative dentistry a contemporary approach. Quintessence Publishing Co. Inc.
Ritter, A. V., Boushell, L. W., Walter, R., & Sturdevant, C. M. (2019). Sturdevant’s art and Science of Operative Dentistry. Elsevier.
Congratulations
You’ve reached the end of this lesson